1. Black trench with removable "agent" collar tabs
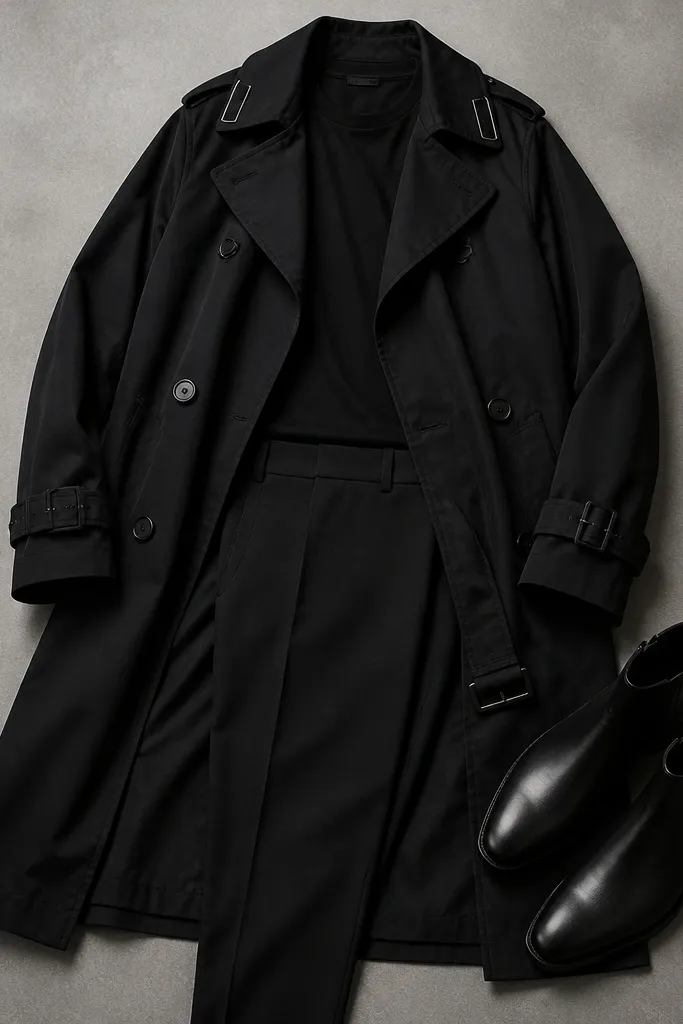
First, pin two collar tabs where they would naturally sit at the outer corners of the collar. Cut tabs from a matte black fabric like cotton twill or thick jersey, about 3 inches wide and 2.5 inches tall, and stitch a narrow channel for silver piping or reflective tape on the top edge. Then attach the tabs using snap buttons or Velcro so they can come off for everyday wear. Finally, style it with a fitted black crew-neck shirt, tapered trousers, and ankle boots with a slight heel so the silhouette stays sharp.
Start with a black trench coat that has a belt and a collar with some structure. Add removable collar tabs so the neck area looks intentional in photos — matte black tabs with a thin silver piping line catch light without looking shiny like costume plastic. This works best on average to taller frames because the trench length creates a clean vertical line, and the tabs add a crisp shape around the chin. If you’re shorter, choose a trench that hits just above the knee so the proportions don’t swallow you. For lighter skin tones, the silver piping makes the face area pop; for deeper skin tones it still reads because the piping gives a clear edge.
Watch outAvoid a trench with a flimsy collar — soft collars collapse and make the whole look read like a costume robe.
Try thisUse reflective tape instead of metallic paint — it looks the same in daylight and in flash photos.
2. Black suit vest over long-sleeve base layer
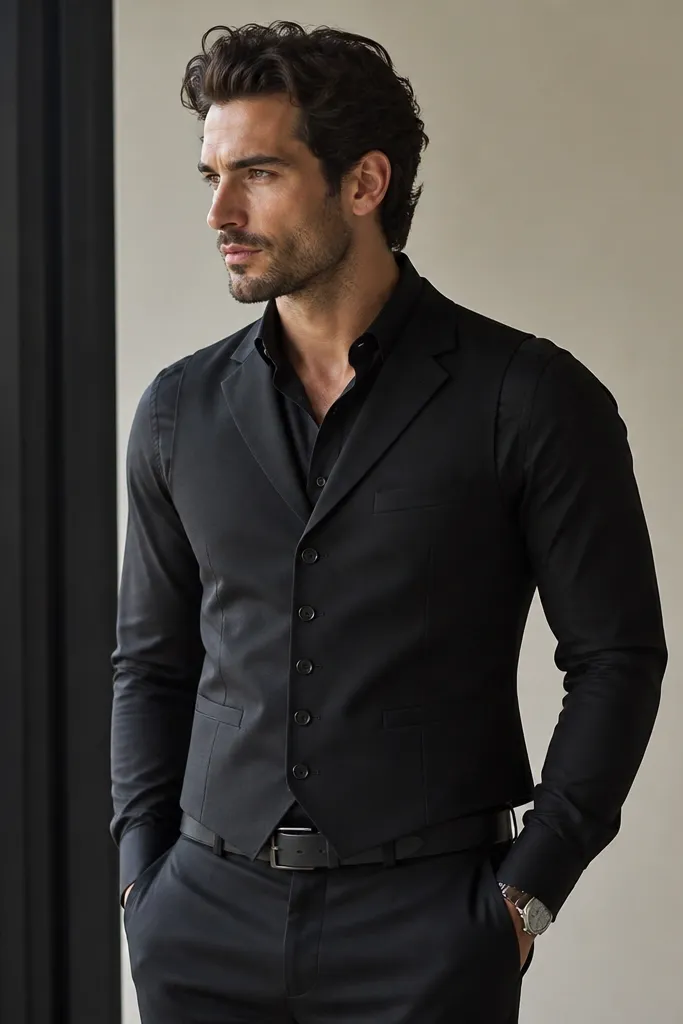
This is the quickest way to make “men in black” read without a full suit. A black suit vest over a long-sleeve black base layer creates a controlled V-shape that pulls the eye toward the chest and face. Choose a vest with a slight sheen in the fabric weave (not glossy) so it has depth in photos. I’ve worn this on both lean and broad builds; lean frames get shape from the vest’s structure, and broader shoulders look tidy when the base layer fits close at the arms. For lighter skin, the clean V helps define jaw lines; for deeper skin, the vest’s texture adds contrast without needing bright colors.
Start by putting on a fitted long-sleeve black shirt — crew neck or mock neck — and check that it doesn’t bunch at the elbows. Then layer the vest so the bottom hem sits around mid-hip and the vest buttons (or front closure) meet cleanly without gapping. Add a narrow black tie or black bow tie only if the event is formal; otherwise skip it and keep the collar plain. Finish with black dress pants or slim chinos and a leather belt; shoes should be black derbies or Chelsea boots to keep it uniform-looking.
Sew or iron the vest’s pocket openings flat so they sit crisp — lumpy pockets ruin the “agent” vibe.
Avoid a vest that’s too short — when it rides up, the look turns into cosplay without authority.
3. All-black bomber with hidden "utility" pocket panels
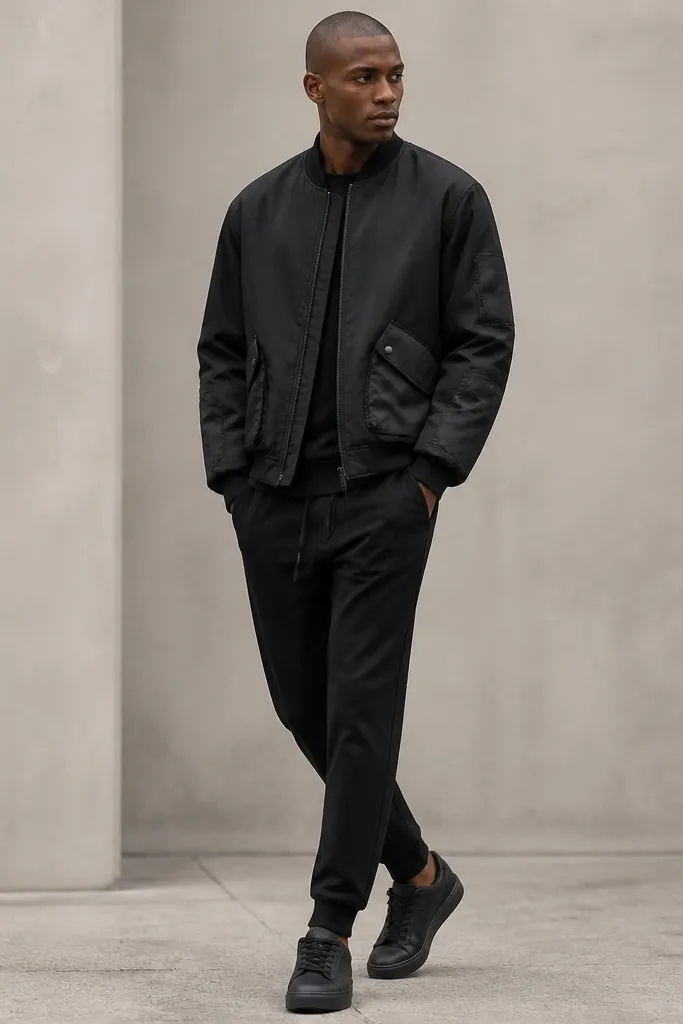
A bomber is already close to costume shapes, but you need detail that looks functional. Add pocket panels in black nylon with visible topstitching so the jacket looks like a uniform piece, not a regular street jacket. This works for athletic builds because the bomber’s rib cuffs define the wrists and waist, and the extra panels add structure around the hips. For rounder builds, choose a bomber with a slightly longer hem and avoid huge pockets — you want clean lines, not bulk. The nylon texture also gives you photo contrast; matte outer fabric plus shiny nylon paneling reads as “designed” under flash.
First, mark two panel placements: one on the lower outer sleeve and one at the side seam near the hip. Cut rectangle panels from black nylon, about 6 inches wide by 4 inches tall, and add a snap or Velcro flap on the top edge. Then topstitch around the perimeter with a straight stitch so it looks factory-made. Wear it with black joggers tapered at the ankle and black low-top sneakers or boots; keep everything else plain so the panels are the hero.
Use a black zipper pull with a flat tab — it catches light without looking toy-like.
Avoid iron-on patches that peel — they look temporary in close-up photos.
4. Black turtleneck + long cardigan "field agent" silhouette
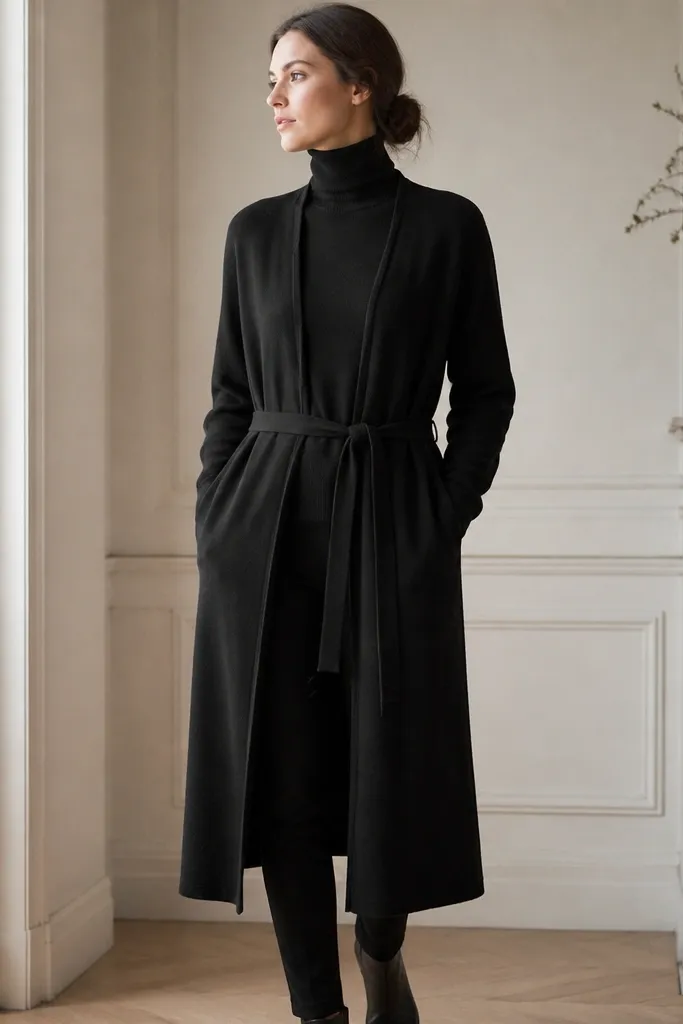
Start with a fitted black turtleneck — rib knit is better than a smooth jersey so it doesn’t shine. Then put on the long cardigan and belt it at the narrowest part of your waist; if it doesn’t have belt loops, tie a black fabric belt through the front with safety pins. Keep pants slim or straight and hem them so the fabric breaks right above your shoes. Add a black watch and simple black leather shoes; I like derbies or Chelsea boots for the “field” look.
If you want the men in black vibe without looking like you’re wearing a costume prop, this silhouette is the move. A black turtleneck under a long cardigan gives you that tall, controlled “agent” shape, and the high neck frames the face in a flattering way. Choose a cardigan with a thick knit so it holds its shape; thin cardigans collapse and look sloppy. This works especially well on taller people because the length amplifies the vertical line, but shorter frames can still pull it off with a cardigan that hits just above the ankle. For cooler undertones in your skin, the turtleneck reads crisp; for warmer undertones, the monochrome still looks sharp because the knit texture adds depth.
Watch outAvoid a cardigan that’s too oversized — the shape turns into blanket territory on camera.
Try thisAdd one small chest patch from black felt — 2 inches wide — so the chest area has a focal point.
5. No-sew black cape with "velcro clasp" shoulder line
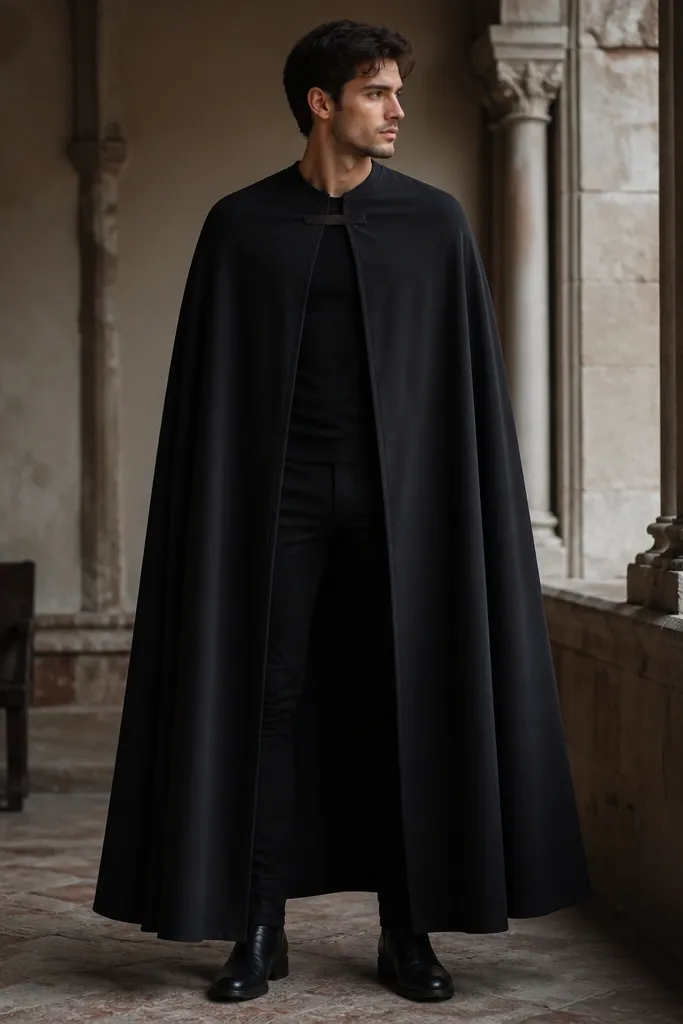
A cape sounds dramatic, but you can make it look like a uniform detail instead of a Halloween throw. The clean shoulder clasp line is the difference — it creates structure and keeps the cape from flapping like fabric. I’ve used this for late-night events where wind makes costumes annoying; this design stays put because it’s anchored at the collar. It flatters most body types because the cape falls straight down, but if you’re very broad-shouldered, keep the cape width moderate so it doesn’t look like a tent. The matte black fabric hides wrinkles, and the Velcro line gives a sharp photo edge.
First, cut your cape from matte black fabric like cotton-poly or heavy chiffon if you want light movement; aim for a rectangle about 60 inches long and 50 inches wide. Hem the edges with a narrow fold and fabric glue or a quick stitch. Then attach Velcro strips at the collar line: place two 1-inch strips on each side so the cape can clasp closed. Wear it over a fitted black top and pants; shoes should be solid and dark, like combat boots or sleek Chelsea boots.
Use a fabric weight or light safety pins under the clasp for extra stability during windy outdoor events.
Avoid shiny satin — it reflects stage lights and turns into a costume sheen fast.
6. Black leather jacket with "radio" chest strap rig
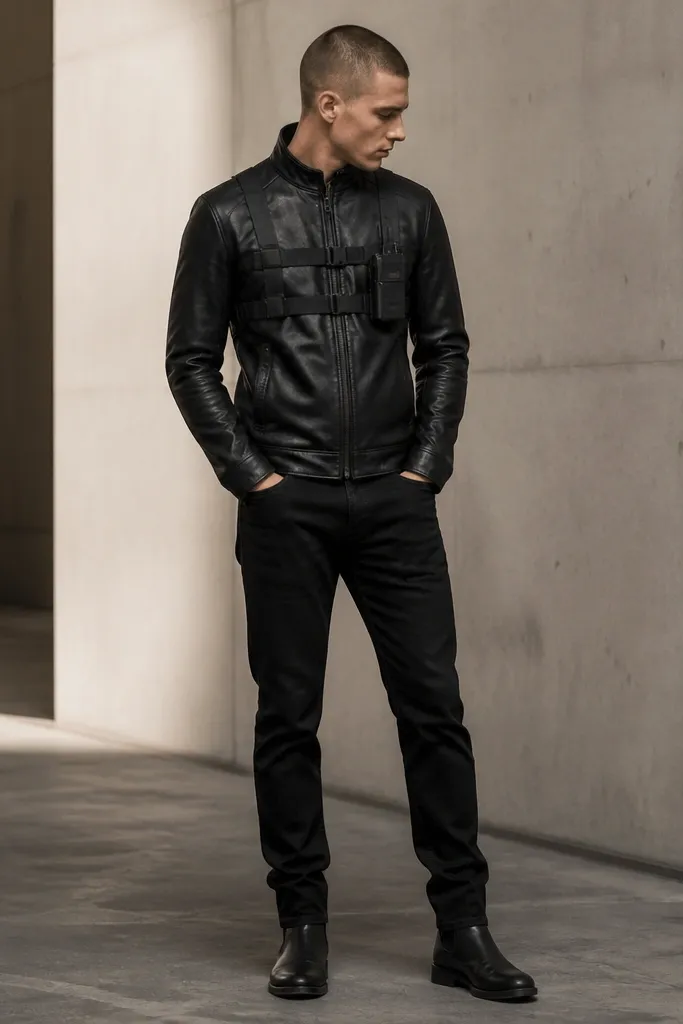
Leather plus a chest rig is the easiest way to look like an agent who does field work. The leather jacket gives you texture contrast instantly — matte black webbing and leather creases read as real gear. The chest strap rig adds a strong horizontal line that makes your torso look more “uniformed,” which is flattering for both lean and heavier builds. If you’re lean, the straps add volume where photos usually flatten you. If you’re heavier, the rig draws attention to the center and keeps your look from looking like a single block of fabric. For almost any skin tone, the leather’s natural highlights make your face stand out.
Start with a black leather jacket that fits the shoulders properly; sleeves should end around your wrist bone. Then make a rig from 1-inch black webbing: two straps across the chest, with a vertical strap down the center if you want more structure. Attach the “radio” prop on the left side using hidden fabric wraps so zip ties don’t show. Finally, wear black jeans or dark trousers and black boots; add one small utility pouch on the belt for balance.
Wrap the prop attachment points with black athletic tape before sewing — it stops squeaks and rubbing.
Avoid a prop that’s too large — if it covers your torso, the look reads as random cosplay.
7. Matte black suit pants with paper-bag waist hack
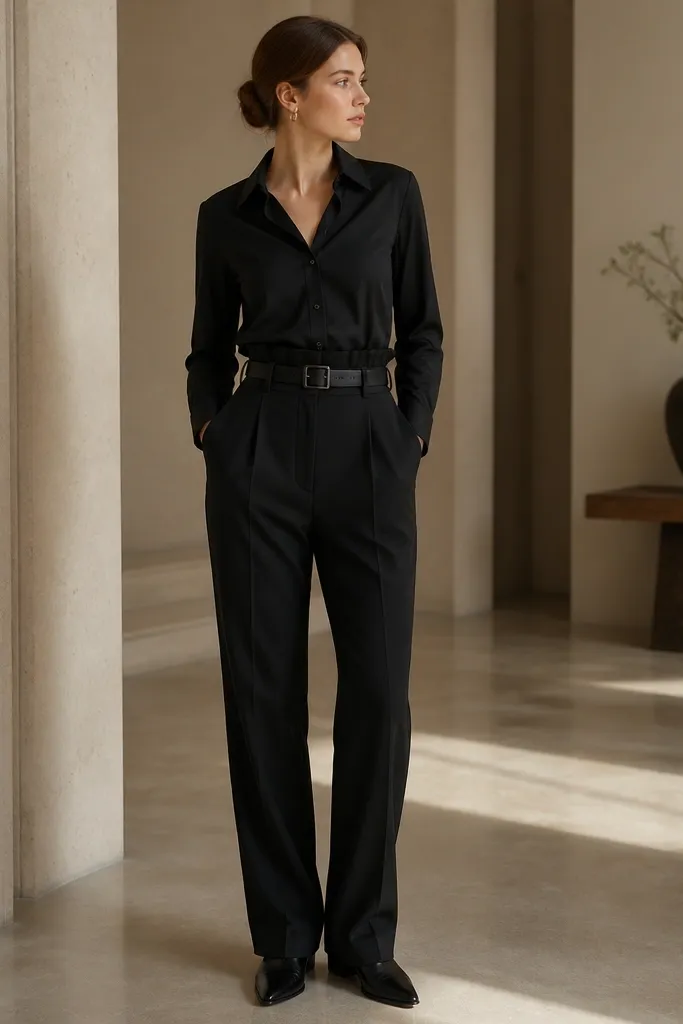
First, put the pants on and mark where you want the gather — usually at the natural waist, about 1 inch above your waistband. Then stitch a simple channel inside the waistband area and thread a drawstring or use elastic to create the gather evenly. Tie a black belt over the top so it hides the drawstring and keeps the folds centered. Style with a tucked black shirt and a clean shoe like a black oxford or minimalist boot.
If your “men in black” goal is sleek but you don’t want a full suit jacket, this waist hack makes regular pants look tailored. Matte black suit pants with a controlled gather at the waist create a uniform look because the fabric forms clean folds instead of wrinkles. This flatters many builds because it adds shape at the midsection without clinging too tightly. For taller frames, the extra structure looks intentional; for shorter frames, keep the rise moderate so the gather doesn’t shorten your legs. The matte finish also avoids the cheap shine that turns black outfits into “store-bought costume” territory.
Watch outAvoid deep creasing all over the thighs — heavy wrinkles look sloppy, not uniform.
Try thisPress the folds with a warm iron after you set the gather — the crease holds longer than you’d think.
8. Black hoodie base with structured shoulder armor panels
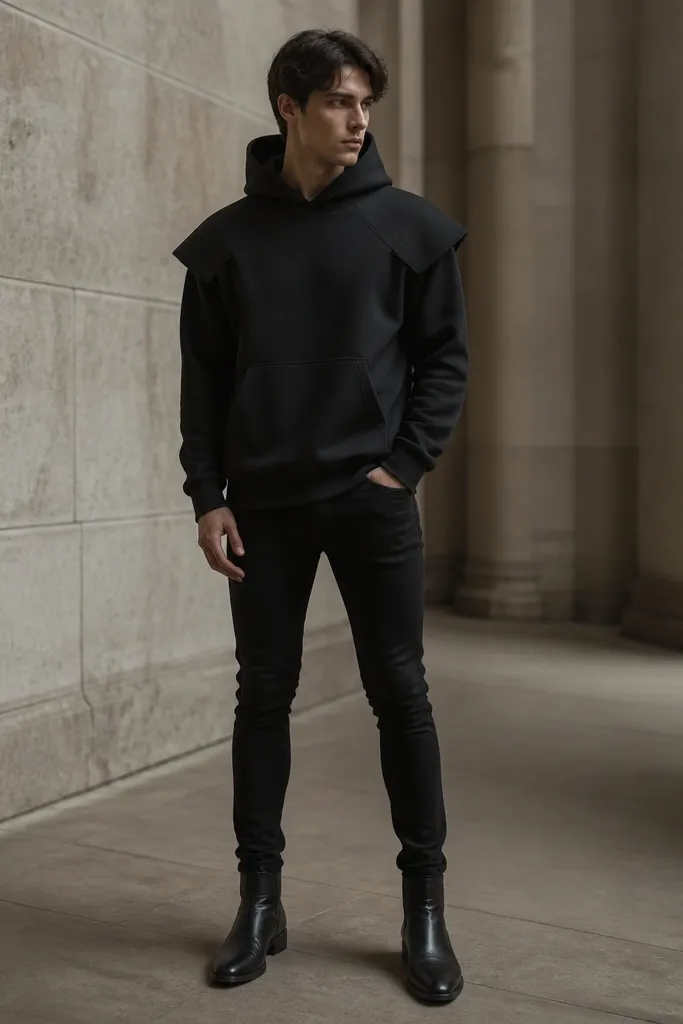
First, cut two shoulder panels from thin craft foam, about 8 inches wide and 6 inches tall, and cover them with matte black fabric. Glue the fabric edges down, then stitch around the perimeter with black thread for a clean look. Attach each panel to the hoodie using hidden hand stitches or Velcro strips at the top edge so the hoodie still stretches. Wear with tapered black pants and sturdy boots; add a simple belt pouch to bring the “uniform” together.
This is my go-to when you need comfort but still want “agent” energy. A black hoodie keeps you warm and moves well, while structured shoulder panels create the broad, authoritative silhouette. The key is flat foam covered in matte fabric, not bulky plastic — it looks like gear you could actually wear. For broad shoulders, keep the panels narrow and stop them before the sleeve seam. For lean builds, slightly widen the panels to balance your torso. The matte finish prevents the outfit from looking like a Halloween costume when you’re standing under bright overhead lights.
Watch outAvoid shiny fabric covering the foam — it reflects light and looks cheap fast.
Try thisUse foam that bends easily — if it holds a rigid curve, it will gap at the neck when you move.
9. All-black monk strap shoes + ankle-length tapered pants
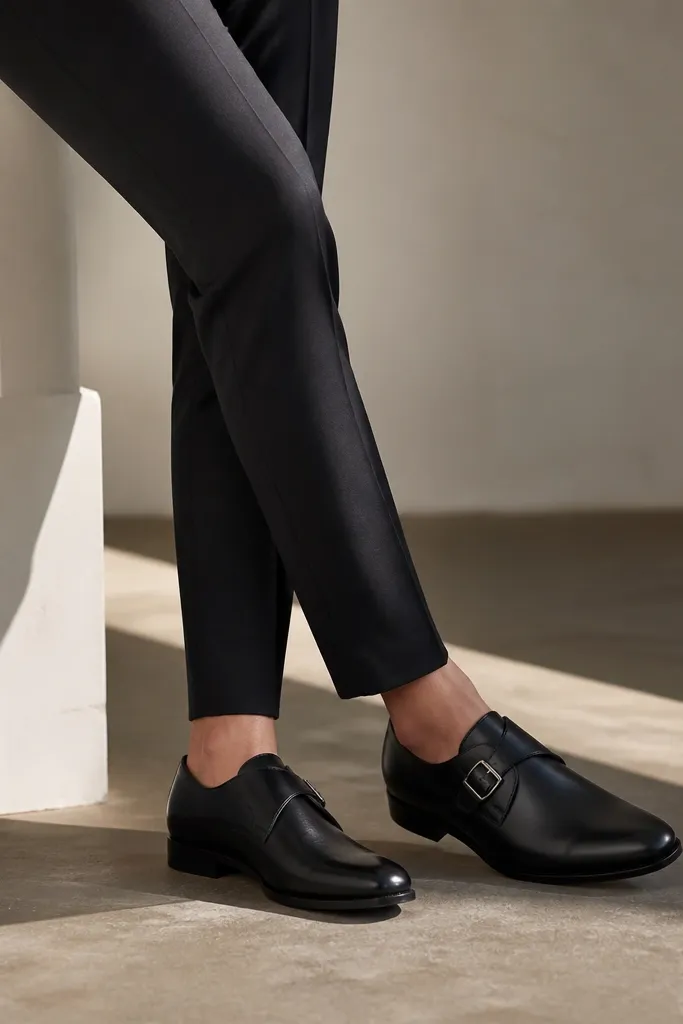
First, hem or cuff your pants so they land 1 inch above the ankle bone. Then wear a tucked black shirt or fitted black long-sleeve so the waist looks clean. Add a belt that matches the shoe — black leather with a matte finish. Finally, keep outerwear simple: a black bomber or a short black coat. If you want extra costume points, add one small silver buckle accessory on a belt pouch.
People underestimate shoes, but they read “costume quality” instantly. When you wear matte black monk strap shoes with ankle-length tapered pants, the outfit looks intentional even if your top is simple. The buckle detail gives you a controlled highlight without adding color. This is flattering because tapered hems make your legs look longer, especially for shorter people. For taller frames, the ankle break keeps everything from looking too long and heavy. The contrast of structured shoe leather against soft fabric pants gives you depth, which matters for men in black styling.
Watch outAvoid baggy pants that bunch around the shoe — it kills the uniform line.
Try thisIf your shoes are too glossy, rub them lightly with a dry microfiber cloth — it reduces flash glare.
10. Black button-up with hidden placket "sleek agent" trim
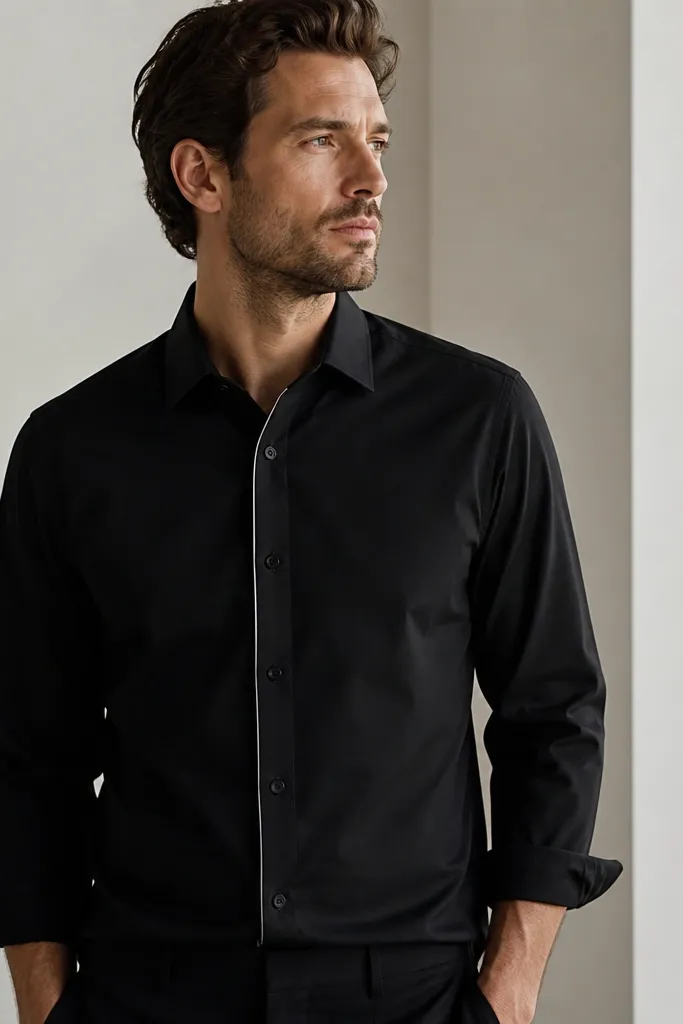
First, open the placket and sew a narrow strip of reflective tape or silver piping inside the left or right edge of the placket, about 1/8 inch from the buttons. Keep the stitch line hidden so you don’t see it from the outside. Then close the shirt and press it flat so the seam line lies flat. Wear it with black trousers and a simple black belt; add a jacket or vest if you want extra structure.
This idea is for people who hate big props but want a costume that looks sharp in close photos. A black button-up with a thin trim line inside the placket creates a “laser line” effect when light hits the front. It’s subtle from far away and obvious up close, which is exactly what you want for men in black. It works on most body types because it’s just a fitted shirt with a clean front — no extra bulk. For lighter skin, the reflective line adds definition near the center of your face; for deeper skin, it still reads because the tape catches light as a thin highlight. Choose a shirt with a collar that holds shape so the neck area stays crisp.
Watch outAvoid thick trim on the outside — chunky shiny lines look like cheap costume tape.
Try thisTest it under a phone flashlight before you wear it — you want a thin highlight, not a bright streak.
11. Black blazer with DIY elbow patches in faux leather
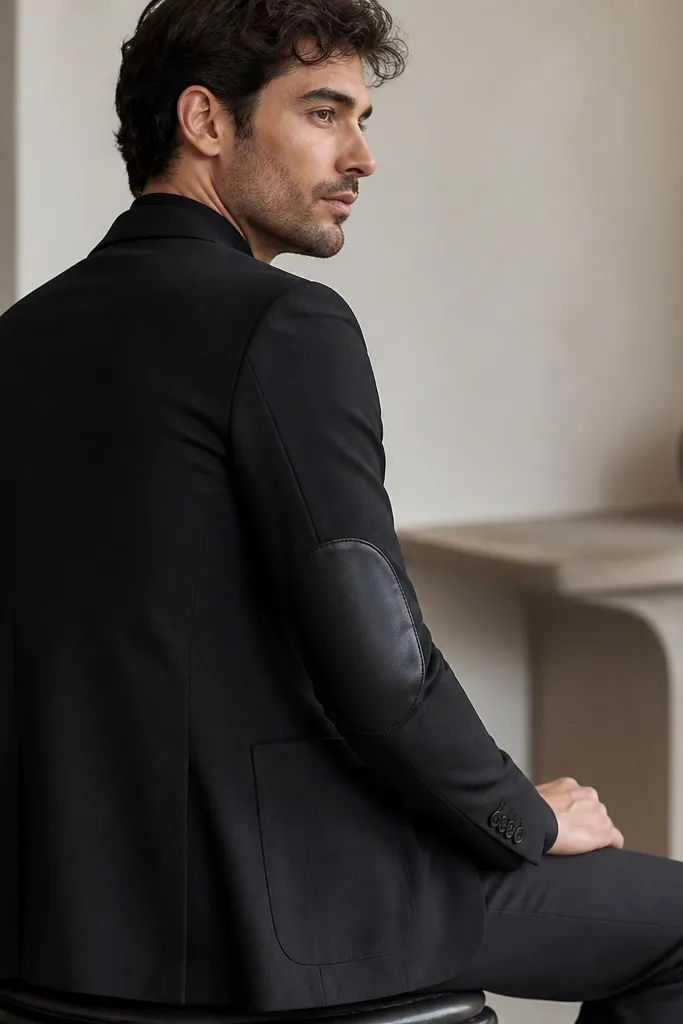
Elbow patches sound old-school, but they work because they add texture and a “working uniform” vibe. Faux leather patches on a black blazer give you a darker, slightly different finish that reads in photos. This flatters people with broader shoulders because it visually narrows the upper arm while keeping the blazer structured. For lean builds, the patches add weight at the elbows so the arms look more substantial. If your skin tone is fair, the faux leather’s warm undertone keeps the monochrome from feeling too stark. If your skin tone is deeper, the patches still show as a clear texture change.
First, find a black blazer that fits the shoulders; that part matters more than the patches. Cut elbow patch shapes from matte faux leather, usually about 4 inches by 3.5 inches, and round the corners so they sit naturally. Pin them to the elbows while you wear the blazer, then stitch around the edges with black thread using a tight straight stitch. Finally, pair with black chinos or dress pants and black loafers or boots. Keep the rest minimal so the patches are the only noticeable “detail.”
Use a walking foot if you have one — it prevents the faux leather from creeping under the needle.
Avoid glossy faux leather — it reflects stage lights and looks like costume vinyl.
12. Black bomber + web belt with two pouch straps
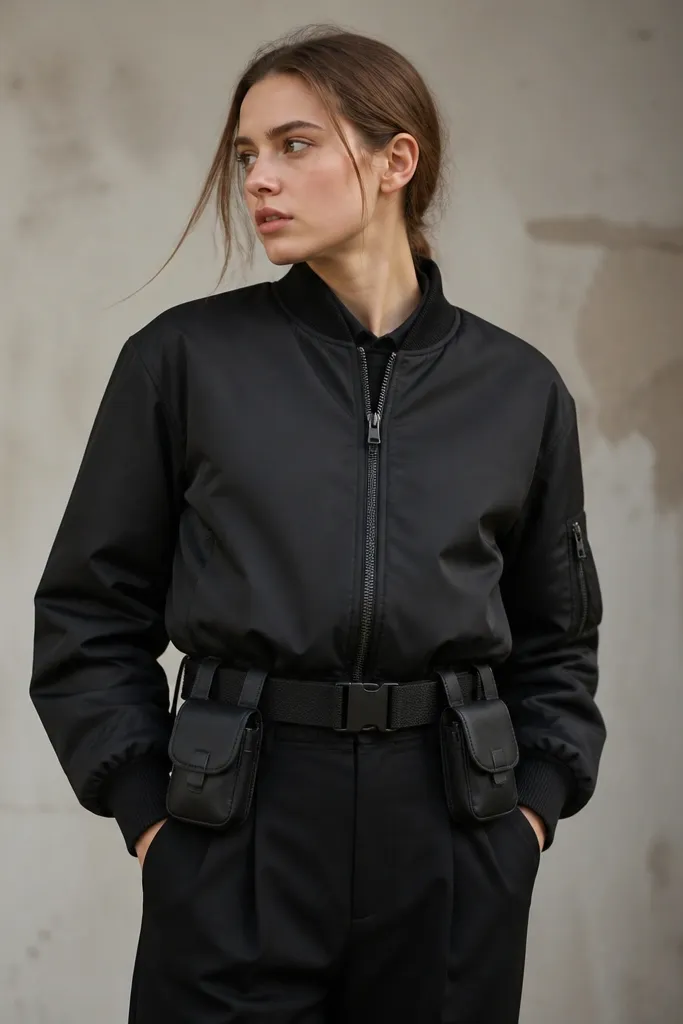
First, put on your bomber and mark where your natural waist sits. Then add a wide black web belt — either buy one with adjustment or sew elastic into the ends so it stays snug. Attach two pouches (felt or canvas works great) to the belt using strap loops, placing them about 2 inches apart from the center seam. Finish by wearing tapered black pants and dark boots; keep your shirt tucked so the belt line stays visible.
This is the “uniform without a suit jacket” solution. A wide web belt with two pouches creates a clear center-of-gravity and makes your torso look like it has gear mounting points. It works for both men and women because the belt defines the waist and the pouches give structure around the hips. If you’re smaller, choose smaller pouches so the proportions stay clean. If you’re larger, go with one pouch per side and keep them symmetrical so the belt doesn’t twist. The matte black pouches also avoid the bright plastic look that cheap costumes have.
Watch outAvoid pouches that swing — if they bounce, the whole outfit looks improvised.
Try thisUse black snaps instead of buckles if you want less clanking during photos and events.
13. Black tactical vest over fitted long sleeve
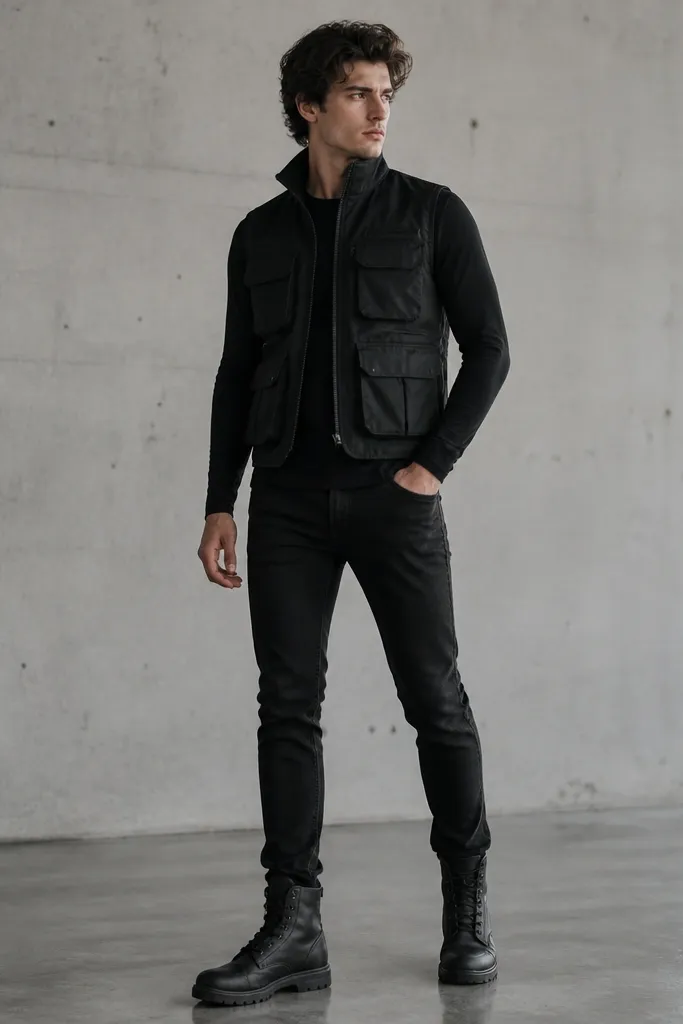
A tactical vest is the fastest path to “men in black” because it already looks like equipment. The trick is to wear it over a fitted long sleeve so the vest doesn’t bunch and create weird ridges. I’ve used this setup for people of different heights; shorter frames look best when the vest hits around mid-hip, and taller frames can go slightly longer but still keep the waist visible. For lighter skin, the vest’s dark panels create a strong frame around the face. For deeper skin tones, the pocket edges and zipper lines still show shape under flash.
First, choose a vest in matte black fabric with a clean zipper — avoid shiny nylon. Then layer a fitted black long-sleeve shirt underneath and tuck it if needed so it doesn’t float. Adjust the vest straps so the shoulders sit flat and the vest front stays centered. Finally, wear black jeans or straight trousers and boots; if you want a costume upgrade, add one small chest patch with reflective tape on the edge.
Put a small piece of black foam behind the zipper line so it stays straight when you move.
Avoid wearing a bulky sweater under the vest — it makes the whole look too thick and messy.
14. DIY black face scarf with "agent" wrap and goggle strap
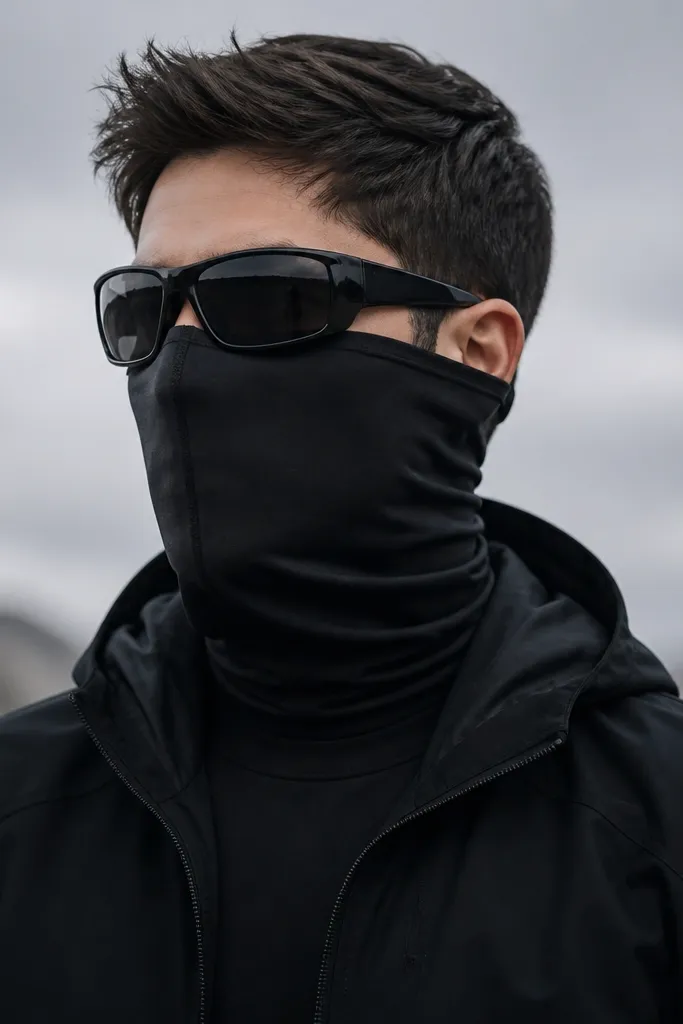
If you want the look to read instantly, face coverage does it, but you need it to look intentional. A black scarf wrapped around the lower face with a clean vertical center line makes you look like an agent rather than someone hiding from weather. I like matte jersey or cotton because it doesn’t shine. This works for most people because it’s adjustable and keeps the focus on your eyes and brow. For lighter skin, the black around the mouth reduces contrast and makes your eyes stand out. For deeper skin, the scarf still gives a clear frame and keeps the monochrome costume effect strong.
First, cut a rectangle scarf from black jersey about 24 inches by 12 inches. Fold it so you have a double layer and wrap it around the lower face with the fold centered over your nose bridge. Secure each side with small hidden stitches or Velcro tabs so it stays put when you talk. Then attach a thin elastic strap from the scarf edge to your sunglasses frame using black thread, so the scarf looks “designed” with the eyewear. Wear with a black jacket and keep the rest simple.
Use a scarf fabric that stretches in two directions — it stays comfortable and doesn’t wrinkle when you move.
Avoid a scarf that’s too loose — loose wraps bunch and look messy on camera.
15. Black hooded sweatshirt with DIY "command" shoulder stripe
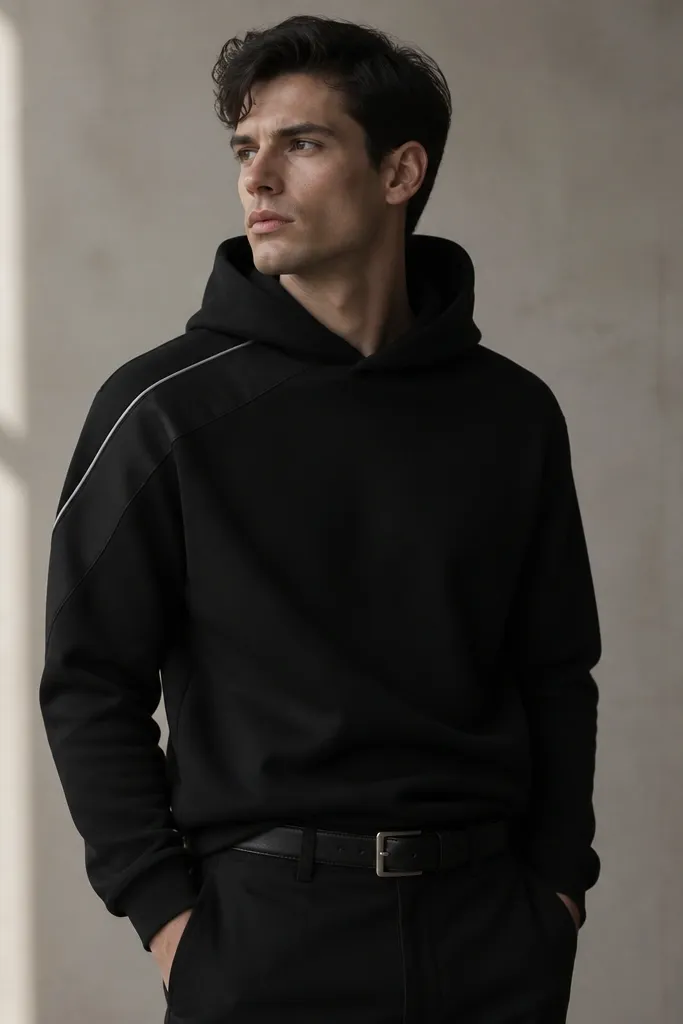
First, choose a black hoodie with a structured hood that doesn’t flop. Cut a stripe panel from matte black fabric or felt, about 2 inches wide and 8 inches long, and add a 1/8-inch silver reflective tape line along one edge. Pin it to the shoulder, then stitch it down with straight stitches through the panel and hoodie fabric. Finally, wear tapered black pants and black shoes; add a simple watch or bracelet so the hands look intentional in photos.
This is a low-effort look that still reads as uniform because it adds one graphic line. A diagonal shoulder stripe made from matte fabric with a thin silver line gives you a controlled “command” feel. It flatters a lot of body shapes because the stripe guides the eye across your shoulder line. If you’re broad, keep the stripe narrow so it doesn’t widen your silhouette. If you’re slim, make the stripe slightly wider for balance. Under flash, the thin silver line gives just enough highlight to make the outfit look designed.
Watch outAvoid heat-transfer vinyl letters or logos — they look like cheap print jobs.
Try thisUse reflective tape on the edge only — full reflective stripes look costume-y fast.
16. Black suit jacket with DIY hidden "arm band" straps
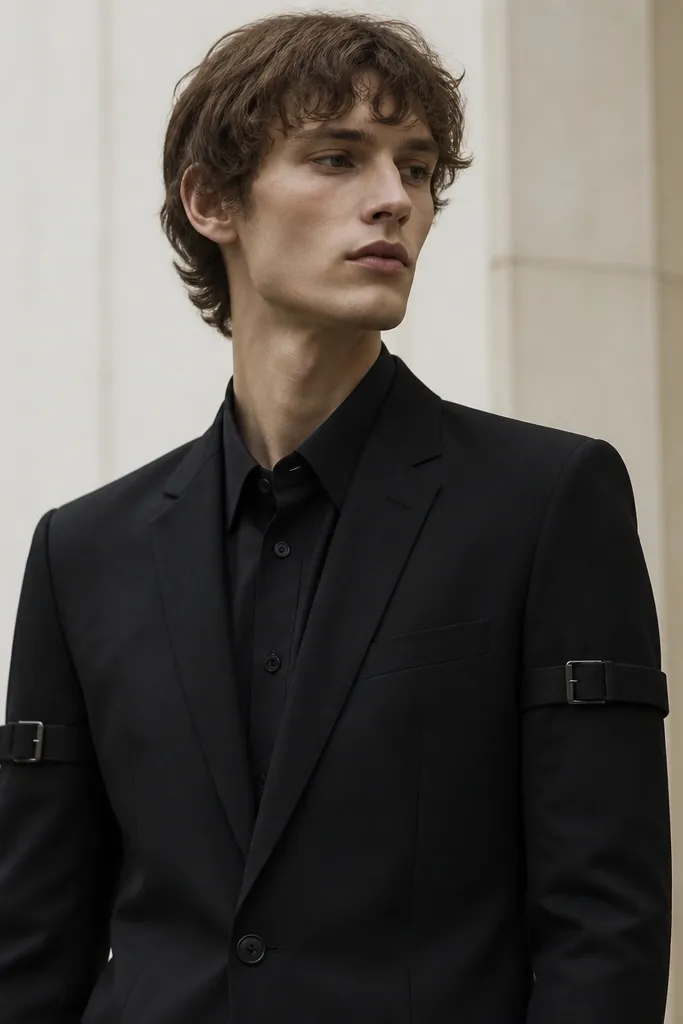
Arm bands are a men in black cue without needing a sci-fi helmet. When you attach narrow webbing straps around the upper arm, you create clean, mechanical lines that read well in motion. I like this on people who already own a suit jacket but feel it looks too formal for the vibe. It flatters most builds because the straps sit above the bicep and can be adjusted tight for a sharper silhouette. For lighter skin, the silver buckle adds a subtle highlight; for deeper skin, the strap texture still shows clearly. Keep the straps narrow so the look stays sleek.
First, measure your upper arm circumference about 1-2 inches above the elbow bend. Cut two webbing straps in black, each about 12 inches long, and add small silver buckles if you have them. Sew the strap ends to the inside of the jacket sleeve seam so they’re hidden when you look straight on. Then adjust and do a test fit while wearing the jacket — you want snug but not restrictive. Pair with black trousers and a simple belt; skip extra accessories so the arm bands stay the hero.
If you don’t want buckles, use Velcro and make the strap ends 2 inches longer for easy adjusting.
Avoid straps that sit too low — they look like gym gear instead of uniform gear.
17. Black trench + DIY "invisible" belt holster pouch
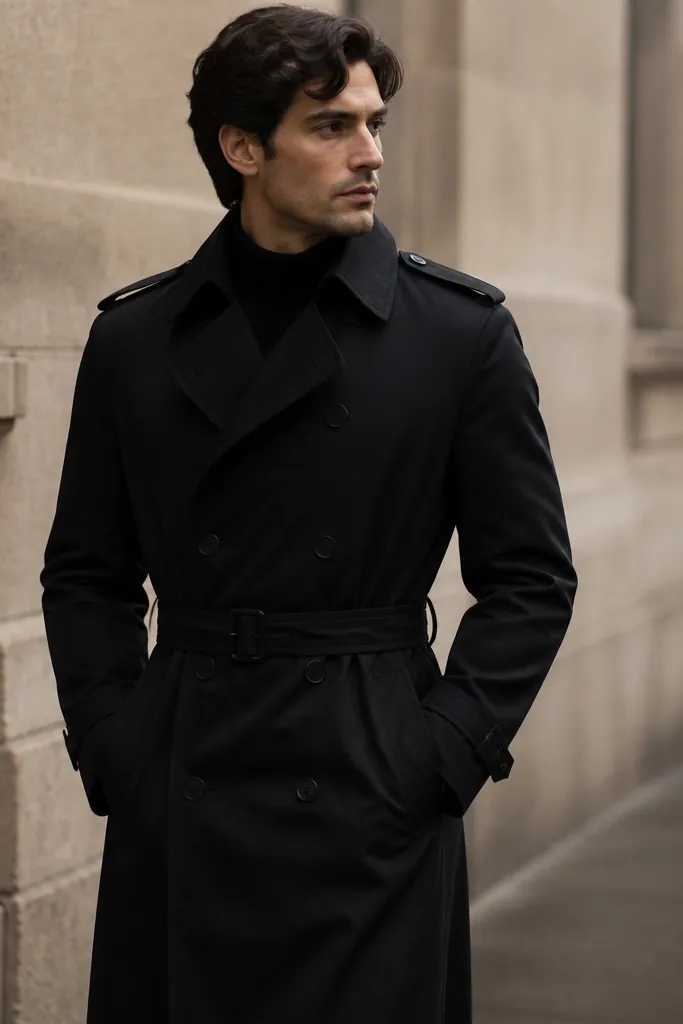
First, find a slim pouch shape in black fabric or buy a small holster pouch and remove any bright hardware. Attach it to a belt that you can wear under the trench using black thread or hidden snaps. Position it so it sits slightly off-center to the side you prefer, usually your dominant hand side, and make sure the trench flap covers it. Then close the trench and adjust the belt so the pouch doesn’t pull the coat fabric outward. Wear with black trousers and boots so the waist line stays clean.
This is one of those details that people don’t notice until they look closer, and that’s why it works. A slim holster pouch attached under the trench flap makes your waist area look like equipment placement, not random pockets. It flatters almost everyone because the pouch sits at the center and keeps the coat front structured. If you’re tall, it adds realism by breaking the coat’s flat front. If you’re shorter, keep the pouch slim so the trench still reads as vertical, not bulky. The matte black pouch also avoids the shiny “toy” look.
Watch outAvoid bulky pouches — they push the trench front open and look obviously “attached.”
Try thisUse black elastic thread or strong nylon thread for attachments so it holds under movement.
18. Black jumpsuit with cropped jacket layer
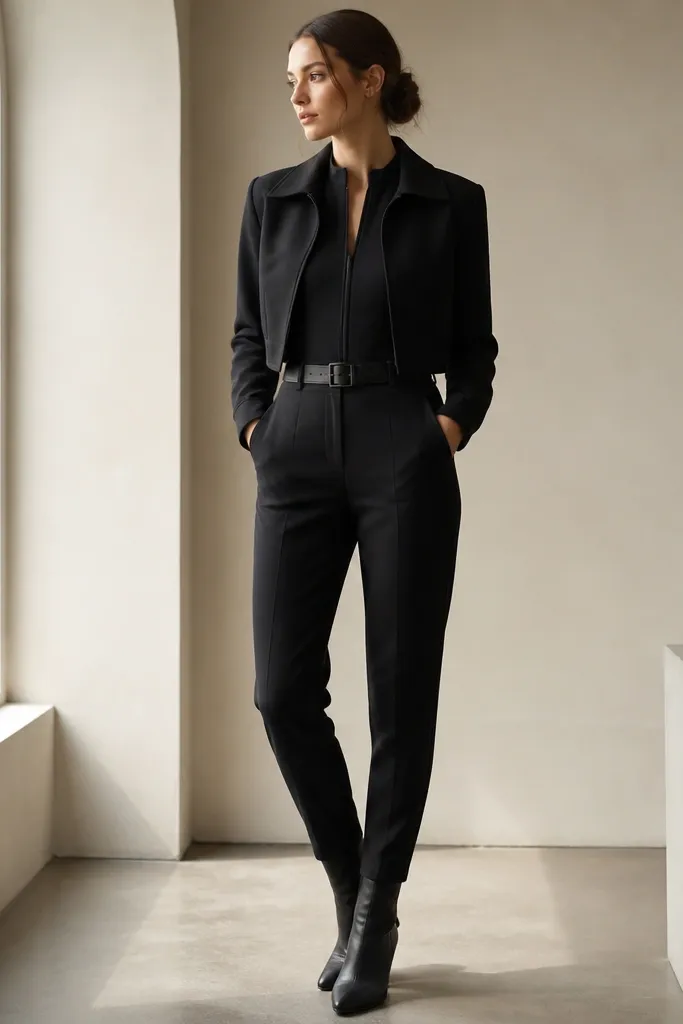
A black jumpsuit is already a one-piece uniform, which is perfect for men in black styling. The best version is fitted through the torso and tapered at the ankle so the silhouette looks controlled. Adding a cropped black jacket on top creates a layered effect that reads like a costume even if you’re not using props. This is flattering for athletic builds and for people who want to minimize fuss — one garment does most of the work. For taller frames, the cropped jacket keeps proportions from feeling too long. For shorter frames, a jumpsuit that hits at the ankle with boots helps you avoid looking swallowed.
First, choose a jumpsuit in matte black fabric like ponte knit or thick cotton blend. Then add a short cropped jacket or even a structured vest that ends right at your natural waist. Make sure the jumpsuit zipper or seam lines sit flat so the torso doesn’t wrinkle. Wear black boots with a slim profile and a belt if the jumpsuit doesn’t have one. If you want extra agent detail, add one small reflective strip on the shoulder seam.
Press the jumpsuit seams with a warm iron before you go — knit jumpsuits wrinkle faster than you think.
Avoid thin, clingy jumpsuits — they show sweat and body lines in flash photos.
19. Black overcoat + DIY "badge" patch on chest pocket
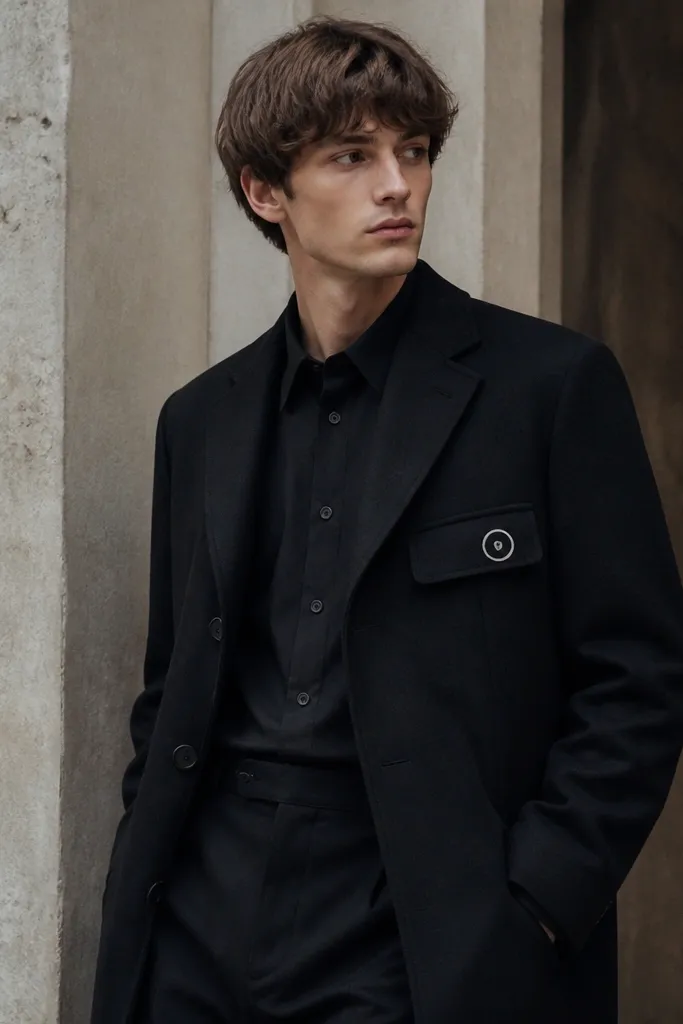
First, choose an overcoat with a chest pocket or a flat chest panel where you can attach a patch. Cut a badge base from matte black felt and stitch a circular ring using white thread; add a tiny silver button or rivet in the center. Pin the badge to the coat, then hand-stitch around the edges so it lies flat. Style with a black shirt and slim trousers; add a simple leather belt and black shoes. Keep the badge the only “graphic” element so it looks official.
A chest badge turns a plain black coat into a recognizable uniform. I like the DIY version because you control the size and the finish — keep it small, about the size of a quarter, so it looks like a real insignia. The overcoat gives you the men in black “authority” silhouette, and the badge gives the photo an obvious focal point. This works for most builds because the coat hangs straight and the badge sits at the natural chest height. For lighter skin, white stitching pops clearly; for deeper skin, the white stitching still reads without needing extra color. It’s also easy to remove if you want to wear the coat again.
Watch outAvoid huge patches — big graphics make it look like a costume brand logo.
Try thisUse thick thread for the circle so the badge looks raised in photos, not flat like a printed sticker.
20. Black raincoat with "sealed" sleeve cuffs
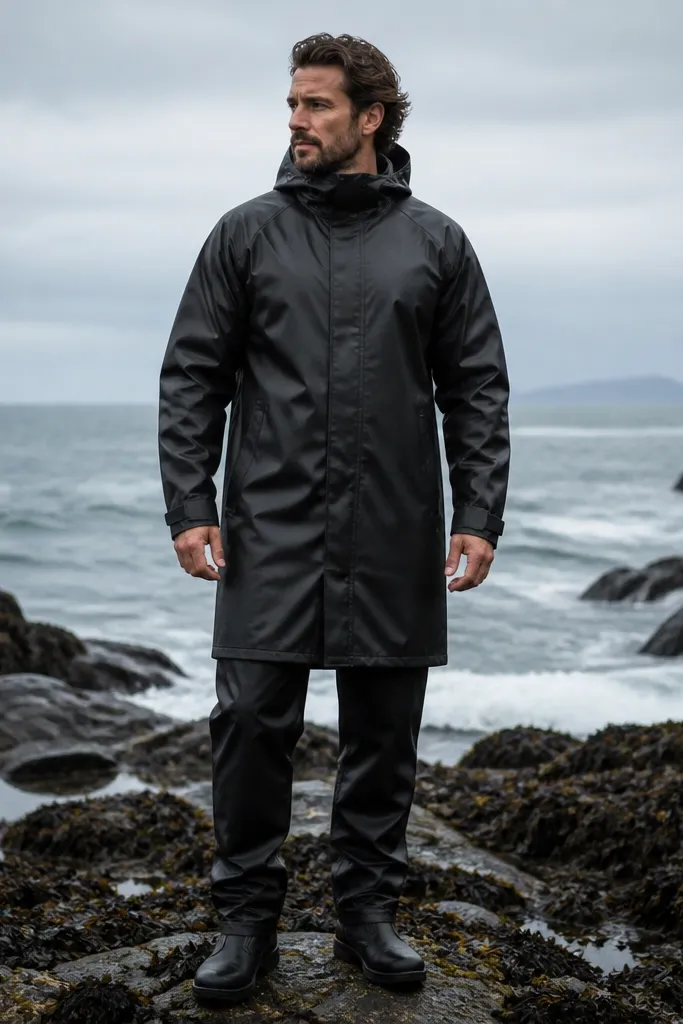
Raincoat styling gives you instant “agent who can handle weather” energy. The men in black detail here is sealing the sleeve cuffs — it looks like the suit has protective barriers. I’ve worn this in outdoor events where people get sprayed or it starts to drizzle, and the sealed cuffs keep the look clean and practical. It flatters most builds because the sealed cuffs make your sleeves look intentionally fitted. For lighter skin, the contrast between the glossy raincoat body and matte cuff bands frames your hands and wrists. For deeper skin, the cuff seal still reads as a clear line that draws attention upward.
First, put on the raincoat and mark where you want the cuff to tighten, usually right above your wrist bone. Then attach black elastic bands under the cuff lining or use a Velcro tab to close the cuff. If you want it extra clean, sew a small strip of matte black fabric over the inner edge so it doesn’t look frayed. Finally, wear black pants and boots; a simple black umbrella prop in your hand also sells the “field” story.
Test cuff tightness by raising your arms — if the cuff rides up, tighten the Velcro placement by half an inch.
Avoid leaving the cuffs open — flappy sleeves make the raincoat look like random outerwear.