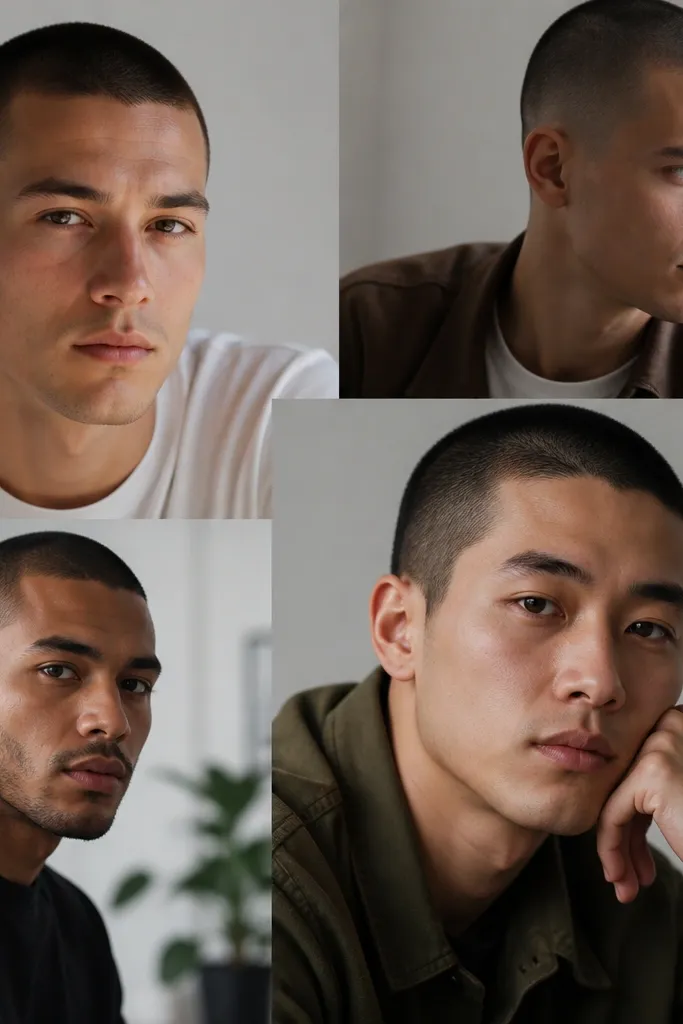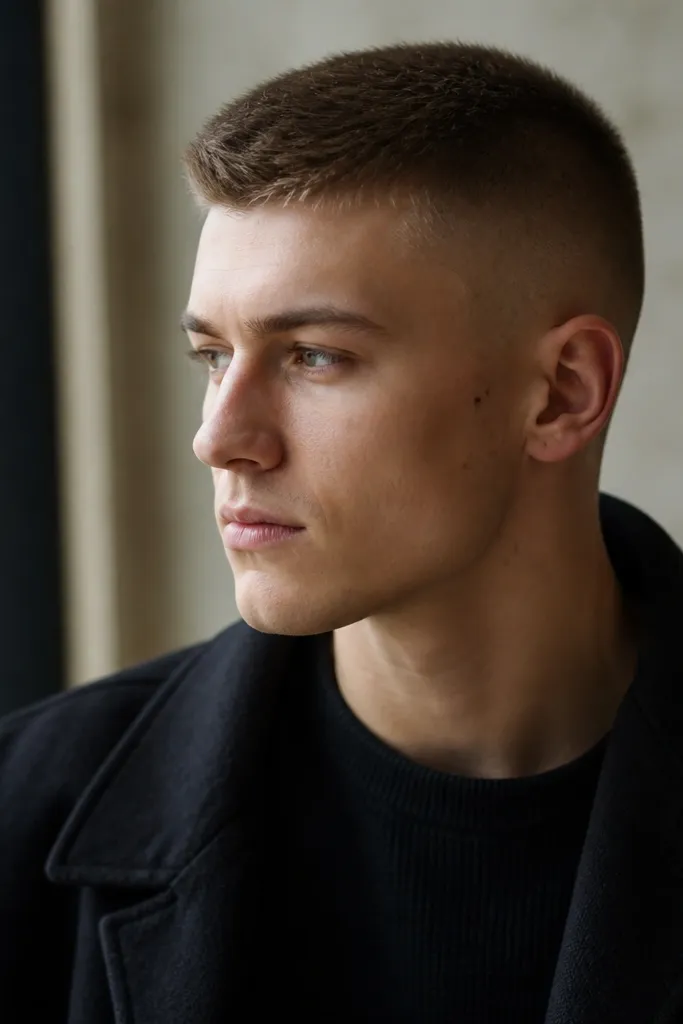
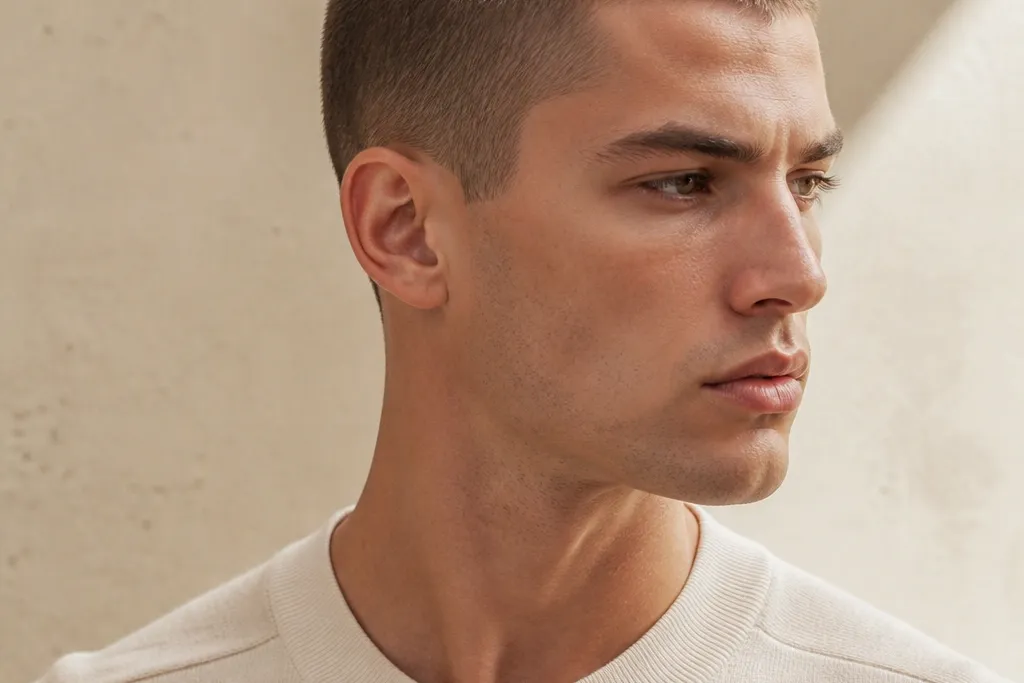
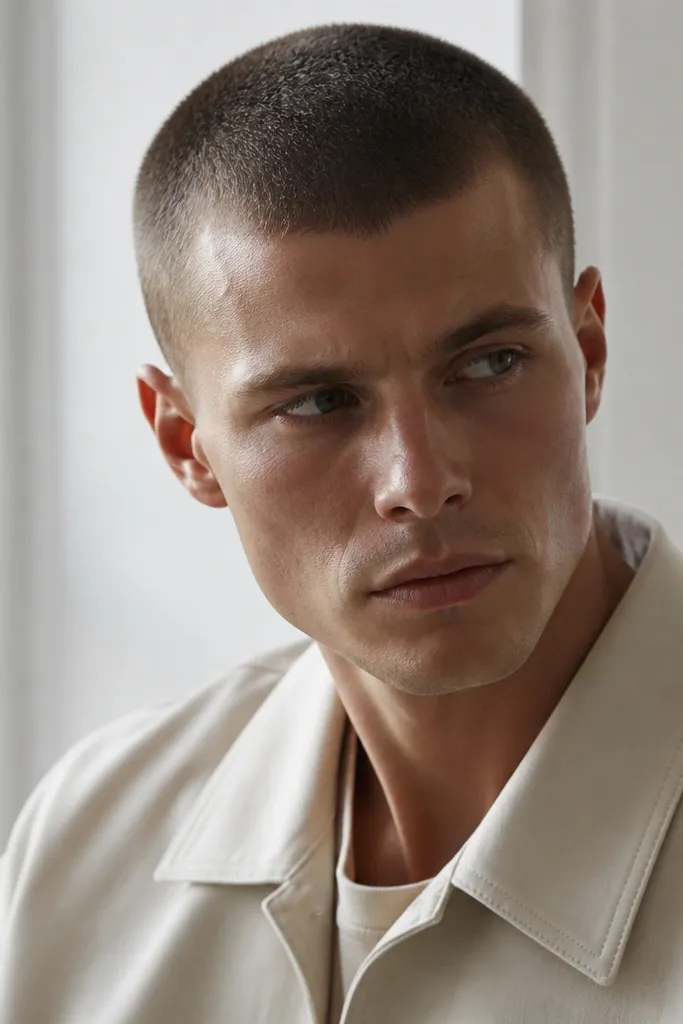
1. Classic 1-Guard Buzz with Low Fade
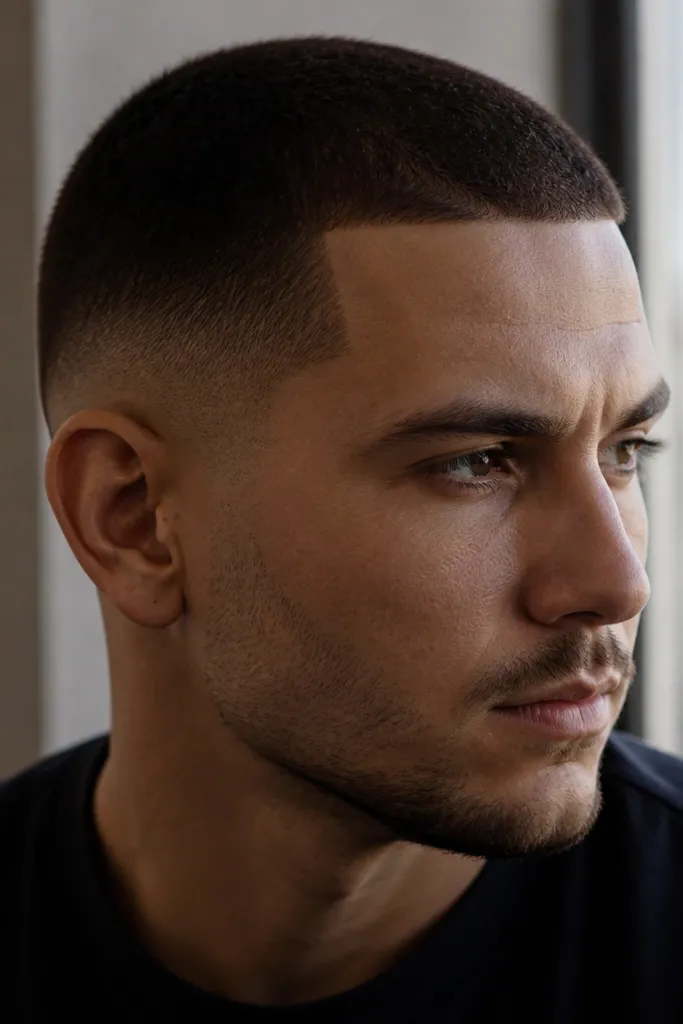
This is the buzz cut mens luxe high end look that reads expensive because it’s consistent. The top is a uniform 1 guard, so the hair density looks even from every angle, and the low fade keeps the silhouette clean without exposing too much scalp. I like it on oval and round faces because the low fade doesn’t pull attention upward — it frames your jaw and temples. If your hair is medium to thick, the matte finish makes the grain look natural instead of shiny and greasy.
Start by buzzing the whole head with a 1 guard comb attachment, working against the grain at the crown for an even cut. Then build a low fade using clipper-over-comb only from the sides upward, stopping around the same height on both ears. Finish with a straight razor at the neckline and a light softening pass at the top of the fade so there’s no harsh step. Style with a fingertip-sized amount of matte clay rubbed between palms, then press it lightly into the top to kill shine.
Ask for symmetry at the temple — if one side sits 2mm higher, the whole cut looks “off” in photos.
Avoid a high fade with a 1-guard top if you want a luxe, office-ready look.
2. 0.5 Buzz with Razor-Soft Mid Fade
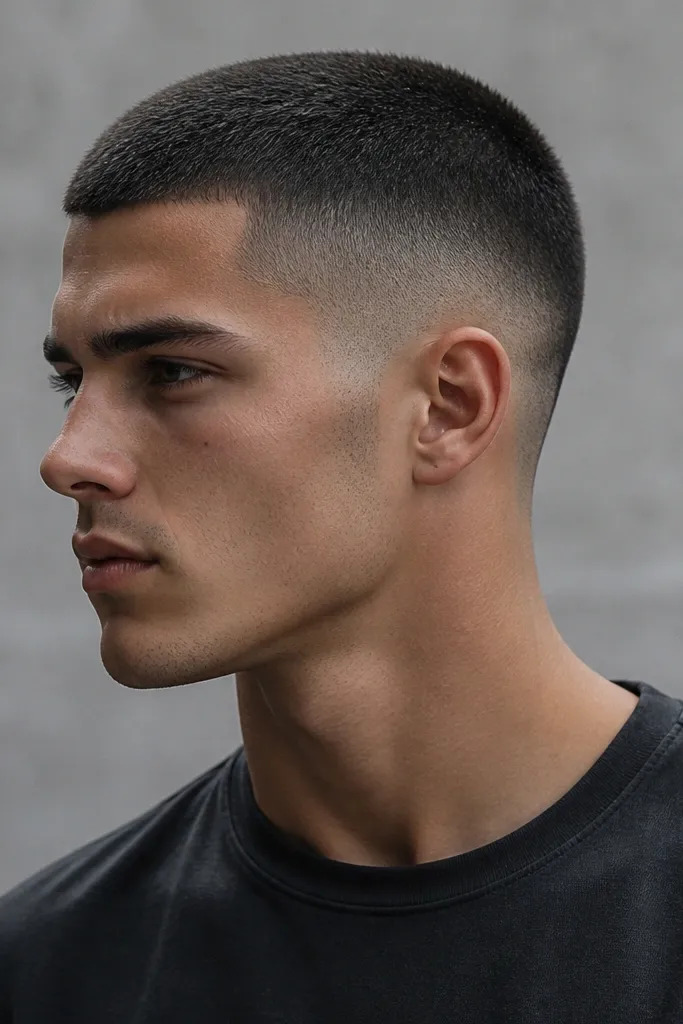
When you go ultra-short, luxury comes from control. The 0.5 guard top shows your natural hair density, and the razor-soft mid fade adds contrast without looking harsh. This works best if your hairline is solid and you don’t have patchy thinning — otherwise the scalp shows through and the cut looks unfinished. I’ve found it flatters square and long faces because the mid fade shortens vertical length and keeps the head shape looking tight.
Try thisIf you sweat a lot, keep a small travel towel and blot after showers — shine makes ultra-short cuts look oily fast.
Buzz the top with a 0.5 guard in steady sections, then re-pass around the crown to remove any length ridges. Create the mid fade by starting with a 1 guard around the midline and stepping down to skin closer to the lower sides. Blend with a light touch and short strokes — you’re removing the line, not carving the fade. Use a matte powder or dry texture spray sparingly, then press it in with your hands to keep the finish non-reflective.
Watch outDon’t leave a visible “ring” where the fade ends; it reads cheap instantly.
3. 2-Guard Buzz with Temple Fade and Line-Up
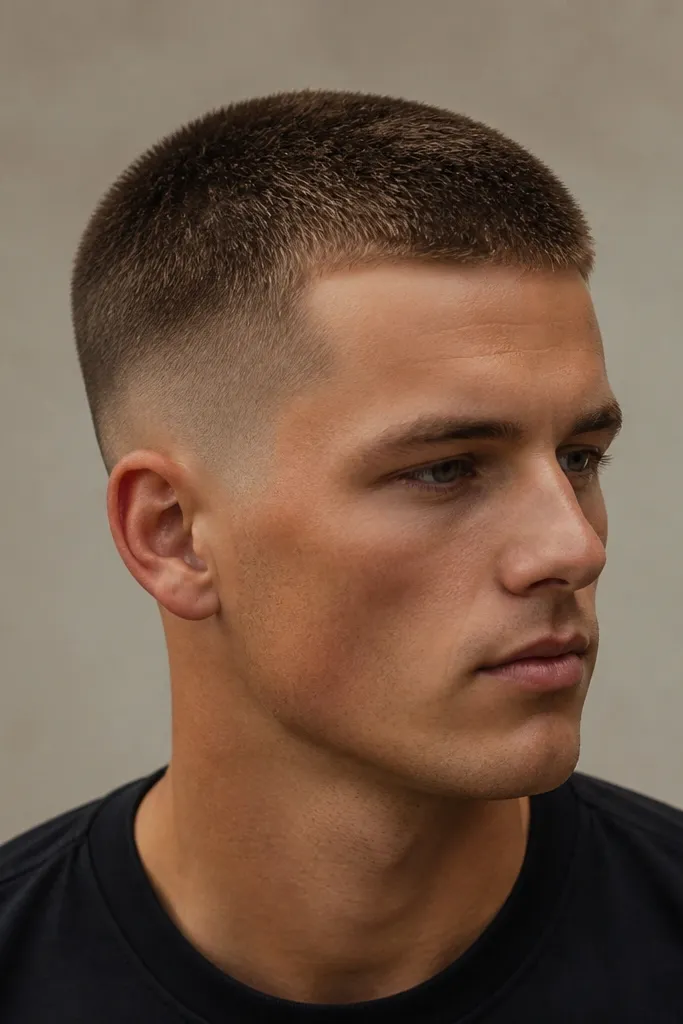
This style gives luxe without making your scalp the star. A 2-guard top holds coverage, so it’s forgiving if your hair is fine or you’ve got minor uneven growth. The temple fade adds shape at the sides, and the line-up makes the front look intentional. I like it for men with a slightly wider forehead because the temple work visually narrows the upper frame.
Start with a 2 guard buzz across the whole top and sides, then clean up around the ear area with a tighter 1.5 to 1 guard blend. Ask your barber for a temple fade that fades inward toward the front, not a full side fade that climbs too high. Finish with a crisp line-up at the hairline and a defined neckline, then soften the edges with a light brush-over to remove any harshness. Style with a tiny amount of matte cream, not gel, and keep it mostly dry so it doesn’t clump.
If your hair grows fast, refresh the line-up every 10 to 14 days while keeping the length longer.
Avoid gel-heavy products; they make a 2-guard buzz look like helmet hair.
4. 3-Guard Buzz with Side Taper Only
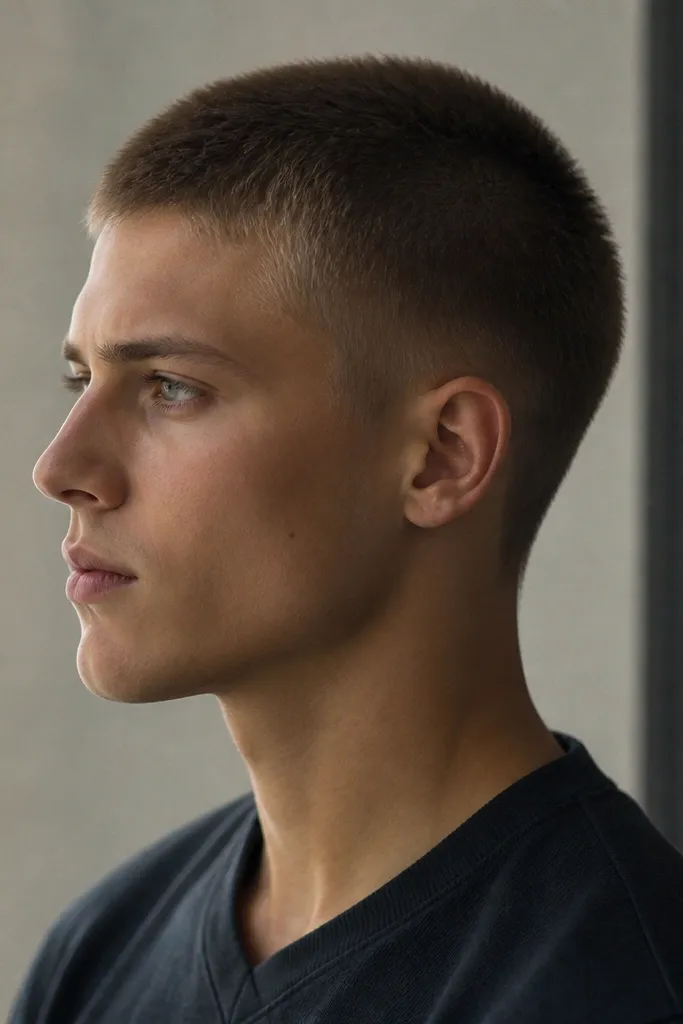
This is the “clean but relaxed” luxe buzz cut mens luxe high end look for people who don’t want skin fades. The 3-guard top gives a softer texture that photographs well and hides scalp variations. Side taper only keeps the silhouette smooth and flattering, especially if you have sensitive skin that reacts to razor work. It works for almost every face shape, but I love it on people with rounder cheeks because it keeps the cut from looking too aggressive.
Buzz the top evenly with a 3 guard, then use clipper tapering on the sides from about a 3 down to a 1.5 without going to skin. Keep the taper low and gradual so you don’t create a hard contrast line. Trim the neckline with scissors first if it’s thick, then clean with clippers at the very end for a neat edge. Use a matte paste with low hold, and rub it in with a damp cloth first if your hair feels wiry.
For a luxe finish, keep the hair dry. Water + product makes buzz hair look flat and shiny.
Skip skin fades if you get razor bumps — it ruins the luxe look quickly.
5. 0.75 Buzz with Hard Part Razor Line
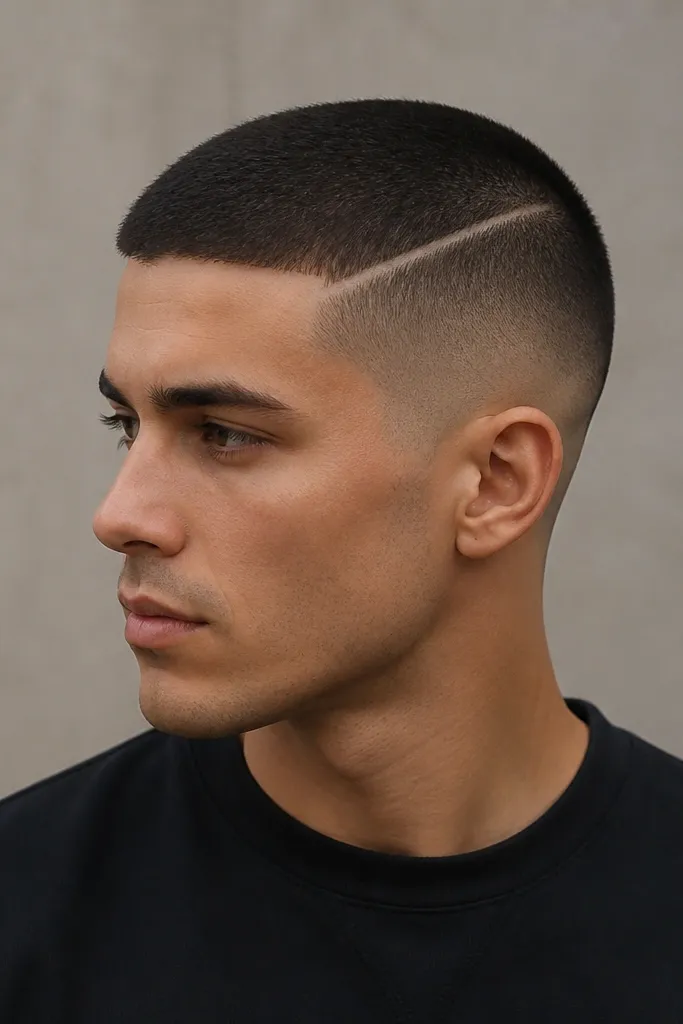
A hard part is the fastest way to make a buzz look styled, not accidental. The 0.75 guard top stays tight, while the razor line creates a crisp direction that makes your head look more sculpted. This works best if you have enough hair density to hold the line visually, and it’s great for guys who want something clean but slightly fashion-forward. For medium to thick hair, the contrast reads luxe — not edgy — when you keep the rest of the cut simple.
Try thisUse a tiny amount of product. Too much makes the hard part blur.
Buzz the top at 0.75 guard, then pick the hard part location with your natural hairline angle in mind. Use a comb to mark a straight line and cut it with a razor, then clean the area with clippers so there’s no stray stubble. Keep the sides in a low fade so the hard part doesn’t look like it’s floating. Apply matte clay lightly at the top, pushing hair away from the part line so the line stays visible.
Watch outDon’t make the part too wide — a thick groove looks like a haircut from a hurry.
6. Skin Fade Buzz with Beard Connection
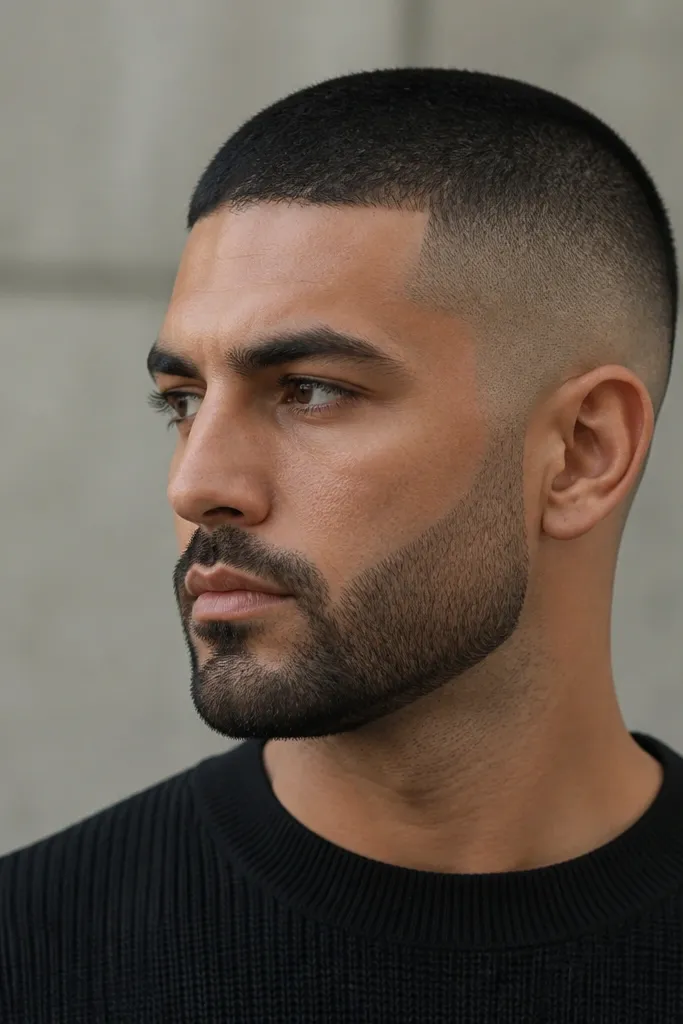
This look is luxe because it has one continuous frame from hair to face. The buzz top stays short, while the skin fade creates a clean transition that makes your beard line pop. I’ve done this on clients who wear a short boxed beard and it instantly makes the whole head-and-jaw area look intentional. It’s especially flattering if your beard grows evenly and your neckline isn’t too high, because the connection makes the proportions look right.
Buzz the top at 1 guard, then taper down the sides to skin around the lower half of the head. Use a trimmer to set the neckline first, then match the fade and beard edge to that line so they line up in the mirror. Clean up around the ears with a light razor pass for a smooth transition. Style by pressing a matte paste into the top and leaving the sides product-free so the skin fade stays crisp.
When you maintain it at home, only touch the neckline and beard edges — leave the fade to a barber.
Avoid uneven beard length; it makes the connection look accidental.
7. Faux Crew Buzz with Crown Lift
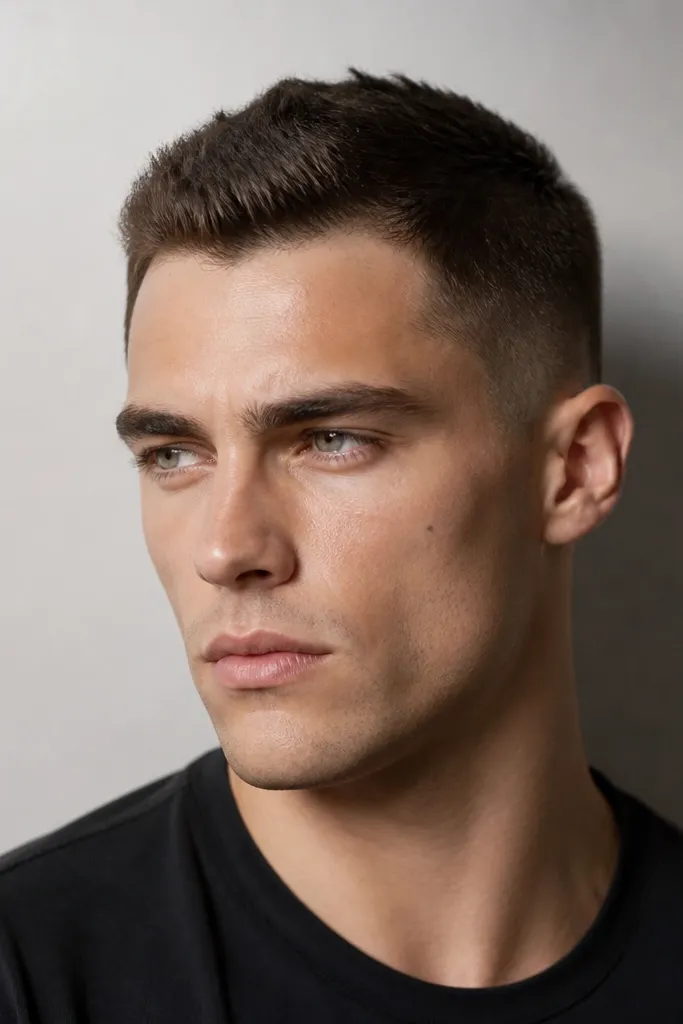
A faux crew buzz gives you that “I have a style” vibe without growing your hair out. The sides stay at a short buzz, while the crown is kept just a touch longer so you can create direction. This works for men with average or thicker hair who want a luxe look that isn’t flat. I’ve seen it soften square faces because the crown lift adds a bit of height and keeps the jaw from looking too heavy.
Try thisIf your hair falls flat, use a hair dryer for 20 seconds only on the crown — stop before it gets shiny.
Cut the sides with a low taper down to about a 0.5 to 1 guard, depending on your comfort with scalp showing. Leave the crown at about 1.5 to 2 guards, then blend carefully around the crown perimeter so you don’t get a line. Style on damp hair with a small amount of matte clay, then point the crown upward and slightly back using your fingers. Finish by drying with a cool setting or air-drying fully so it holds shape without shine.
Watch outDon’t leave the crown longer without blending; the step looks like a mistake.
8. Buzz with Scissor-Trimmed Fringe
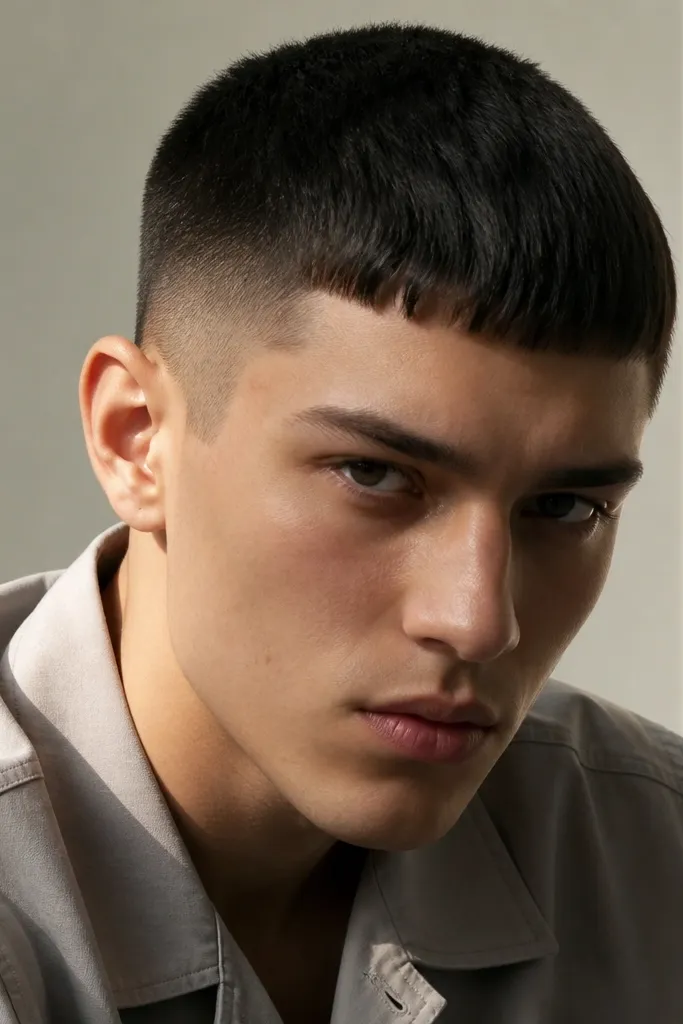
This is a luxe twist for people who want a buzz but still want a front frame. The fringe adds a controlled shape, and the scissor work keeps it from looking like stubble. It flatters men with higher foreheads because the fringe visually lowers the hairline, and it also works well on straight hair that naturally lays flat. When done cleanly, it looks intentional and expensive instead of “I forgot to finish my haircut.”
Buzz the sides to 0.5 to 1 guard and keep the top at about 1 guard, then stop short of the front section. Create the fringe by sectioning the front 1 to 2 inches and scissor-trimming it to a consistent length, usually about 1 to 1.5 cm. Blend the fringe into the buzz so there’s no hard edge line. Style with matte cream — rub a pea-size between hands and tap it into the fringe so it stays straight.
Trim the fringe every 2 weeks. A fringe that grows uneven makes the whole buzz look sloppy.
Avoid a ragged fringe. Straight, even scissor cuts look luxe.
9. Low Fade Buzz with Soft Natural Edges
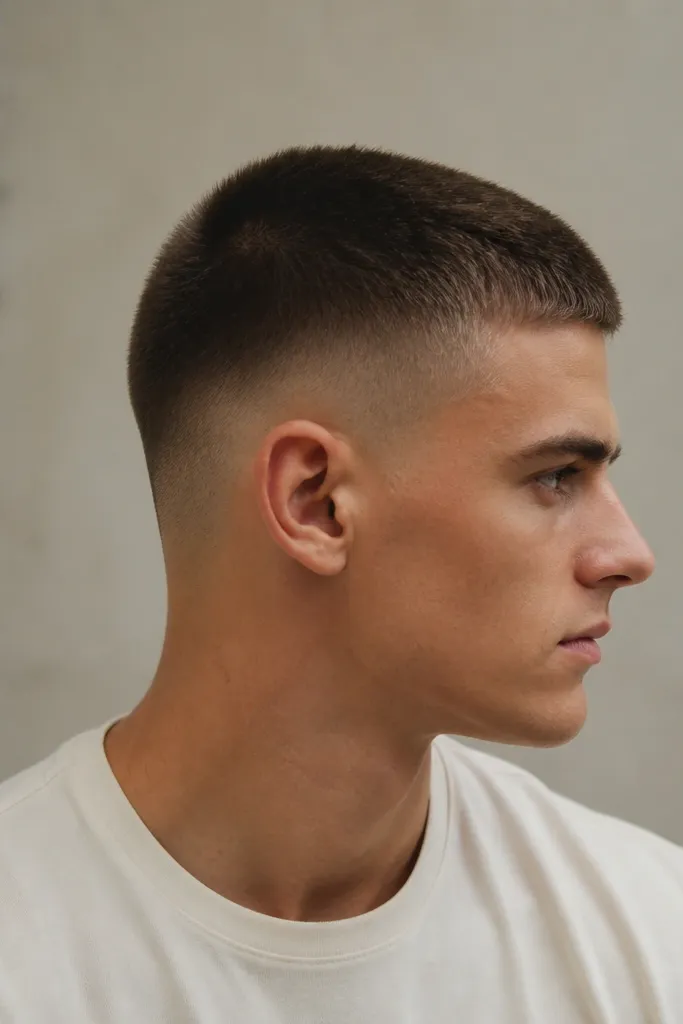
Not every luxe buzz needs razor lines. This version looks expensive because it’s calm and clean — the blend is so smooth that your eyes read it as “high quality.” It suits men who get irritated by aggressive line-ups, and it works on sensitive skin because the neckline stays natural. I also like it for clients with a softer hairline since hard lines can look unnatural. The key is the fade blending — if it’s smooth, it looks tailored.
Try thisIf you want this to look sharper, use a dry brush right after haircut — it reveals uneven spots immediately.
Buzz the top at 1.5 guards, then taper the sides low using clipper blending without going to skin. Keep the temple area blended — no hard razor line — and clean the neckline with clippers at a light angle. Use a brush to check for any patchiness between sections, especially around the ears. Style with matte paste and a light press, then finish with a quick comb pass to keep the top looking even.
Watch outAvoid skipping the ear clean-up. The ear area is where cheap buzz cuts reveal themselves.
10. Mid Fade Buzz with Textured Top (Matte Clay)
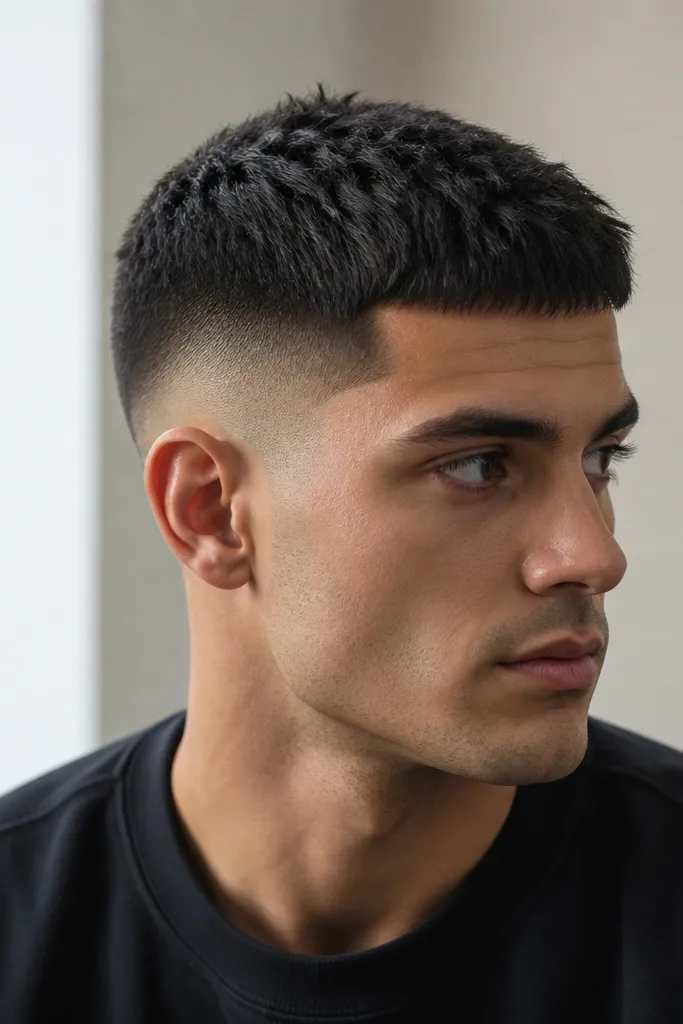
Texture is what makes a buzz look luxe in motion. This cut keeps the top at around 1 guard, then uses matte clay to create tiny directional texture instead of flat stubble. It flatters guys who have decent hair density and want a look that survives wind and photos. The mid fade gives contrast, while texture keeps it from looking too severe.
Try thisIf you see shine, you used too much product. Add a tiny pinch of matte powder instead of more clay.
Cut sides with a mid fade — aim to reach skin at the bottom, but keep the blend smooth in the middle. Keep the top at 1 guard and do a final pass around the crown to even it out. Apply matte clay in a thin layer: rub a small amount between palms, then press and lift in random tiny directions. Let it dry for 2 minutes, then tap the top with your fingertips to remove any clumps.
Watch outAvoid wet-look products. They make buzz cuts look sweaty and unfinished.
11. Buzz with Hard Line Around the Ear
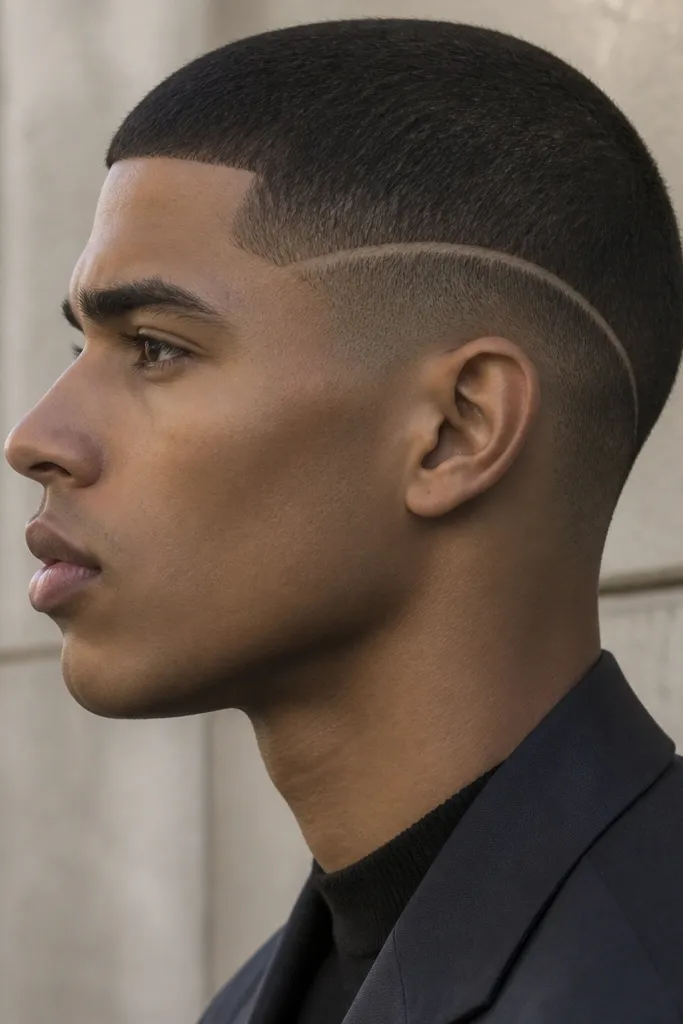
This is a subtle design move that reads high-end when it’s done thin. The main fade stays blended, but a fine razor line around the ear creates a tailored border that makes your haircut look “mapped.” It’s flattering if you have a defined jaw and want your ear area to look cleaner. I like it on men who keep short beards too, because the line helps the whole face frame look intentional.
Try thisUse a handheld mirror for maintenance checks at home. If the line grows out unevenly, it looks messy fast.
Buzz the top at 1 guard, then fade the sides from about 1.5 down to 0.5 near the bottom. Create the ear border line with a razor — keep it thin and follow the natural curve of your ear, not a straight line. Blend the line edges with a brush so the border looks crisp but not jagged. Style with matte clay only on the top; keep product off the lined area so it stays sharp.
Watch outDon’t carve deep grooves. Shallow, fine lines look luxe; deep ones look aggressive.
12. 1.25 Guard Buzz with High-Skin Fade
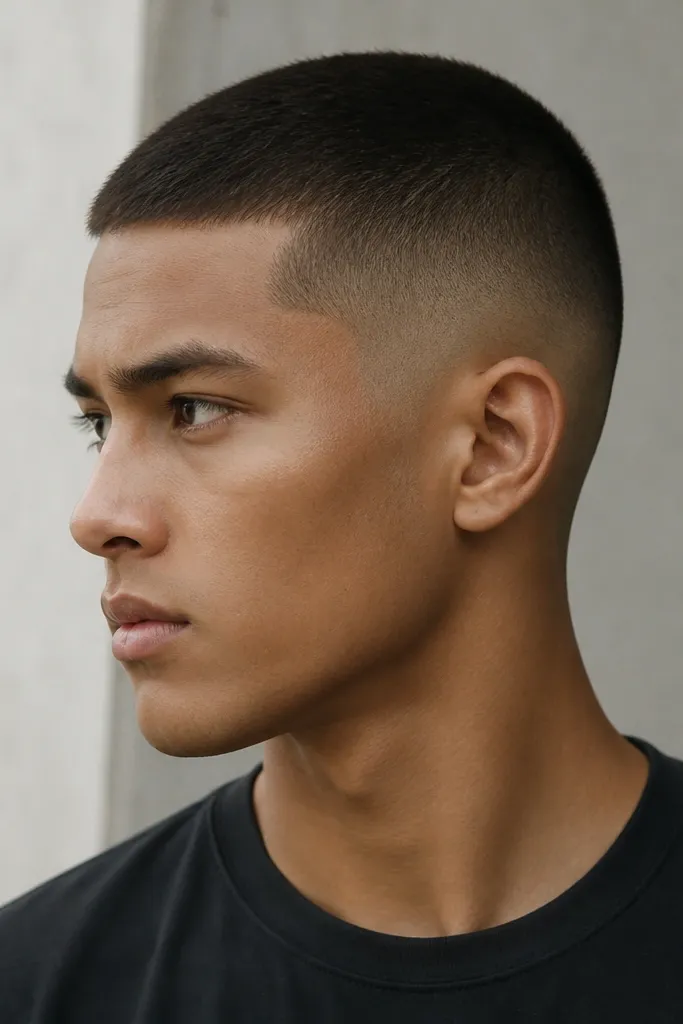
This one is for the people who want drama but still want a clean silhouette. The 1.25 guard top keeps coverage, while a high skin fade adds that sharp, fashion look. It works best on men with thick hair and a strong head shape because the fade is more noticeable. If you’re fair-skinned or you get sunburn easily, consider using sunscreen on your scalp or you’ll end up with uneven color that shows through the skin fade.
Try thisSun protection is part of the haircut. A skin fade with a burned scalp looks messy.
Buzz the top evenly at 1.25 guards with multiple passes around the crown. Fade the sides higher than you think — start fading at about mid-parietal and step down to skin near the bottom. Keep the transition smooth using blending guards rather than rushing the clipper down in one go. Finish with a clean neckline and style with a matte finish spray if you need extra control for flyaways.
Watch outAvoid pairing high skin fade with a patchy hairline.
13. 2-Guard Buzz with Curved Neckline
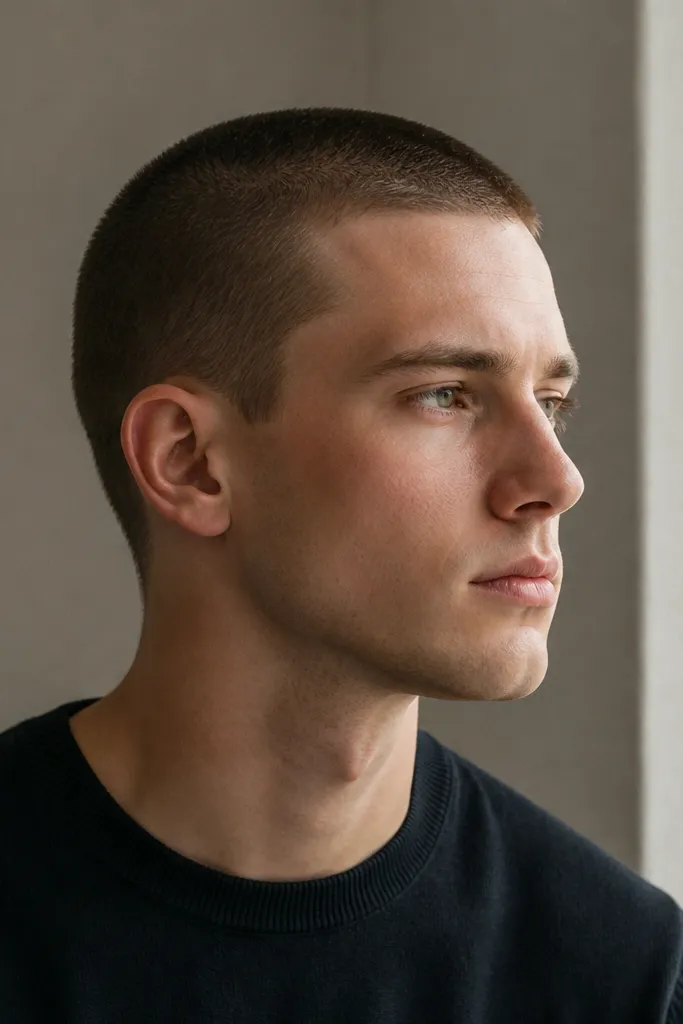
Neckline shape is where a buzz cut turns from basic to tailored. This style uses a 2-guard top for coverage and a low taper for a clean frame, then shapes the neckline in a gentle curve that follows your jawline. It’s flattering on most face shapes, especially if you have a slightly heavier jaw — the curved neckline makes the transition look smoother. I also like it on men who wear collared shirts because the neckline stays neat.
Try thisTake a photo of your neckline in daylight. If the curve is too high, it makes your head look smaller in photos.
Buzz the top at 2 guards and keep the sides around 1.5 to 1 with a low taper. Shape the neckline by setting a center point under the head, then curving outward slightly toward the sides. Trim the nape first with scissors if it’s thick, then use clippers to refine the edge. Style with a matte paste and lightly press the top so it looks even and not spiky.
Watch outAvoid a straight, boxy neckline. It looks harsh on most heads.
14. Buzz with Side Part Fade Line (No Hard Groove)
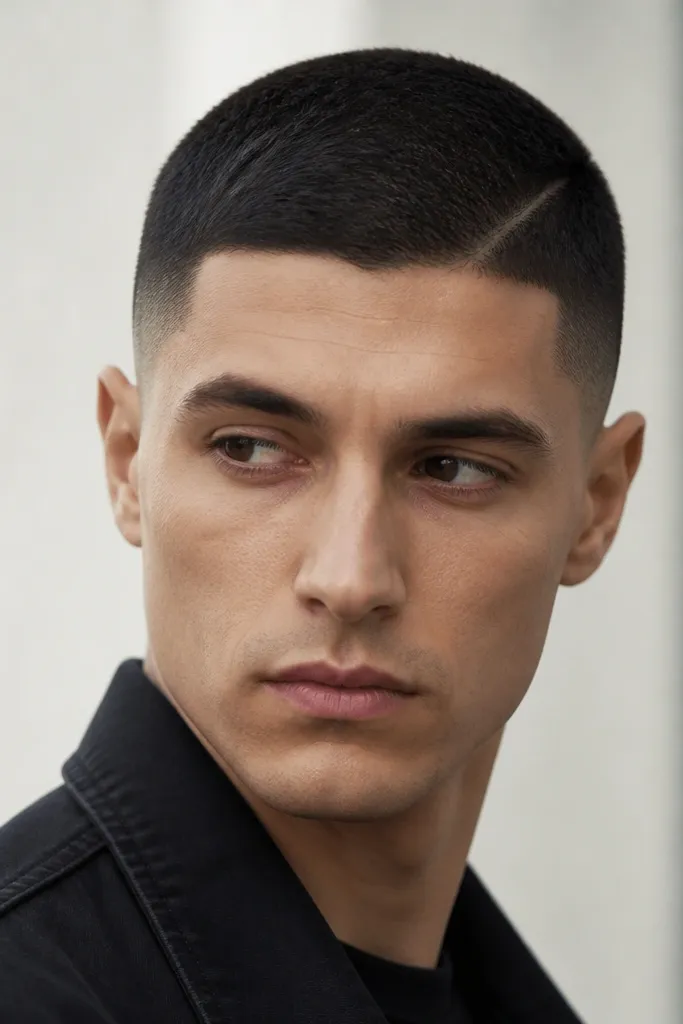
This is the luxe version of a side part for people who don’t want a carved line. You get the visual split by blending the fade and using product to set direction on the top. The top stays at about 1 guard, but you brush it to one side so the part reads clearly. It looks great on men with slightly wavier hair because the direction holds better, and it flatters round faces by adding a touch of diagonal structure.
Try thisChoose the part based on where your hair naturally falls after a shower. Fight that and it won’t look luxe.
Cut the top at 1 guard and keep the sides in a mid taper, blended smoothly without skin if your scalp shows easily. Create a subtle part by setting a direction with your fingers during styling — no deep razor line. Apply matte clay, brush the top to your chosen side, then hold it for 20 seconds while it sets. Clean up the edges around the temple with a light trimmer pass so it looks intentional, not grown-out.
Watch outAvoid overusing product on a buzz — it makes the part look greasy.
15. 0.5 Buzz with Slight Crown Texture
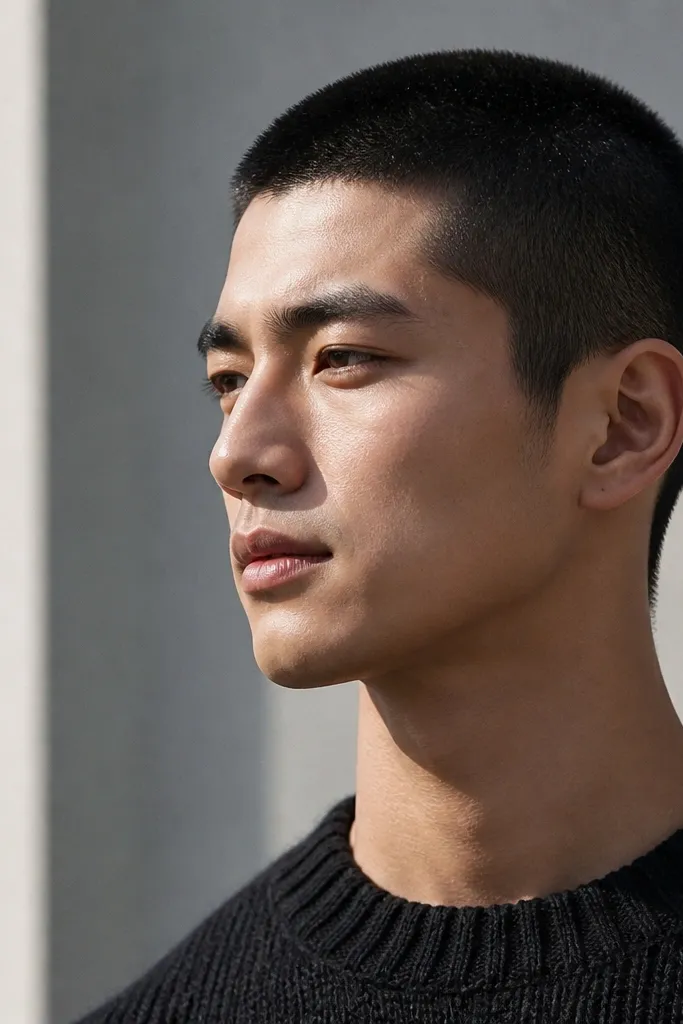
This is minimalist, but it isn’t flat. The 0.5 guard keeps the silhouette tight, and the crown gets just a hint of texture so your head doesn’t look like one uniform blur. It works for men with straight hair who want an easy, high-end look that still has depth in photos. I’ve seen it flatter thin hair too because texture makes density look more even than a totally uniform clip.
Buzz the entire head at 0.5 guard first to lock in the baseline. Then, use clipper-over-comb or a very light guard lift at the crown to add a tiny bit of length, usually about 0.25 to 0.5 guard difference. Blend the crown perimeter so you don’t create a ring. Style by rubbing a micro amount of matte clay into the crown only, then lightly scrunch and let it dry.
If the crown looks too flat, use a cool air blast for 10 seconds and stop.
Avoid adding longer crown length on both sides — it looks like you missed a section.
16. 1-Guard Buzz with Scalp-Ready Clean Finish
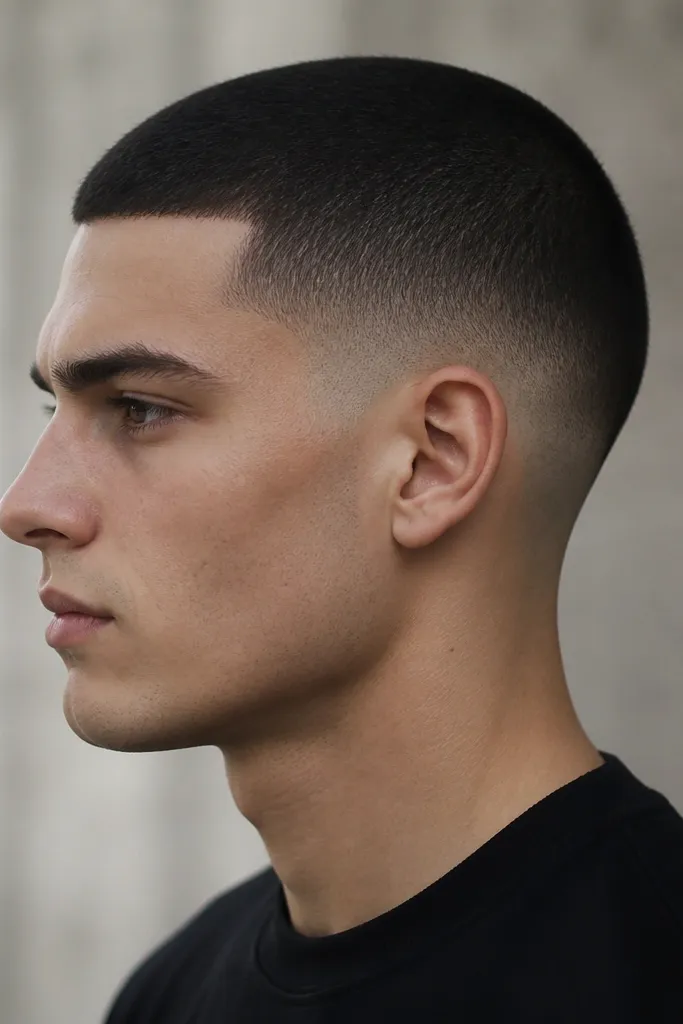
This look is for days you want to feel sharp without thinking about it. The 1-guard top is neat and consistent, and the bottom cleanup makes the haircut look fresh longer. It’s flattering on most skin tones because the fade is subtle, and it works whether your hair is straight or slightly wavy. The luxe part comes from the finish — no patchy dryness, no stray longer hairs, and edges that are cleaned like they were planned.
Try thisKeep a small bottle of alcohol-free aftershave or balm for the neckline after cuts. It stops dryness that makes hair look patchy.
Buzz the top at 1 guard with the same direction each time so the grain looks uniform. Do a low taper on the sides with gradual steps, but stop short of going fully to skin if you get irritation. Clean the neckline and around the ears with a trimmer and a quick razor touch only where hair grows irregularly. Style with a matte spray that reduces shine — then brush once with a soft brush to even everything out.
Watch outAvoid leaving the top too long at the crown. The crown is where buzz cuts look sloppy first.
17. Buzz Cut with Retro High-Contrast Fade
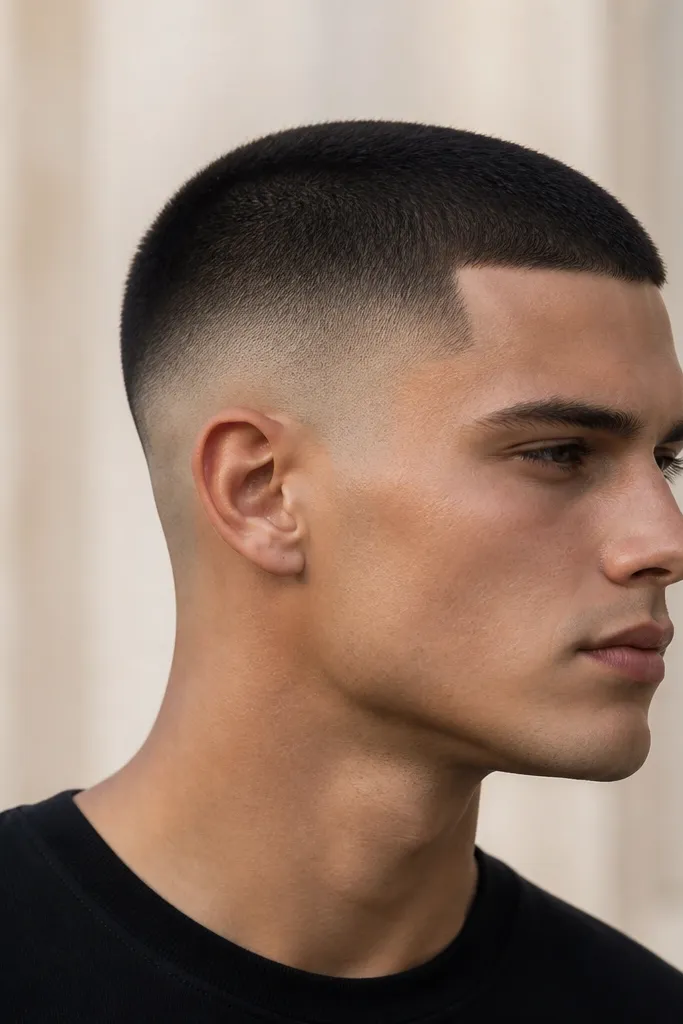
This is retro-luxe: high contrast, clean silhouette, and no extra fluff. The top stays short enough to look sharp, while the fade climbs higher to create that “styled” look even when your hair is just buzzed. It works best when your hairline and density are strong because the contrast makes any thinning obvious. I recommend it for events where you’ll be photographed under bright lights.
Try thisBright light reveals everything. Check the cut in a bathroom with white lights before you leave.
Buzz the top at 1 to 1.25 guards, then ask for a high fade that starts around the upper sides — not mid. Step down quickly but blend with care so you don’t get a visible shelf. Razor the neckline and clean the temples with a trimmer so the contrast looks intentional. Style with matte clay pressed lightly on top — don’t spike, just set direction forward and let it settle.
Watch outAvoid high contrast if your scalp has visible uneven pigmentation — it will show through.
18. 2.5 Guard Buzz with Soft Mid Fade (No Skin)
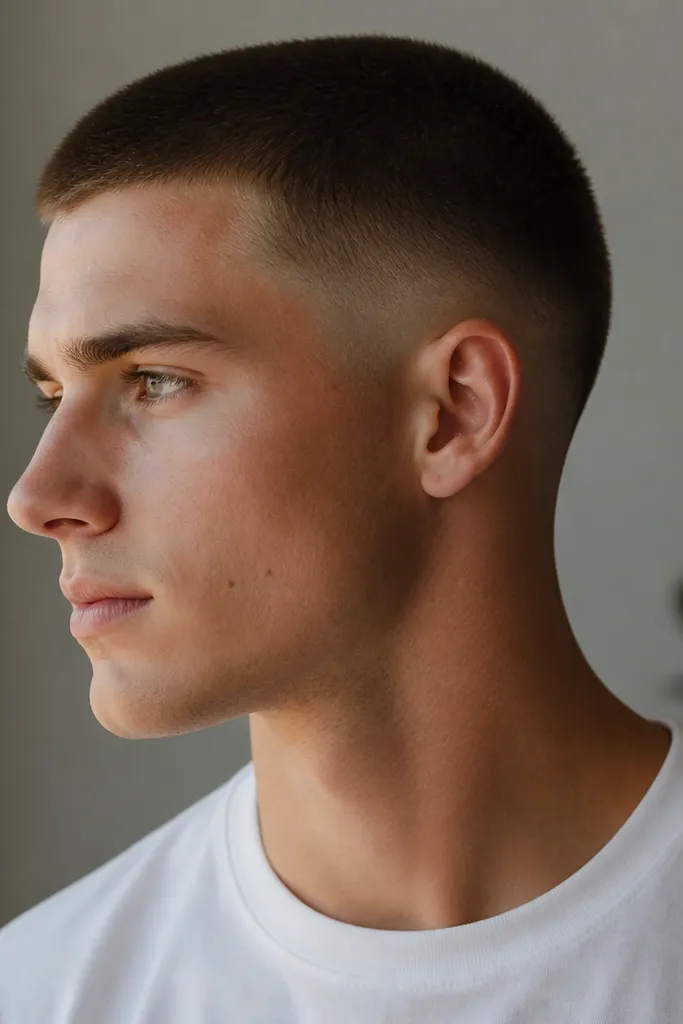
This is the luxe compromise between a buzz and a crew cut. The 2.5 guard top gives you a bit of cushion and coverage, while the soft mid fade adds shape without the skin-fade intensity. It flatters men who want a sharp look but don’t want to deal with scalp visibility or razor maintenance. If you have a bit of uneven hair growth, the extra length hides it and still looks intentional.
Buzz the top with a 2.5 guard and keep the crown consistent. Build the mid fade with blending guards down to about a 0.5 to 1, but do not finish at skin. Keep the blend smooth by using a steady rhythm and checking both sides for the same height. Finish with a clean neckline and a light matte product, then run a comb through once to remove any clumps.
Use a soft matte finish. A little sheen makes a no-skin fade look dull instead of luxe.
Avoid stopping the fade too high. If the fade starts too high, it looks like a half-finished cut.
19. Buzz with Glossy Pompadour Direction (Tiny Amount)
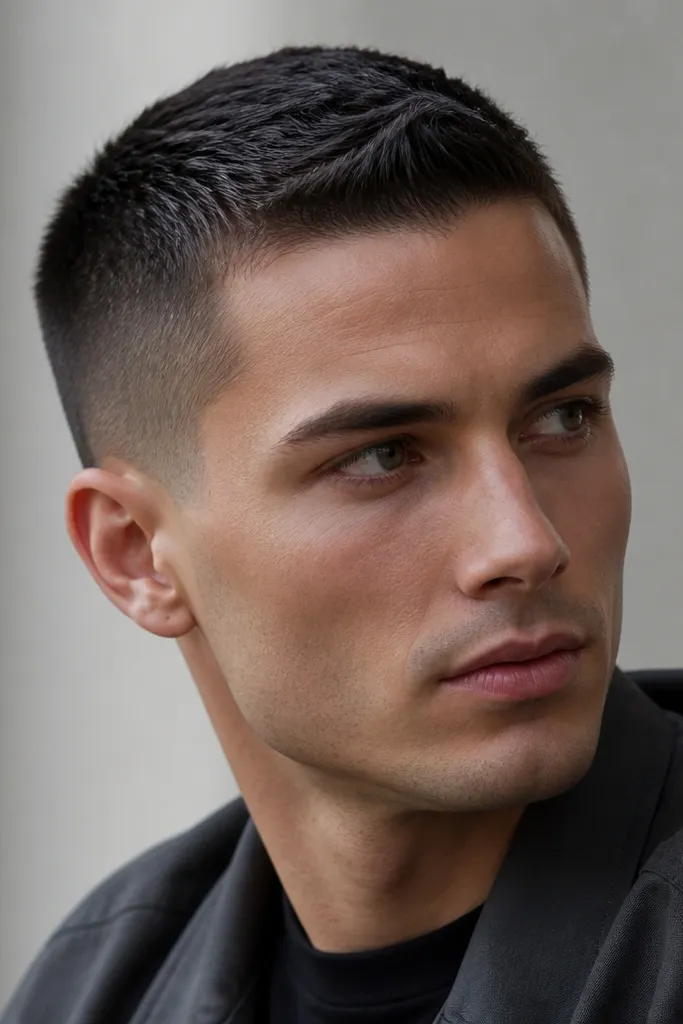
A little shine can look high-end on buzz hair when you use a tiny amount and keep it controlled. The top stays at about 1 guard, but you create a small pompadour direction — not a tall style, just a forward lift. This looks great for formal nights because the sheen catches light without looking greasy. It flatters men with straight hair and strong hair density, and it works on any face shape because the direction sits near the forehead.
Buzz the top at 1 guard and keep the sides low taper for a clean base. Apply a pea-sized amount of light pomade to dry hair — warm it between palms first, then spread thin. Push the top forward and slightly up, then smooth the edges with your fingertips. Wipe hands on a towel between passes so you don’t add too much product on the sides.
If your hair looks shiny after 30 minutes, you used too much. Reduce the amount next time by half.
Avoid heavy gel. It turns buzz hair into wet-looking texture.
20. 1.5 Guard Buzz with Clean Fade Around Ears Only
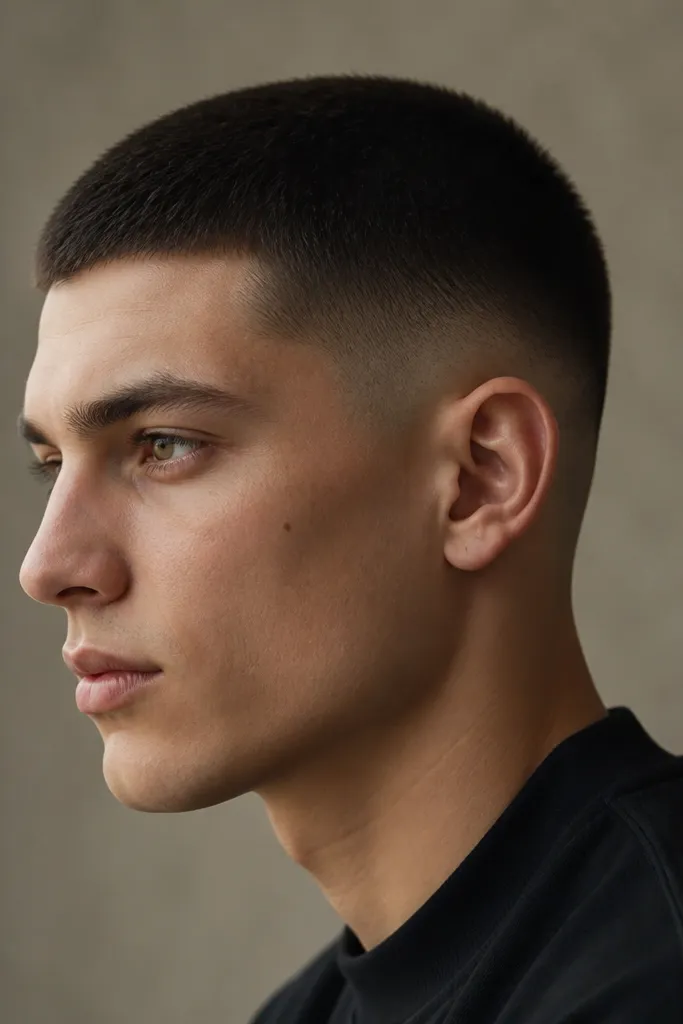
This is the “quiet luxe” option when you want clean edges but not a visible fade. The 1.5 guard top stays consistent, and the ear-area cleanup makes your haircut look sharper up close. I like it for men who wear glasses because it keeps attention on the face, not the haircut design. It’s also a smart choice if you’re between barbershop visits and want the cut to grow out gracefully.
Buzz the whole head at 1.5 guards first. Then focus your blending only around the ear — use a 1 guard to taper the area behind and around the ear, stopping before you create a full side fade. Clean the neckline with a trimmer and lightly square the corners for a neat finish. Style with matte clay pressed into the top lightly, then brush once toward the front to keep it even.
If you can’t get a barber, do this one yourself. Use clipper guards and focus only on the ear transitions.
Avoid trying to fade the entire side if you want this subtle look.