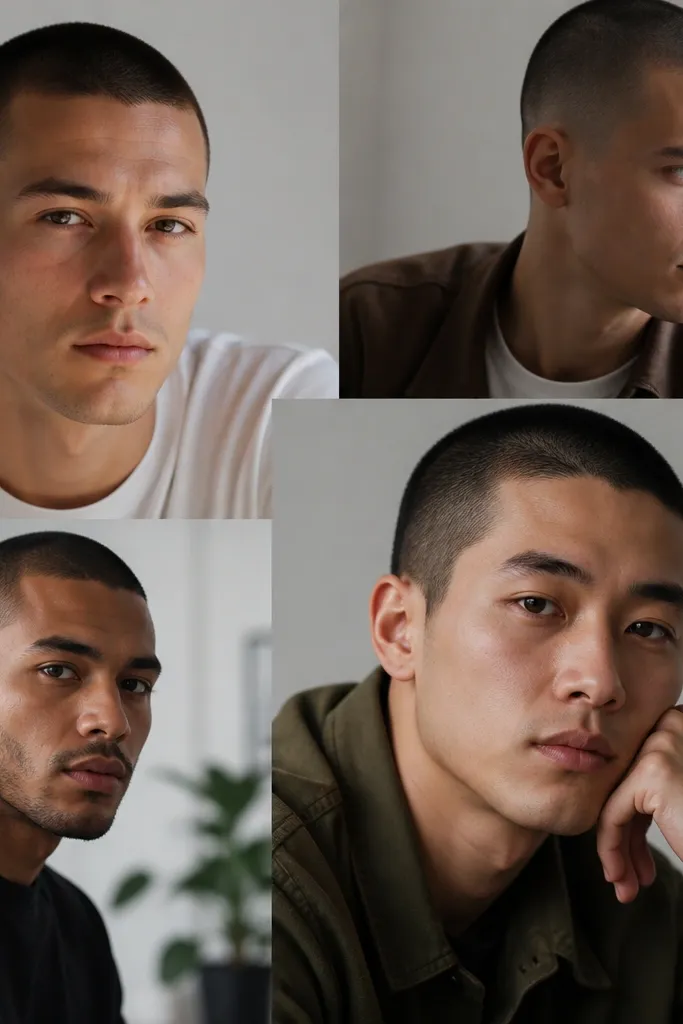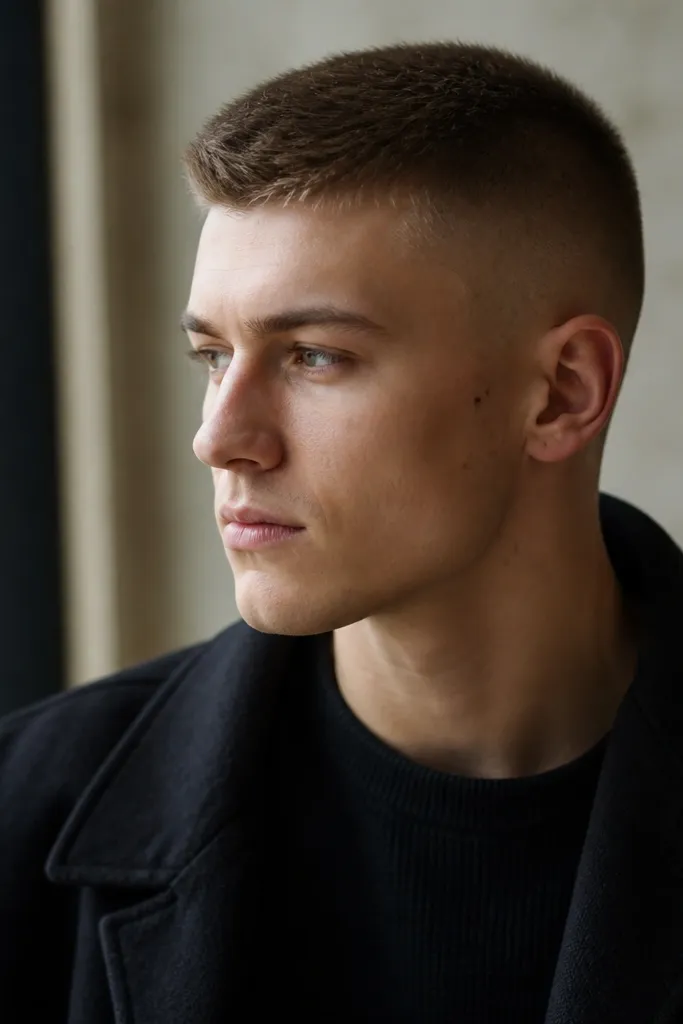
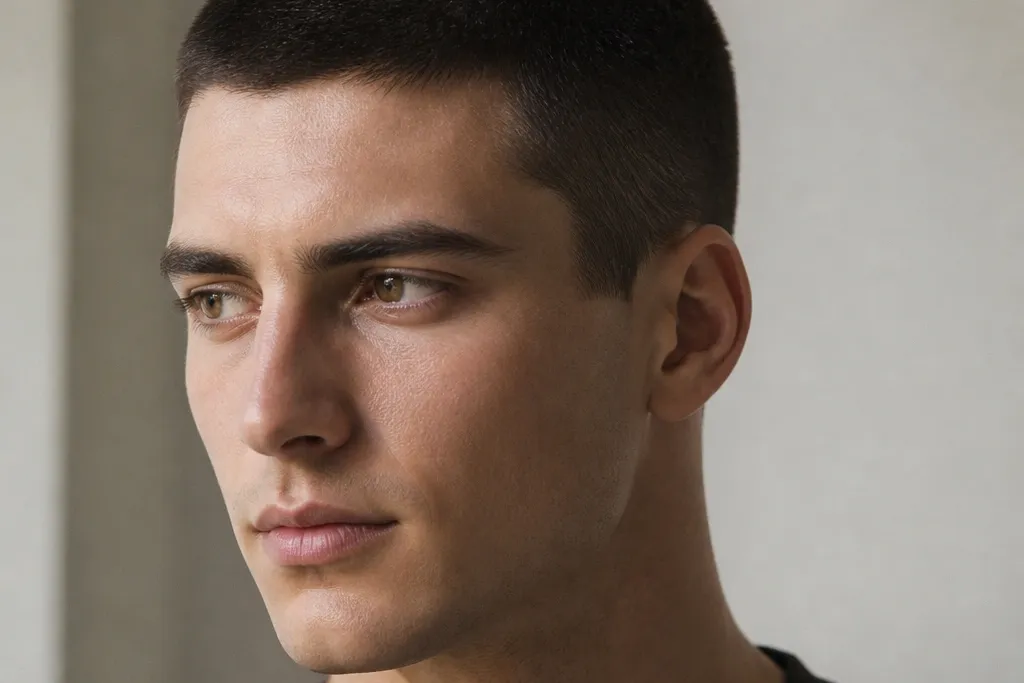
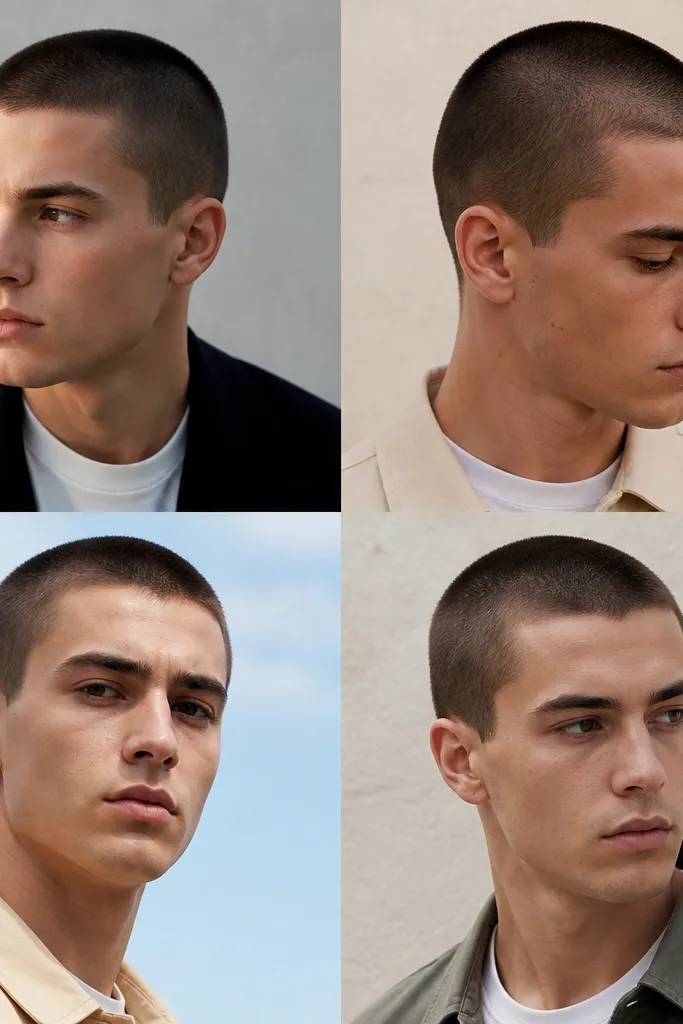
1. Classic Buzz Cut with Guard 4 All Over
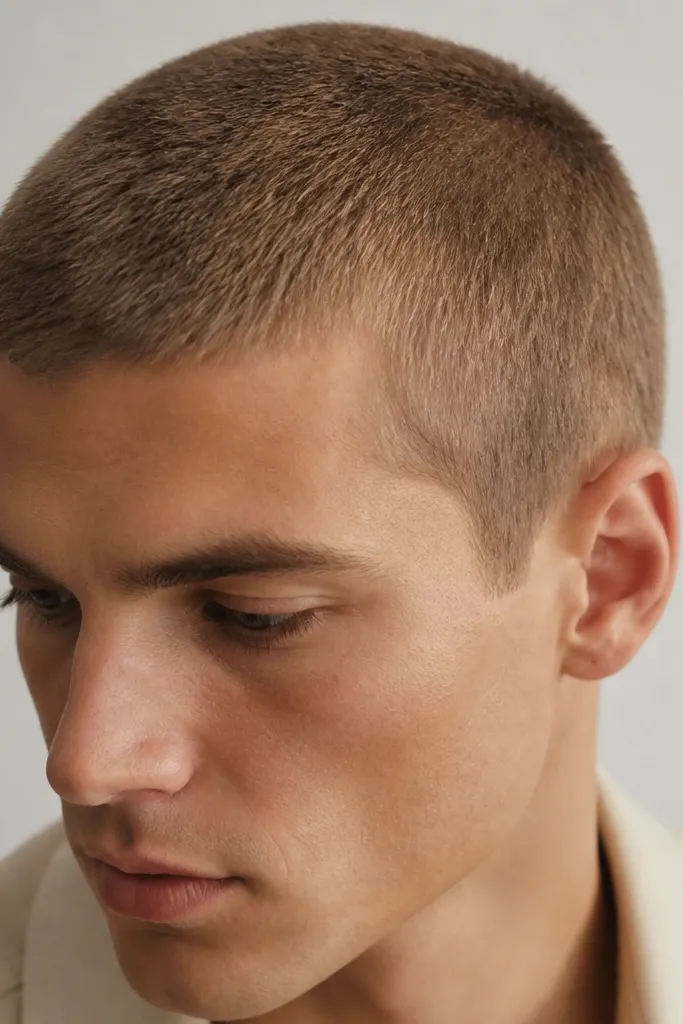
This is the first buzz I teach people because it hides beginner mistakes. With guard 4 (about 1/2 inch), the hair still has enough body to look textured, not scalpy. It flatters most face shapes because the silhouette is simple and the eye reads one length. If you have a receding hairline, the uniform cut makes it look intentional instead of patchy. Keep it matte and you’ll get a clean, “put together” look without styling.
Start with clean, dry hair and brush it straight up. Use clippers with guard 4 and go against the grain on the top for a crisp finish, keeping your wrist steady. Do the sides the same way — no blending needed since everything matches. Finish around the ears with the guard off or a detail guard, then use a small trimmer to tidy the hairline.
Try thisUse a mirror setup with one side mirror — you’ll catch uneven spots before you shave them too short.
Watch outSkipping a dry cut — wet hair makes guards feel different and you end up uneven.
2. Crew Fade Buzz with Guard 3 Top and Guard 1.5 Sides
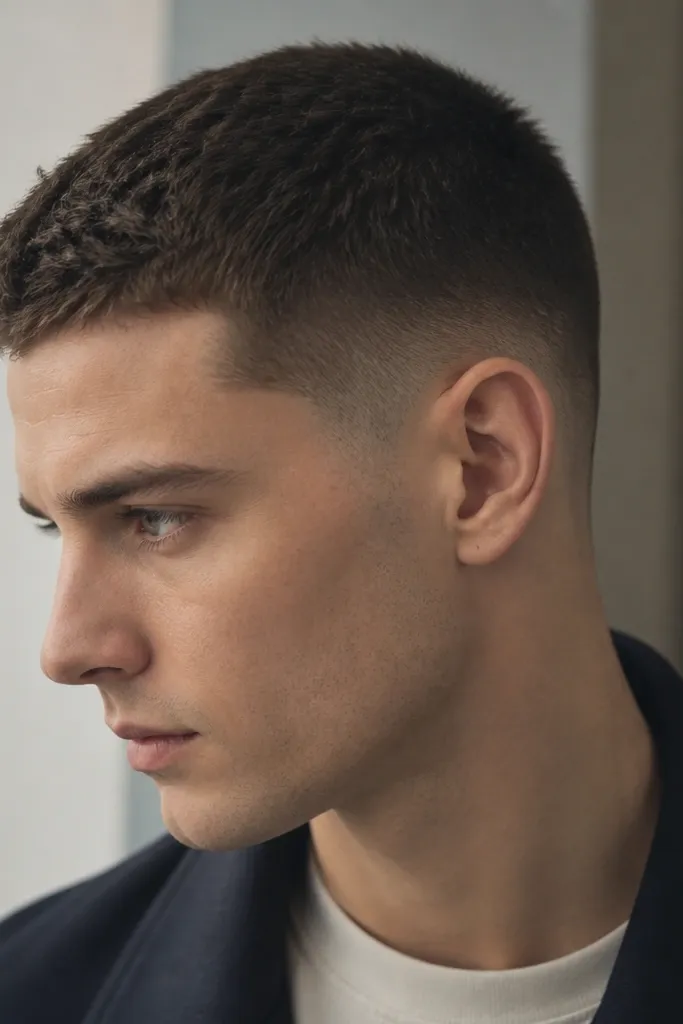
This one gives you the sharp look people associate with a fade, but it’s still beginner-friendly. Guard 3 on top (about 3/8 inch to 1/2 inch depending on clipper) keeps texture, while guard 1.5 on the sides stays neat without needing advanced blending. It works well if you have thick hair because the top doesn’t collapse. For lighter skin tones, the contrast looks crisp; for deeper skin tones it still reads clean because the fade is tight and matte.
Start by cutting the top with guard 3, going in the direction you want the texture to sit. Then choose where the fade starts — usually around the upper ear and slightly above the temple. Run guard 1.5 from that point down. Finally, use a shorter guard or blending technique: lightly take guard 2 or 1.75 in the transition area with short strokes and less pressure, then re-check in the side mirror.
Try thisStop blending when it looks a little darker than you want — it evens out after a quick rinse and dry.
Watch outGoing too high with the fade — it can make your head look longer than it is.
3. Low Fade Buzz with Guard 2.5 Top
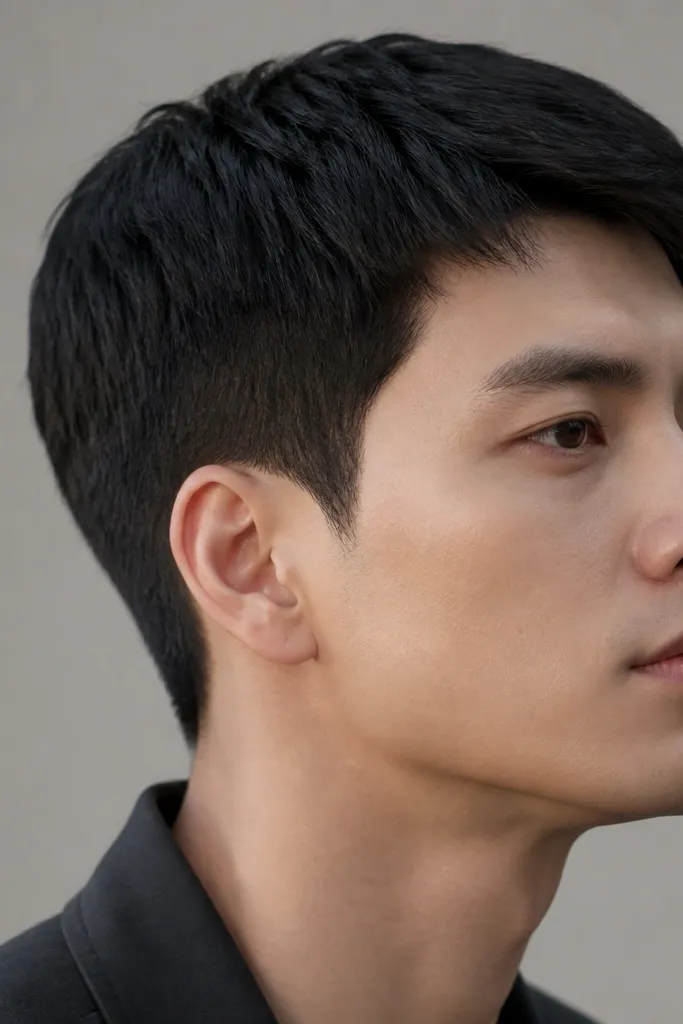
A low fade is the easiest way to look “barbershop sharp” without making your face look harsher. Keep the top at guard 2.5 so you still get a bit of height and texture. The sides drop gradually starting near the lower part of the ear, which balances rounder faces and softens strong jawlines. If you’re starting with home clippers, the lower start gives you more room to blend without creating a hard line. It also grows out more gracefully than a high fade.
Start by cutting the top evenly with guard 2.5, using slow passes and checking for missed patches. Pick a fade start point low on the sides, roughly one thumb-width above the ear. Cut from that point down with guard 1. Then blend upward into the transition using guard 1.5 with feather-light passes. Tidy the neckline with a detail trimmer and keep the hairline natural, not squared.
Try thisUse a comb to lift the top slightly and see where the transition line is — that’s where you blend next.
Watch outSquare neckline cleanup — it can look like you’re wearing a hat instead of a natural cut.
4. Buzz Cut with Skin Taper Around the Ears
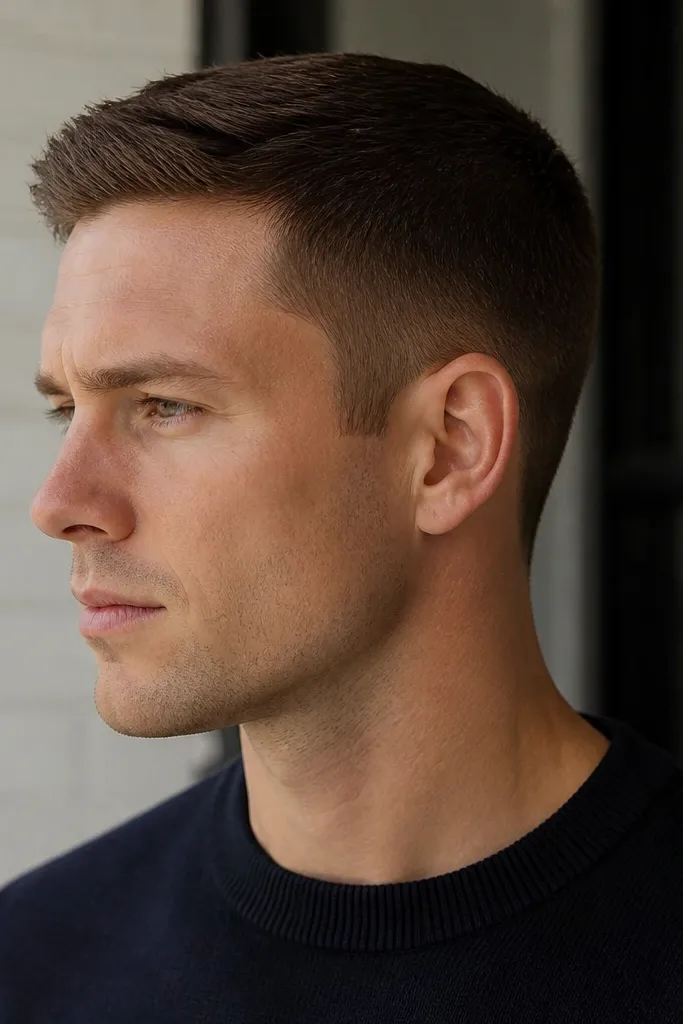
This style looks clean because the skin taper is localized where it matters most: around the ears and edges. The top stays slightly longer so you still have texture and don’t get that “completely bald” look. It’s especially flattering if you have a normal or slightly tall hairline because the attention goes to the silhouette rather than the scalp. I like it for workdays because it looks sharp even if you miss a week of trimming.
Cut the top first with guard 3, keeping it even from front to crown. On the sides, use guard 0.5 or a skin-safe setting starting just above the ear and blend upward with guard 1.5 in short, light strokes. Pay attention to behind the ear — that area shows unevenness fast, so use a small mirror. Finish by shaving the neckline lightly with a trimmer and keeping the temple line soft.
Try thisAfter cutting, run a damp cloth over the sides to see the true blend line before you touch anything up.
Watch outGoing fully skin all the way around — it can show every scuff and uneven spot.
5. Textured Buzz with Guard 5 and Matte Finish
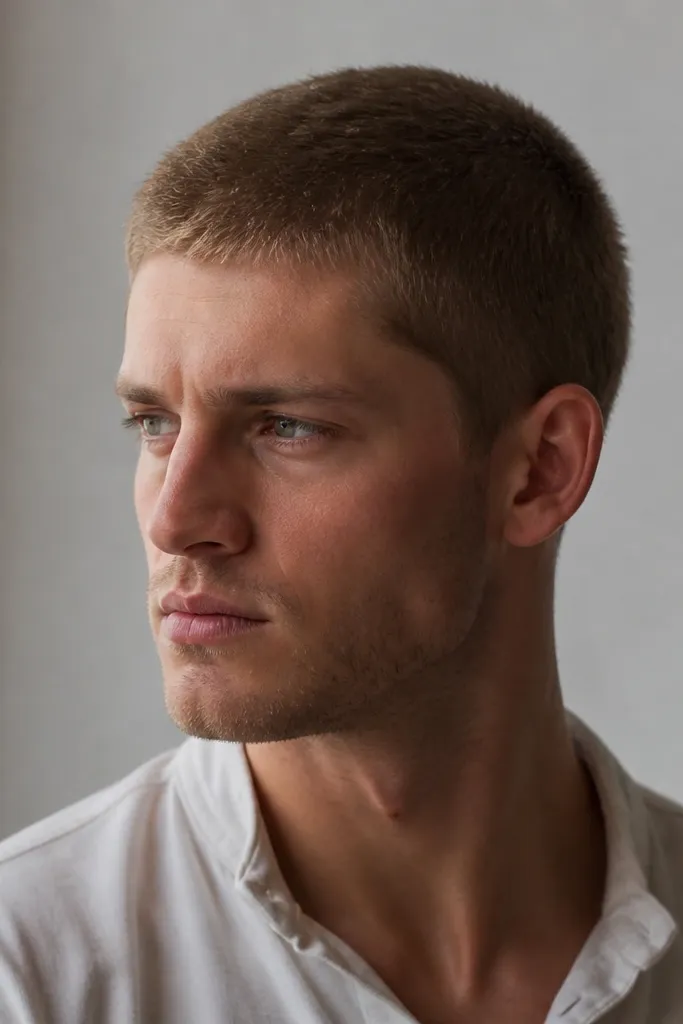
Guard 5 (around 5/8 inch) gives you a buzz that still looks like hair, not shadow. This is the beginner-friendly option if your hair texture is fine or wavy because longer length holds shape and doesn’t cling to the scalp as much. It’s flattering for people who don’t want high contrast at the edges. For medium to light skin tones, it looks natural and clean; for deeper skin tones it still reads even because the length creates a soft gradient. The secret is matte — shine makes the surface look patchy.
Start with guard 5 across the top, then keep the sides at guard 4 so everything blends without a sharp line. Use a scissor over comb only if you see obvious cowlicks — otherwise, skip it. After cutting, towel-dry and apply a pea-size amount of matte paste or clay to the top, rubbing it between your palms first. Then lightly press the hair texture down and forward with your fingers for a controlled, messy look.
Use matte paste, not gel — gel highlights uneven spots.
6. Buzz Cut with Single-Length Crown (Guard 4) and Side Taper
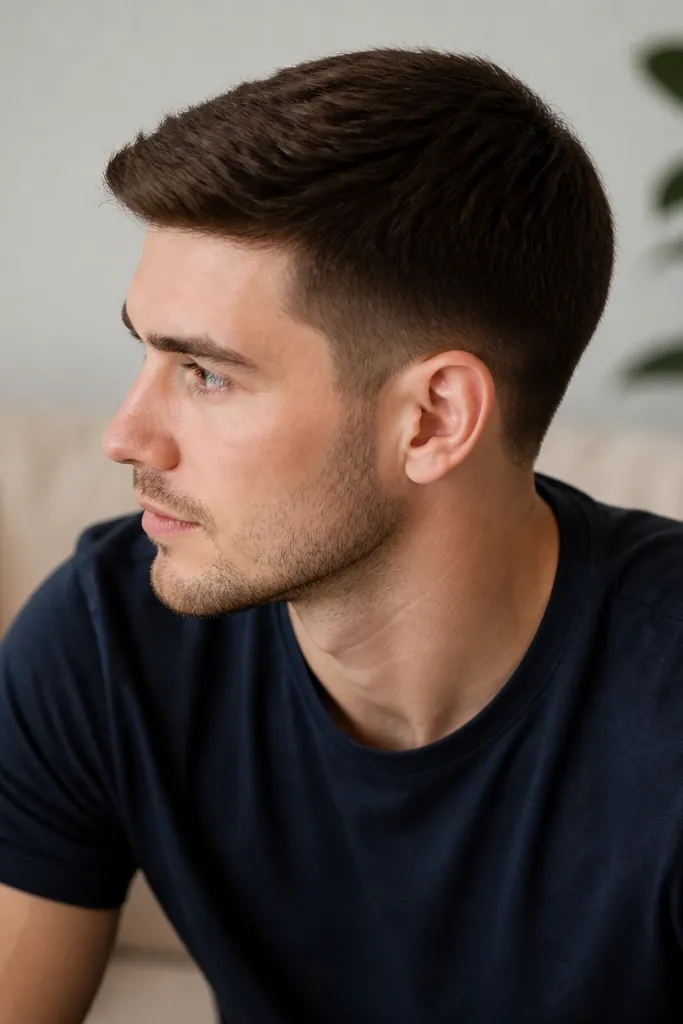
This style keeps the crown consistent, which makes it look better as it grows. When the crown stays at guard 4 and the sides taper, you get a clean dome without the “flat spot” look. It works for people who have a swirl or cowlick at the crown because you’re not fighting it with a complicated fade. If your hairline is uneven, the taper still frames it without drawing attention to patchy areas. The finish is neat and low maintenance.
Cut the top and crown with guard 4, following the grain on the crown so it doesn’t stick up oddly. For the sides, start a taper around the mid-ear and reduce down to guard 1.5. Blend the transition using guard 2.5 for a softer step, with short strokes that don’t leave tracks. Tidy the edges with a trimmer, then use a brush to check if the crown looks uniform from every angle.
Try thisIf your crown grows faster, drop the sides slightly sooner than the top instead of trying to fix everything at once.
Watch outCutting the crown shorter than the sides — it makes cowlicks show more.
7. High Fade Buzz with Guard 2 Top
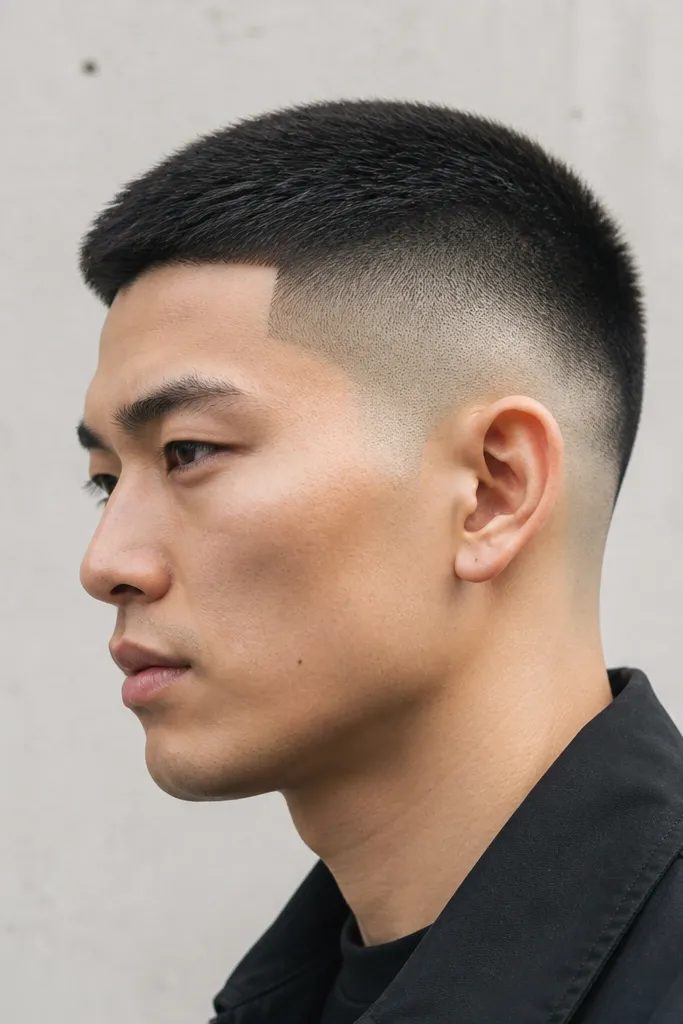
A high fade makes the head shape look sharper, especially if you have an oval or slightly longer face. Guard 2 on top is short enough to feel easy, but long enough that the fade doesn’t look like a bald cap. This is a great “first fade” if you’re comfortable with clippers but want a predictable outcome. The high start means you need good blending, yet the short top makes mistakes less noticeable. Keep it matte and it looks intentional.
Start with guard 2 on the entire top area, cutting evenly from front to back. Mark your fade start point with a comb handle — about a finger-width above the temple line. Cut down the sides with guard 0.5 from that start point. Blend upward into the fade using guard 1 and then guard 1.5 with lighter pressure. Finish with a clean trimmer around the temples and neckline.
Keep your clipper flat for the fade passes — angled blades create hard steps.
Leaving a dark line between guards — it reads as a stripe, not a fade.
8. Buzz Cut with Line-Up and Soft Fade (No Hard Top Line)
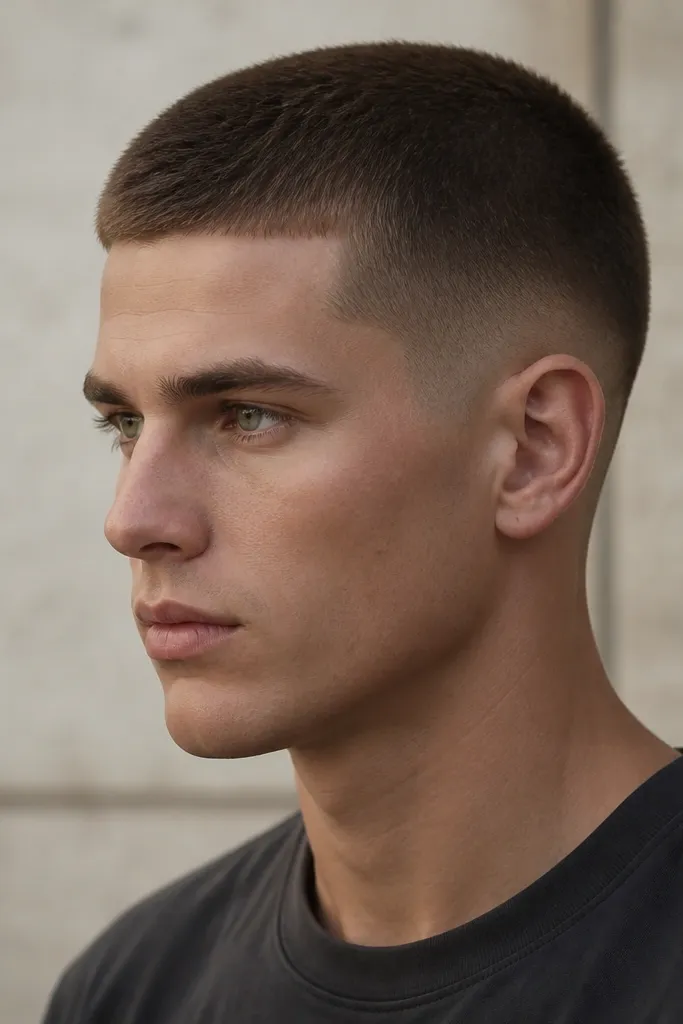
The line-up gives you that fresh look, but keeping the top free of hard lines makes it beginner-friendly. The “soft fade” means the transition is gradual, so you don’t need surgical blending. This style works for almost anyone because it frames the face and cleans up the hairline. If you have patchy growth at the temples, the line-up makes it look like it’s part of the design. It also photographs well because the edges are defined without looking harsh.
Cut the top with guard 3 and keep the sides at guard 1.5 at first. Blend the transition with guard 2, using short, light strokes and checking often. Once the fade is done, use a detail trimmer to clean the temple line and neckline — keep it natural, slightly rounded, not a sharp square. Don’t carve a hard line across the top — just tidy the boundary where hair meets skin.
Use a white towel to wipe the trimmer — black hair clippings hide unevenness in your mirror.
Over-squaring the temples — it makes the cut look like a stencil.
9. Faded Buzz with Longer Top Fringe Edge (Micro-Front)
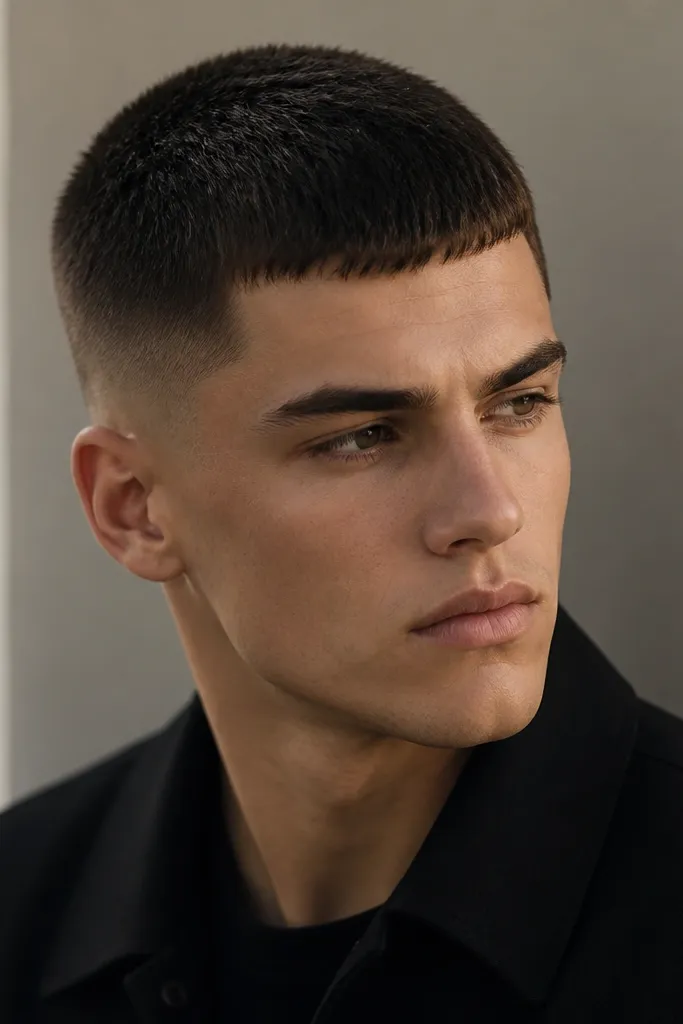
This is a clever way to add style without turning your buzz into a full haircut. You keep the top mostly short, but leave a micro-front edge at the very front so it frames the forehead. The sides fade down so the front doesn’t look like a separate hairstyle. It flatters people who hate the “all one length” look because it adds direction and a small focal point. It also helps if your hairline is uneven — the micro-front draws attention forward.
Cut the top with guard 3, but at the front, lift the hair slightly with a comb and leave an extra 1/4 inch by holding the comb more horizontal. Blend the sides down with guard 1.5 and a transition guard of 2. Taper behind the ear carefully with the smallest guard you have. Finish by using a matte paste and pressing the micro-front edge forward and slightly off-center.
Try thisUse a hair dryer on low heat for 10 seconds to set the micro-front direction.
Watch outUsing shiny product — the micro-front highlights stray hairs.
10. Buzz Cut with Temple Fade Only
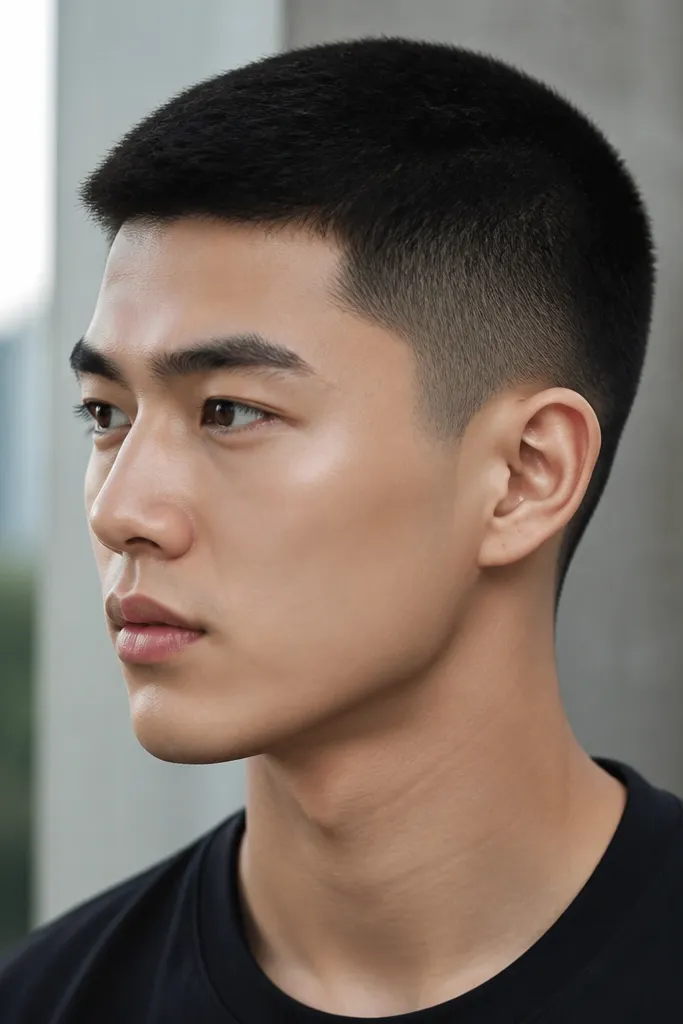
This is the calmest fade option for beginners because you limit the blending zone. You keep the sides at one guard, then fade only around the temple to clean up the face frame. It’s flattering for round faces because it adds structure without shrinking the whole side profile. If you’re nervous about doing a full fade, this lets you practice blending in a smaller area. The look stays tidy even as it grows because the main side length is consistent.
Cut the entire top and sides with guard 3, creating a uniform base. Then switch to a shorter guard and target only the temple area, starting around the corner where the temple meets the side of the head. Blend that temple area up with a transition guard so it disappears into the main side length. Tidy the neckline with a trimmer and keep the temple line smooth, not sharp.
Use your temple line as your guide — blend until you can’t see where the fade starts.
Trying to fade the entire side — it’s harder than it looks.
11. Guard 6 Buzz with Short Side Guard 4
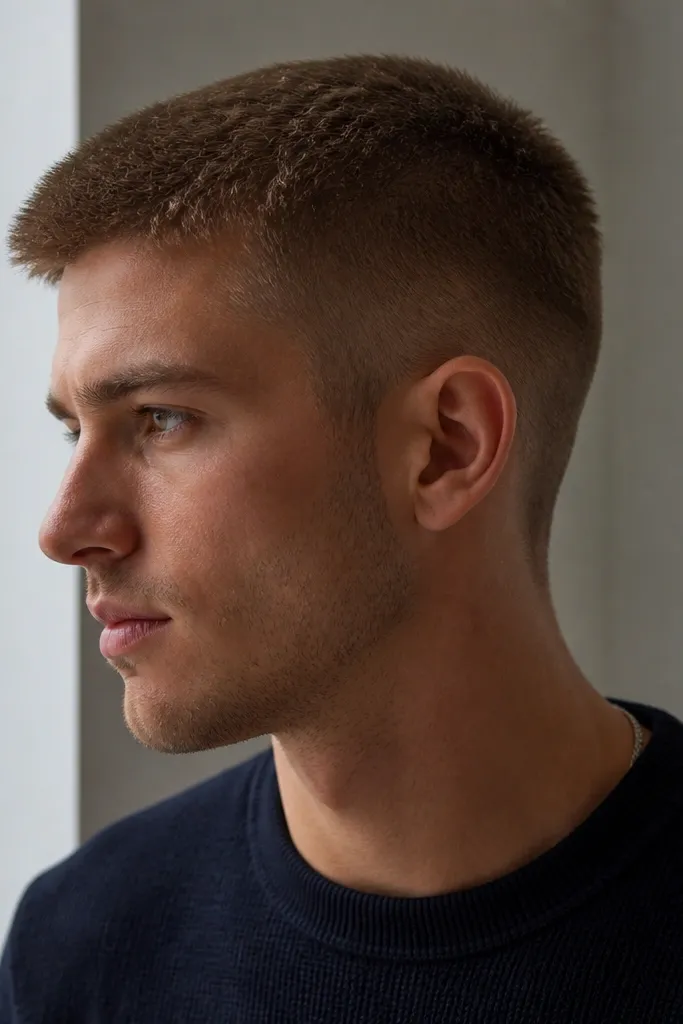
This is the beginner-friendly buzz for people who want “clean, but not too short.” Guard 6 on top gives you a softer silhouette and makes your hair look fuller. Keeping the sides at guard 4 creates a noticeable but not extreme contrast. It flatters people with a bit of scalp sensitivity because you’re not going skin-close. For older teens and adults who want to look sharp for work, it’s a safe choice. It’s also easier to maintain because it grows out without getting awkward.
Start by cutting the top with guard 6 using steady passes from front to back. Then cut the sides at guard 4, keeping the same length down to the lower side. Blend the transition with guard 5 in the middle band so you don’t create a step. Tidy the hairline with a trimmer and brush through to remove loose hairs before styling.
Try thisIf your hair grows fast, trim every 10-12 days instead of waiting for 3-4 weeks.
12. Two-Tone Buzz Using Guard 3 and Guard 1.0 Step Fade
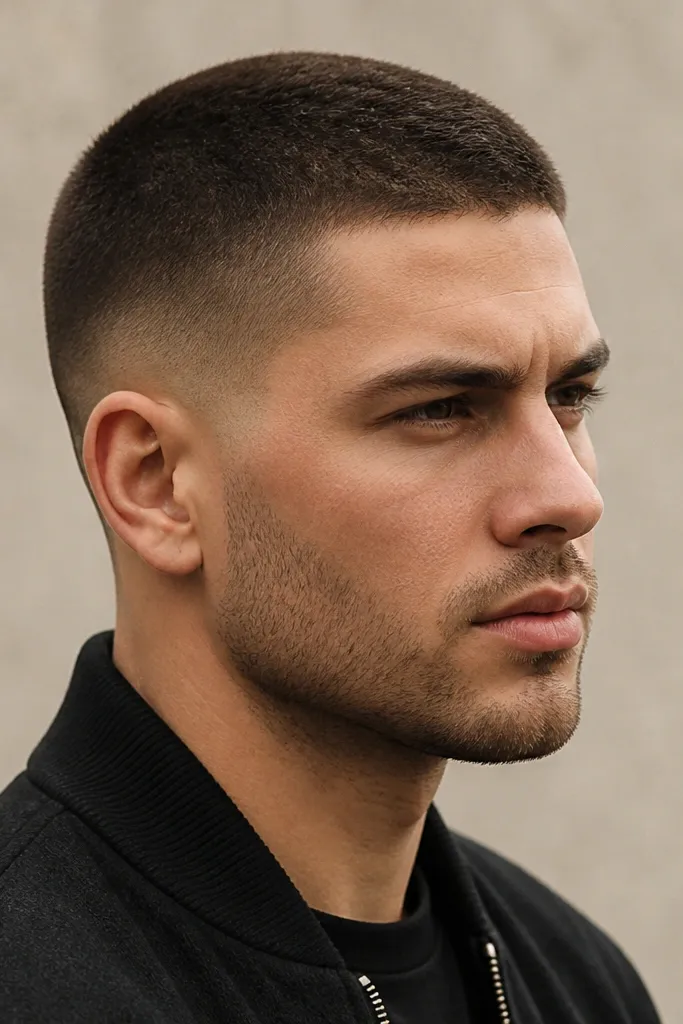
This one is for people who like contrast but still want it to look clean. The top is guard 3, sides are guard 1, and you blend just enough to avoid a harsh stripe. It’s beginner-friendly because you’re only blending one main step, not multiple tiny steps. If you have thick hair, the contrast reads crisp and the top stays textured. This also flatters square jawlines because it adds a clean cap shape without adding volume at the sides.
Cut the top with guard 3 and keep it even. Decide on your transition height — around the top of the ear — and cut the sides down to guard 1. Then blend the step area with guard 2 using light pressure, focusing only on the band where the lengths meet. Check in daylight from the front and side, then tidy edges and neckline with a trimmer.
Try thisUse a comb to drag hair down — if you see a line, blend it for two more passes only.
Watch outOver-blending until the sides match the top — you lose the contrast that makes it look intentional.
13. Buzz Cut with Slightly Higher Top (Guard 4 on Top, Guard 2 on Sides)
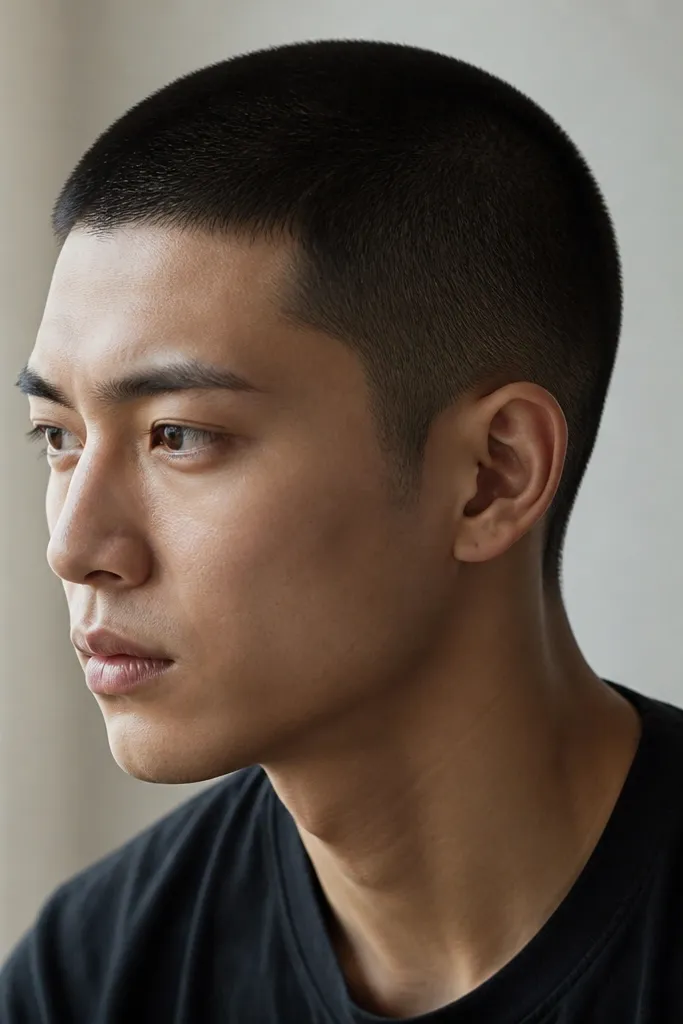
A slightly higher top makes a buzz look styled even with zero product. Use guard 4 on top, but keep the sides at guard 2 so the dome shape shows. This works great for people who want to minimize how flat the crown looks. If you have a round face, the extra height in the center helps it look a bit more oval. It also hides mild scalp unevenness because the top length is consistent and not skin-tight.
Cut the top with guard 4, but keep your passes slightly more vertical at the crown so it forms a subtle dome. Then cut the sides with guard 2, starting the taper just above the ear. Blend the transition with guard 3 for a short band, using light strokes that don’t leave tracks. Finish by trimming the neckline and cleaning around the ears with a detail trimmer.
Try thisPress the hair gently with your palms right after cutting to see the dome line clearly.
Watch outCutting the top too low — you end up with a flat, boxy head shape.
14. Buzz Cut with Soft Scalp Fade (No Skin Shave)
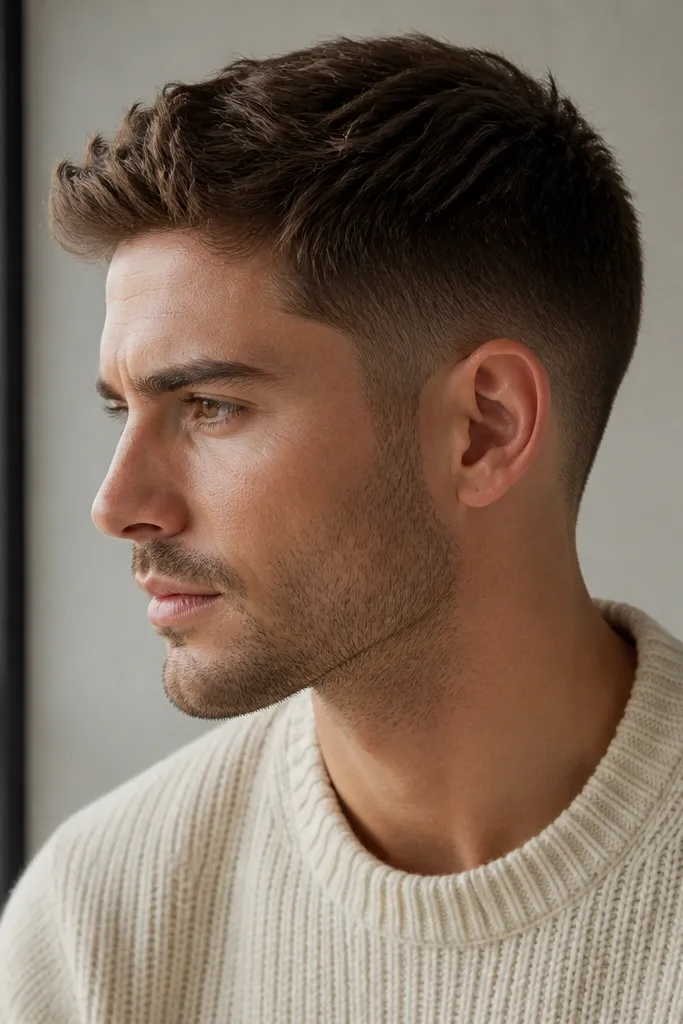
If you don’t love the look of fully shaved skin, this fade gives you the same crispness without the scalp shine. The sides go down to guard 0.5 or 0.75, but you keep the top at guard 3. It’s beginner-friendly because you don’t have to perfectly shave to skin — you just need smooth blending into a very short length. It looks good on all skin tones because it’s more about shape than contrast. It also grows out more gracefully than a skin fade.
Start with guard 3 on top, cutting even around the crown. For sides, cut down to guard 0.5 starting around mid-ear. Blend up into the transition with guard 1 and then guard 2 for the middle band. Keep your blade flat and use short strokes so you don’t create a visible gradient band. Tidy edges with a trimmer and stop before you create a harsh line at the temples.
After the cut, use a matte skin-safe moisturizer if your scalp gets dry — it keeps the fade looking even.
Trying to blend with a wet head — the fade looks different once dry.
15. Buzz Cut with Crown Swirl Direction Cut
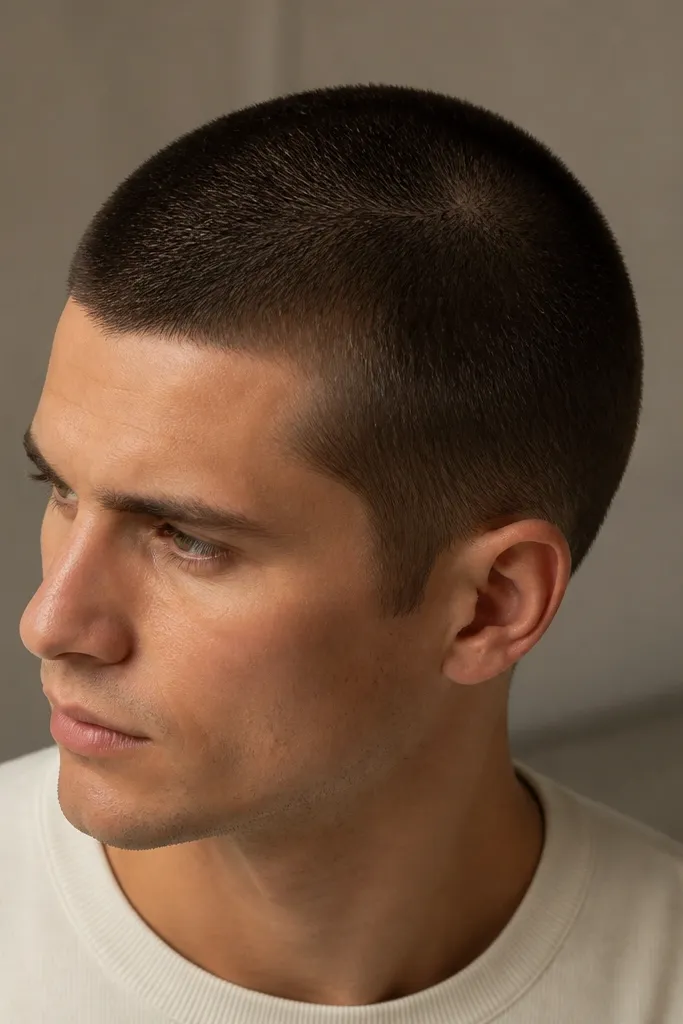
This is the buzz cut that fixes the “cowlick ruins it” problem. You keep the overall length short, but you cut the crown in the direction it naturally grows. That makes the swirl look intentional instead of messy. It’s a great fit for beginner friendly buzz cuts because the crown is where mistakes show most. If your hair has a clear swirl, this style makes it look like you planned it. For anyone with textured hair, you’ll get a clean, natural pattern.
Use guard 3 on top, but at the crown, watch the hair direction and cut with the grain so it lays down. If your swirl rotates clockwise, cut that area in the clockwise direction so the hair stacks neatly. Keep the sides at guard 1.5 and blend with guard 2 in the transition band. Tidy the edges and neckline, then run your fingers over the crown to confirm the swirl sits flat.
Try thisTake a minute to locate your swirl before you start cutting — you’ll save yourself from redoing the crown.
16. Buzz Cut with Razor-Soft Neckline
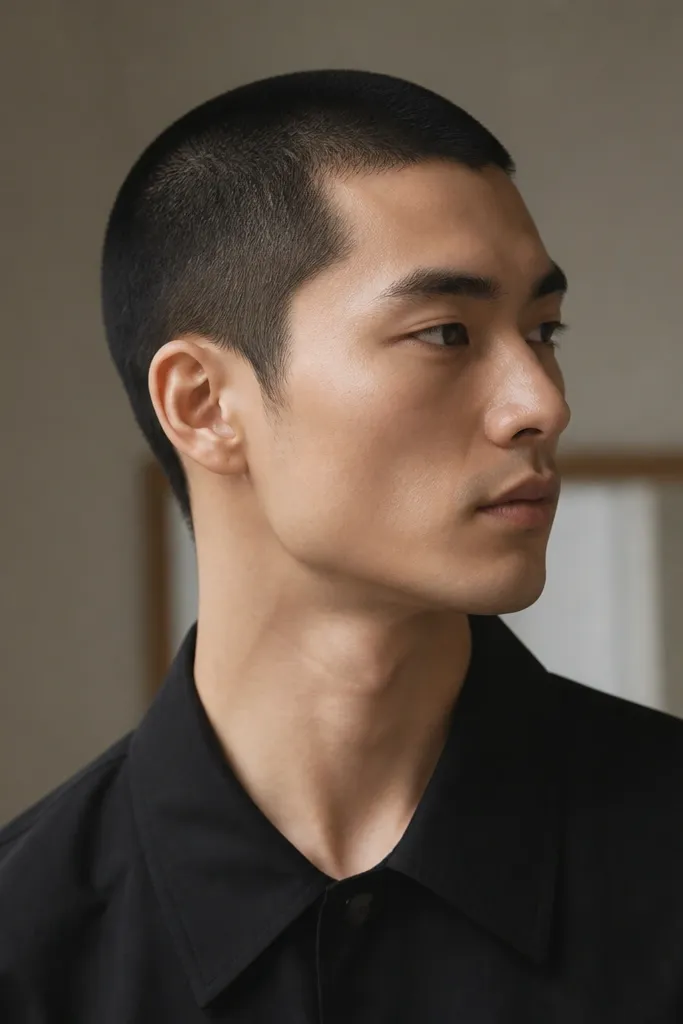
A sharp neckline is what makes a buzz look expensive even when the cut is simple. This version keeps the hair length short all over, then uses a softer neckline shape so it grows out without looking ragged. It’s best if your hair grows fast at the back of the neck. The silhouette looks clean for longer because you’re not relying on a complicated fade. It works across face shapes since the cut is uniform — the neckline detail is the only “style” you add.
Cut the top and sides with guard 3 for a base length. Add a mild taper around the lower sides with guard 2 so the head doesn’t look like a flat helmet. Then use a trimmer to set a natural neckline — find the crease where your head meets your neck and follow it. Finish by using a razor carefully or a very short trimmer pass to remove stubble, but keep the corners rounded. Brush off hair and check the back in bright light.
If you get bumps on your neck, skip the razor and use a fresh trimmer blade with no pressure.
Cutting too high at the neckline — it makes the back look crowded and the front look lower.
17. Buzz Cut with Side Part Line (Micro Hard Line)
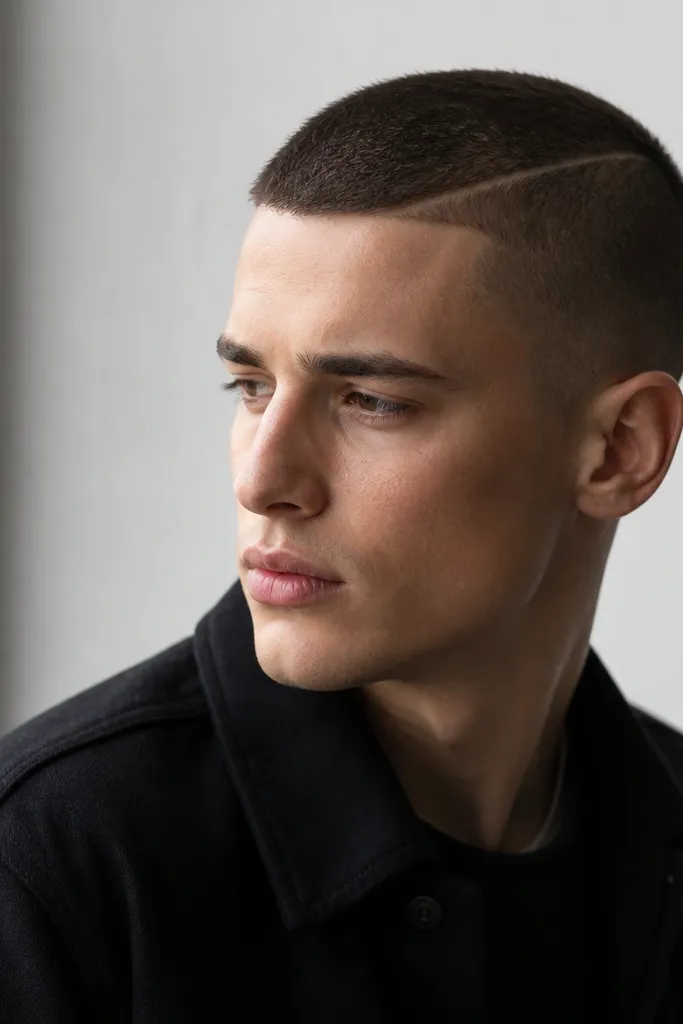
A tiny part line adds personality without needing length. Keep the top at guard 3 and sides at guard 1.5, then carve a micro hard line with a trimmer on one side. This looks best on straight hair because the line stays clean; on wavy hair it can blur, but still looks good if you keep the line narrow. It’s flattering for people who want structure and a little edge, especially with thicker hair. The key is the line width — thin, not wide.
Cut the top with guard 3, keeping it uniform. Fade the sides down to guard 1.5 with a smooth transition band using guard 2. Before you finish the edges, use a fine trimmer to carve a micro line about 1-2 millimeters wide starting near the temple and stopping above the ear. Clean around it with a soft brush so clippings don’t make the line look chunky. Apply matte paste to the top lightly so the line stays the focus.
Try thisMake the line slightly forward toward your forehead — it reads sharper in photos.
Watch outMaking the line too thick — thick lines look like you used a marker.
18. Buzz Cut with Light Taper at the Back Only
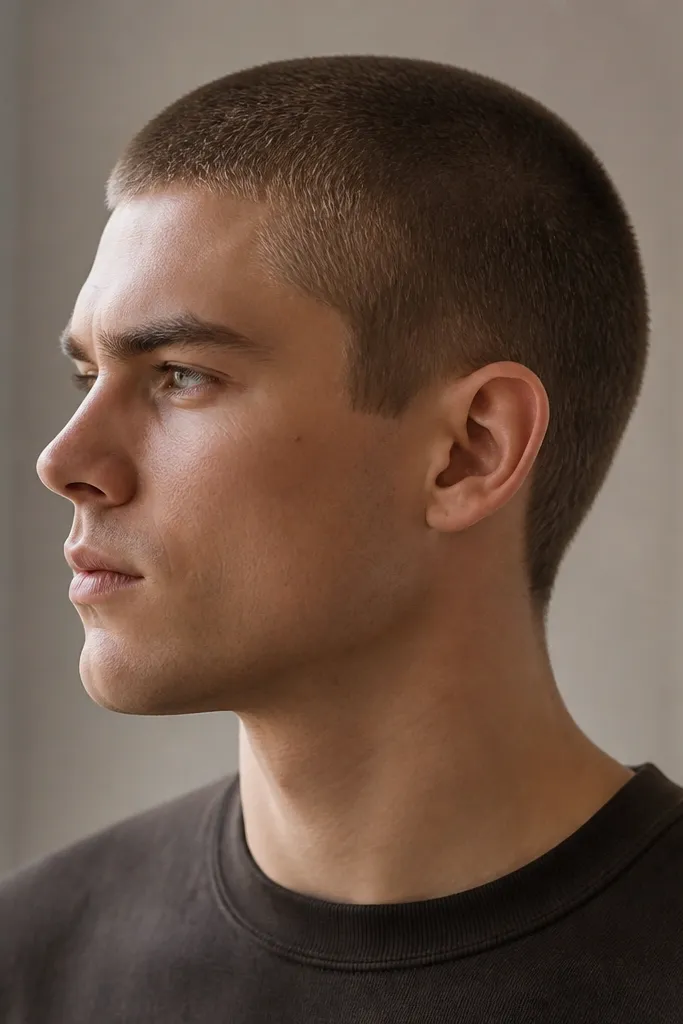
If you hate the look of fades creeping up, try a back-only taper. It keeps the front and sides consistent, then cleans the silhouette at the back where it matters for photos and posture. This is beginner-friendly because you blend one area instead of the whole circumference. It suits people with a round or flat head shape because it adds a gentle curve without changing the face frame. It also helps if your hair grows in different directions at the back.
Cut the top and sides to guard 3. Focus on the back only: start a taper around the occipital area (mid-back of the head) and reduce to guard 1.5 as you go down toward the neckline. Use guard 2 for the transition band with short, light strokes. Keep the temples and sides at the same length so you don’t create a stripe. Tidy the neckline and check from the side and back.
Use the mirror to check the back taper while your head is facing forward — it’s easy to overdo when you look straight down.
Tapering the back too high — it can make the head look top-heavy.
19. Guard 8 Buzz with Side Fade for a Softer Look
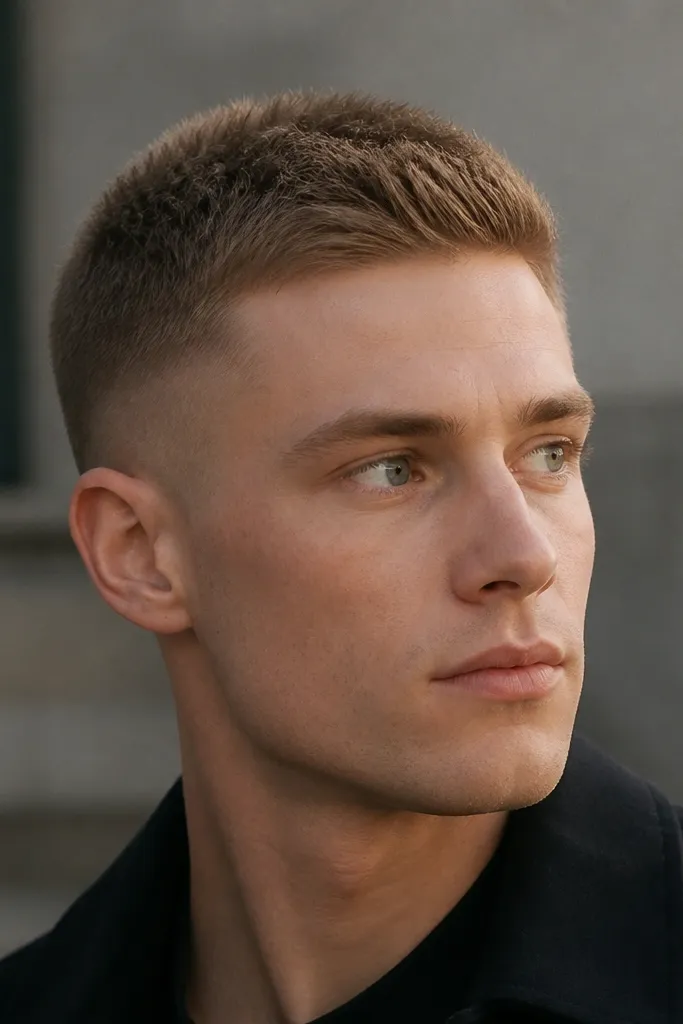
Guard 8 on top gives you a buzz that looks like short stubble hair instead of flat hair. It’s the beginner-friendly option if you’re transitioning from longer hair and you don’t want an immediate skin-close change. A side fade drops the sides to keep the shape clean, but you’re not going extreme. This flatters people with dry or slightly frizzy hair because longer length makes it look intentional. It also looks good for daytime events since it doesn’t scream “military.”
Cut the top with guard 8, keeping it even and brushing through as you go. For the sides, start your fade around the upper ear and reduce down to guard 2.5 or 2. Then blend the transition with guard 4 or 3.5 in a mid band so it doesn’t look like a step. Finish by trimming around the ears and neckline with a trimmer, then keep product to a minimum with matte paste.
If you see fuzz, use a quick pass with a higher guard on the top instead of pushing shorter.
Using glossy pomade — longer buzz cuts show shine and highlight uneven texture.
20. Buzz Cut with Patterned Fade Using a Simple Comb Guide
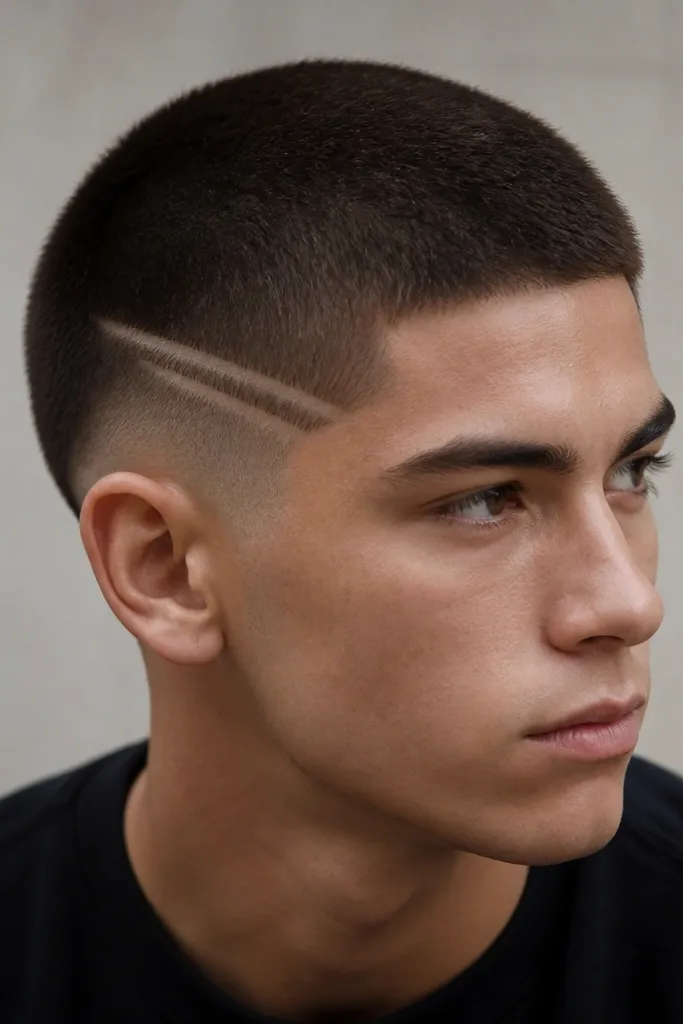
A patterned fade sounds fancy, but you can do it in a controlled way. The beginner-friendly approach is to keep the pattern small and use it as an accent near the temple, not across the whole side. With a top at guard 3 and sides at guard 1.5, you create a clean base and then carve a narrow angled pattern using a comb as your straight edge. This looks sharp on straight hair and on medium thickness hair. It’s also flattering because it draws the eye upward and adds design without adding bulk.
Cut the top at guard 3 and fade the sides down to guard 1.5, then blend with guard 2 in the transition. Decide on your pattern size — keep it to about 1 inch long near the temple. Use a fine trimmer and a comb held flat as a guide, making two angled lines and then cleaning the space between them. Brush out clippings so the lines are crisp. Finish edges with a trimmer around the pattern boundary.
Do the pattern last — you’ll see the exact angle you want once the fade is settled.
Carving the pattern before blending — you end up with messy, unclear lines.
21. Buzz Cut with Slightly Rounded Side Profile (No Sharp Corners)
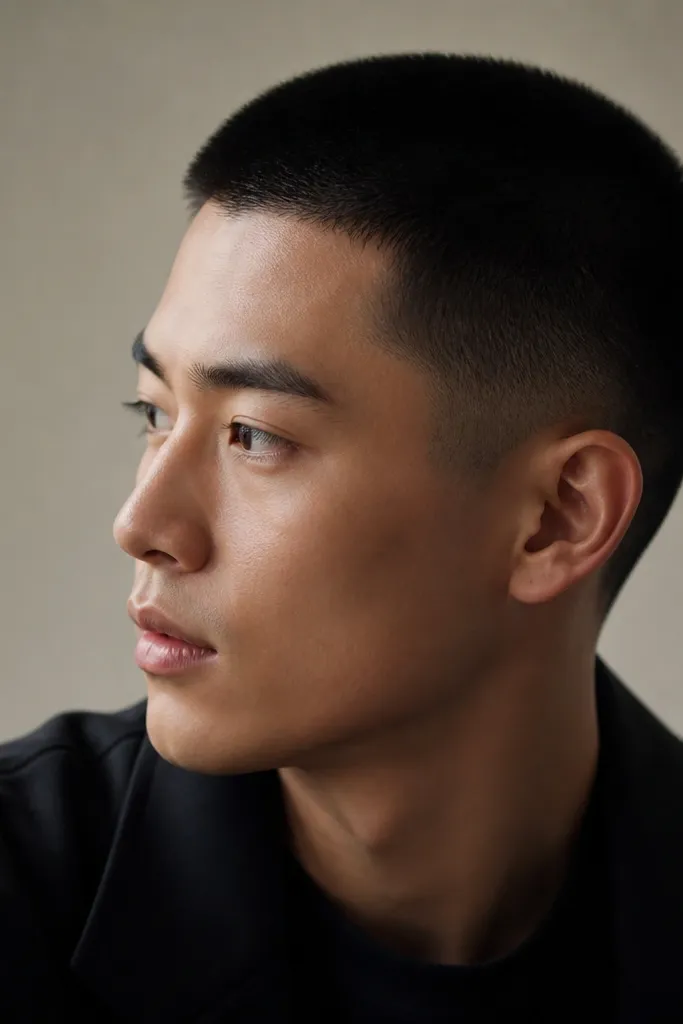
Most beginner buzz cuts look off because people create corners. This version keeps the silhouette rounded, which makes the cut look intentional even if the fade isn’t perfect. I like it for people with angular faces because it softens the look. It also helps if you have uneven ear shape or a temple that dips — rounded contours hide it. The top stays short and matte, so you get a clean “cap” effect without harsh edges.
Start with guard 3 on top for a uniform base. Cut sides to guard 2, then blend into guard 1.5 just near the lower side with light strokes. When you trim around the temple and behind the ear, aim for a gentle curve rather than a straight vertical line. Use a detail trimmer to round the neckline corners too. Brush the sides forward and back to confirm the contour stays smooth.
If your clipper leaves tracks, rotate the blade angle slightly and do one more pass — it smooths the contour without shortening too much.
Chopping the temple into a straight line — it looks amateur fast.
22. Buzz Cut with Hard Part Fade on Both Sides (Symmetry Check)
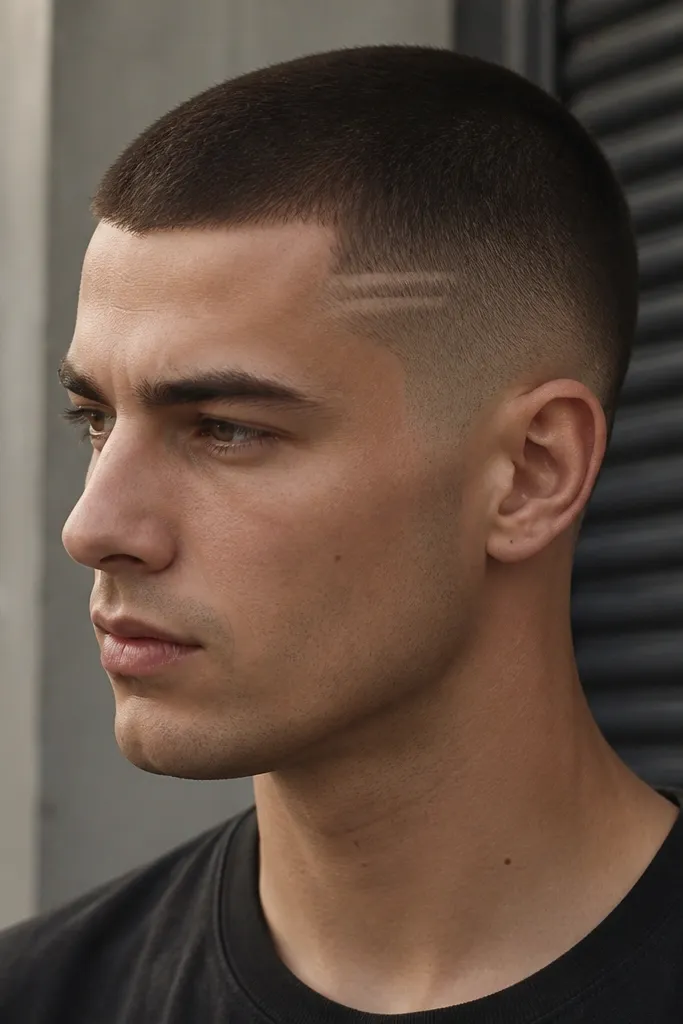
Two micro hard lines make the cut feel designed, but symmetry is the whole game. This works best if your hairline is relatively even and you can see your temple points clearly in a mirror. The top stays at guard 3 for a consistent look, and the sides fade to guard 1.5 so the lines pop without being harsh. For people who like a clean, sporty look, this is a strong option. It also helps if you wear hats because the lines stay crisp at the edges.
Cut top with guard 3 and fade sides down to guard 1.5, blending with guard 2 for the transition band. Mark the temple points using a comb handle so both sides match the height. Use a fine trimmer to carve a micro hard line on each side, keeping the line width narrow and straight. Brush away clippings and check symmetry by standing directly in front of a mirror with bright overhead light. Finish the neckline with a rounded trimmer pass.
Check symmetry with your head tilted slightly up — temple lines shift when you look down.
Freehanding both lines at once — do one, then copy the height exactly on the other.
23. Buzz Cut with High-Contrast Temple Fade and Guard 3 Top
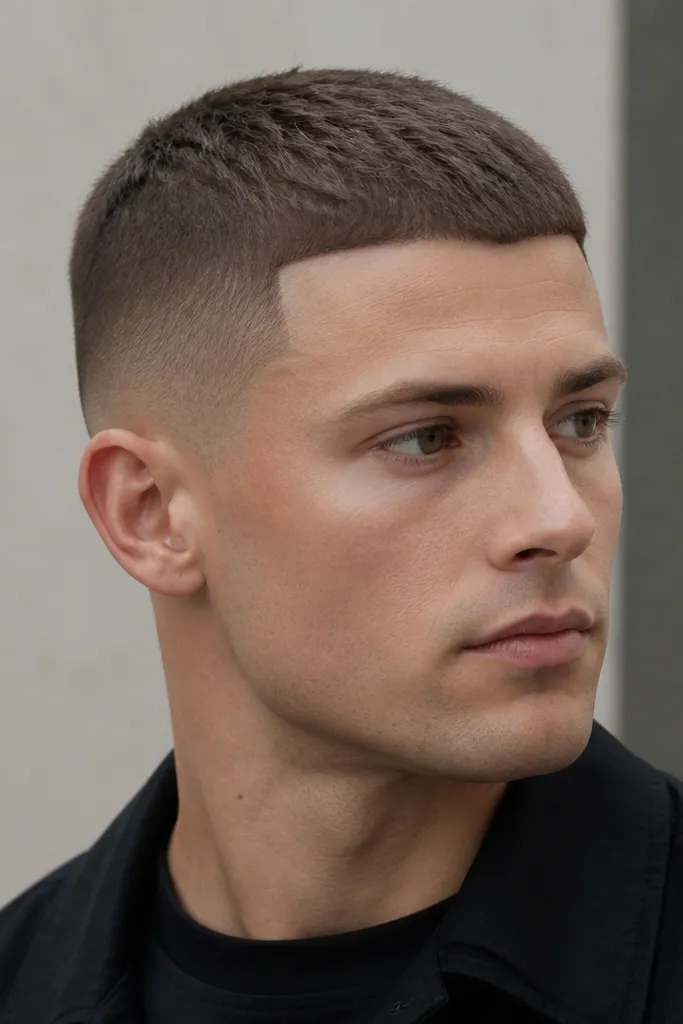
This is the more dramatic cousin of the temple fade only. It creates a quick drop at the temple so the face looks more defined. Keep the top at guard 3 so it doesn’t look too flat, and fade the temple area down to guard 0.5 to 1.0 for contrast. It’s flattering if you have a wider forehead or a face that looks round — the temple contrast narrows the visual width. For beginners, the key is keeping the fade zone limited to the temple so you don’t have to blend the entire side.
Cut the top with guard 3 evenly. Keep the sides at guard 2 for now, then switch to a very short guard for the temple zone only, starting around the temple corner and tapering down toward the upper ear. Blend the temple zone back into the side length with guard 1.5 and then guard 2 so the transition disappears. Clean around ears and neckline with a detail trimmer, then use matte paste on top to keep it looking textured.
Try thisUse a side-by-side mirror view — if both temples don’t look the same height, fix it before you move on.
Watch outLetting the short temple fade creep into the middle side — that’s where it gets messy.
24. Buzz Cut with Guard 1.5 Sides and Guard 3 Crown Only
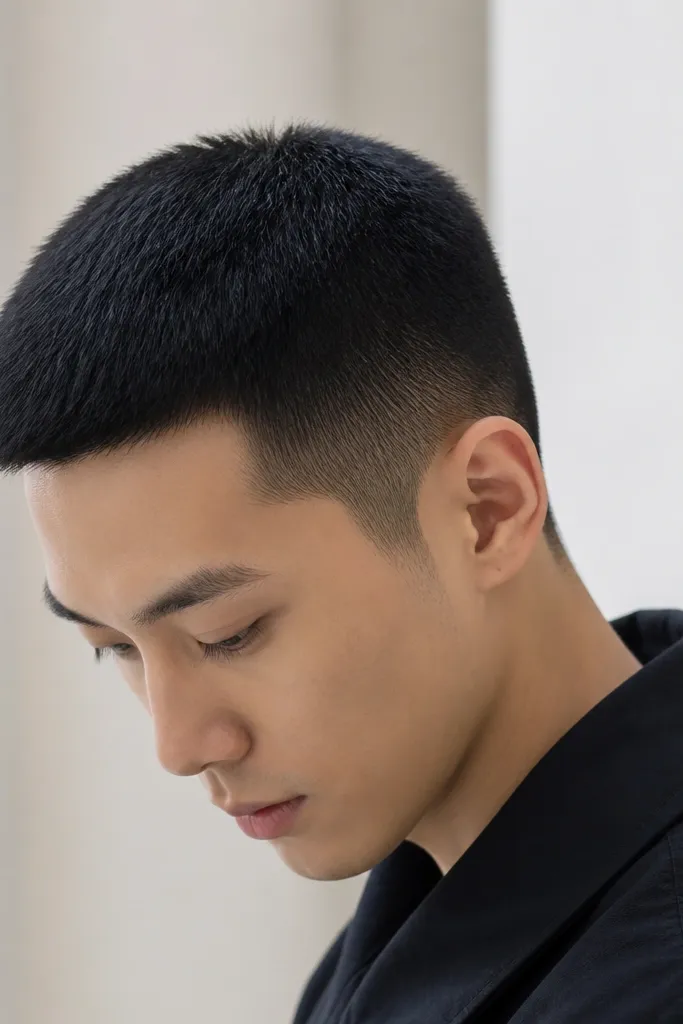
Separating the crown length is a clean way to add shape without a full fade. With guard 3 on the crown and guard 1.5 on the sides, you get a subtle dome that makes the head look more structured. This is beginner-friendly because the blend boundary is mostly around the crown, not all the way around the head. It flatters people who have a flat crown or who want a bit of height without styling. Works especially well with thicker hair because the crown length holds texture.
Start by cutting the sides with guard 1.5 from the lower sides up to where you want the crown to begin. Then cut the crown with guard 3 using slow passes and keep the boundary around the top half of the head. Blend that boundary with guard 2 in a narrow band, using gentle, short strokes. Tidy the neckline and temples with a trimmer, keeping the crown edge smooth. Brush through to ensure no step line shows.
Try thisIf the crown boundary feels too high, lower it slightly — a mid crown boundary looks better as it grows.
Watch outCutting a straight boundary line between crown and sides — you’ll see it immediately.
25. Buzz Cut with Sideburn Fade and Clean Temple Curve
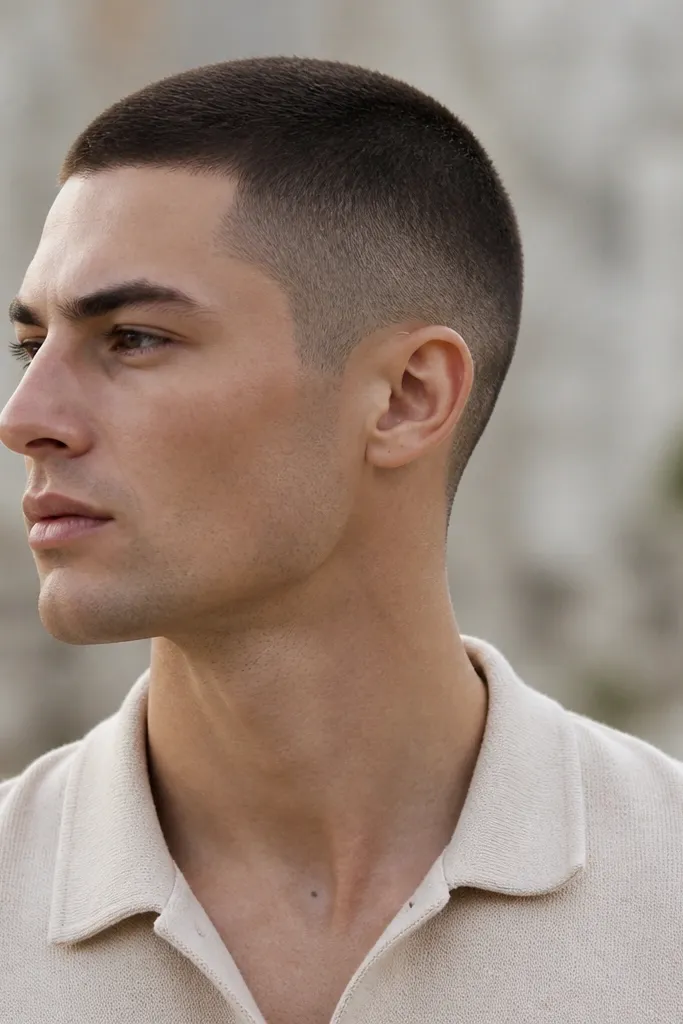
Sideburns are where a buzz cut can look sloppy if you ignore them. This style keeps sideburns connected to the fade with a clean temple curve so the whole haircut reads finished. I like it for people who grow out their hair unevenly at the temples because the curve hides the awkward bits. Keep the top at guard 3 for texture and the sides at guard 1.5 with a gentle blend. It flatters most faces because it doesn’t shrink the face — it cleans the edges.
Cut top with guard 3 and keep it even across the top. Fade the sides down to guard 1.5, starting around mid-ear. Use guard 2 for the transition band, focusing on the sideburn area. Then use a trimmer to define the temple curve: it should sweep slightly upward toward the hairline, not straight down. Finish by cleaning the neckline and checking both sideburns in the mirror.
Trim sideburns in small passes — one extra pass can erase the shape.