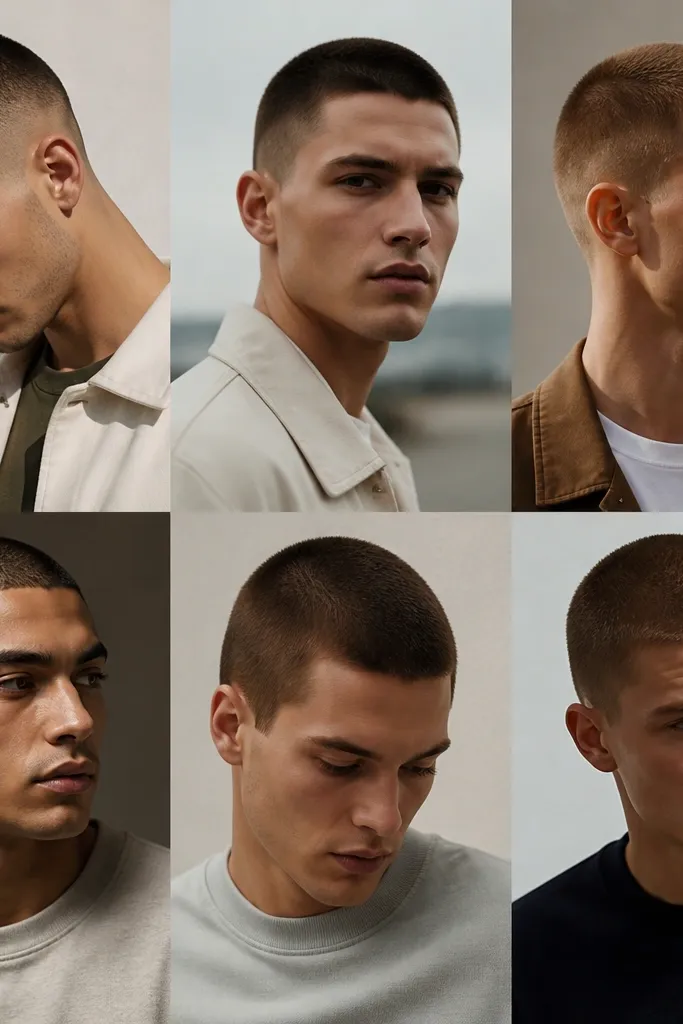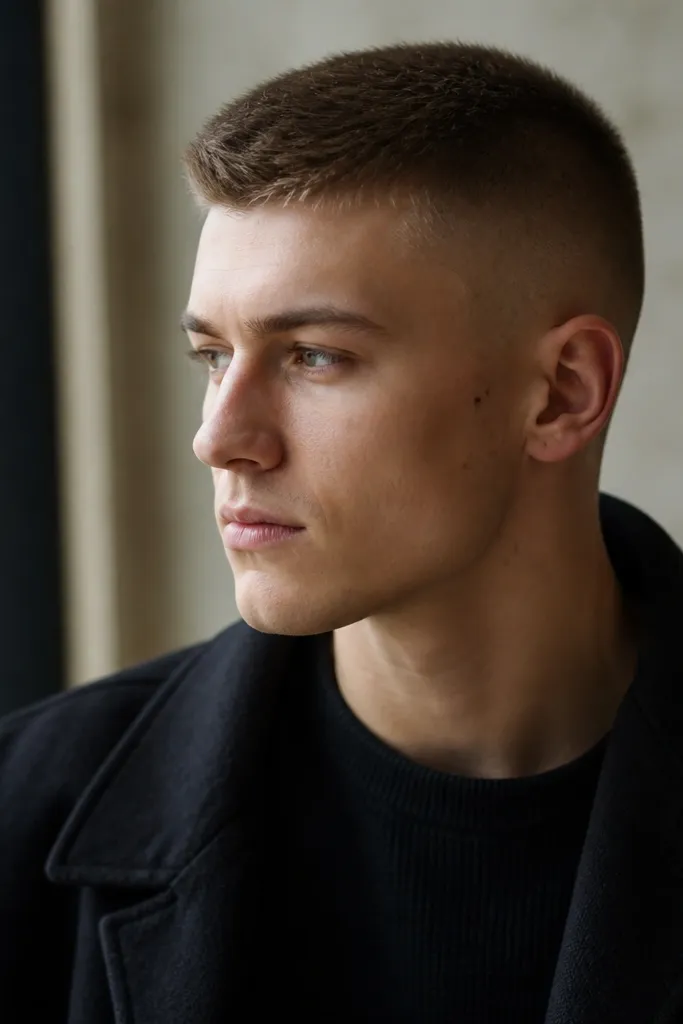
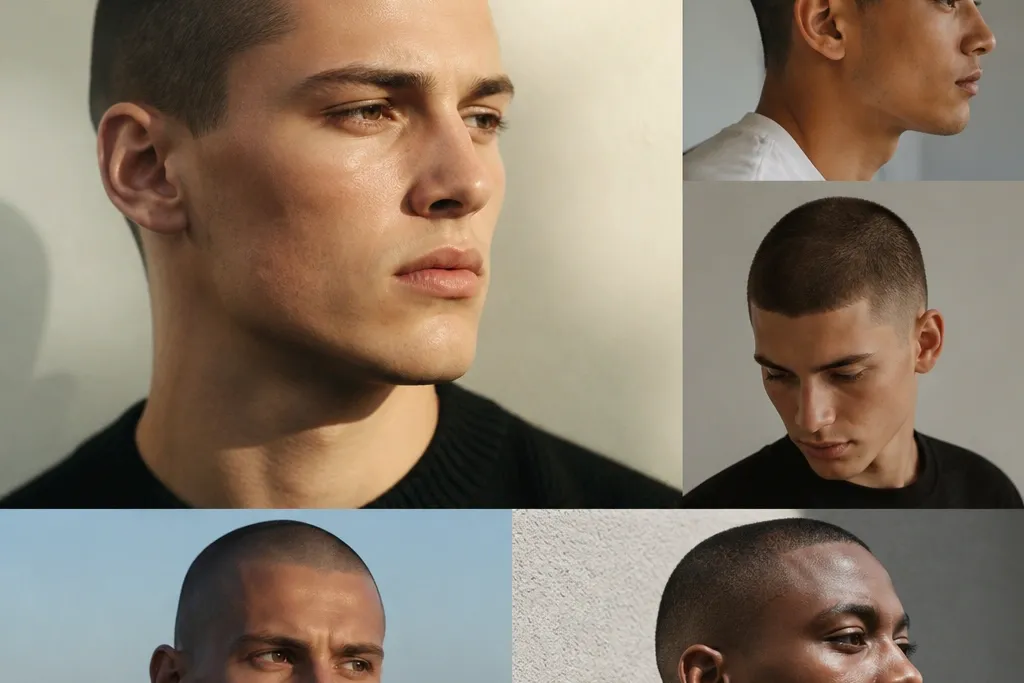
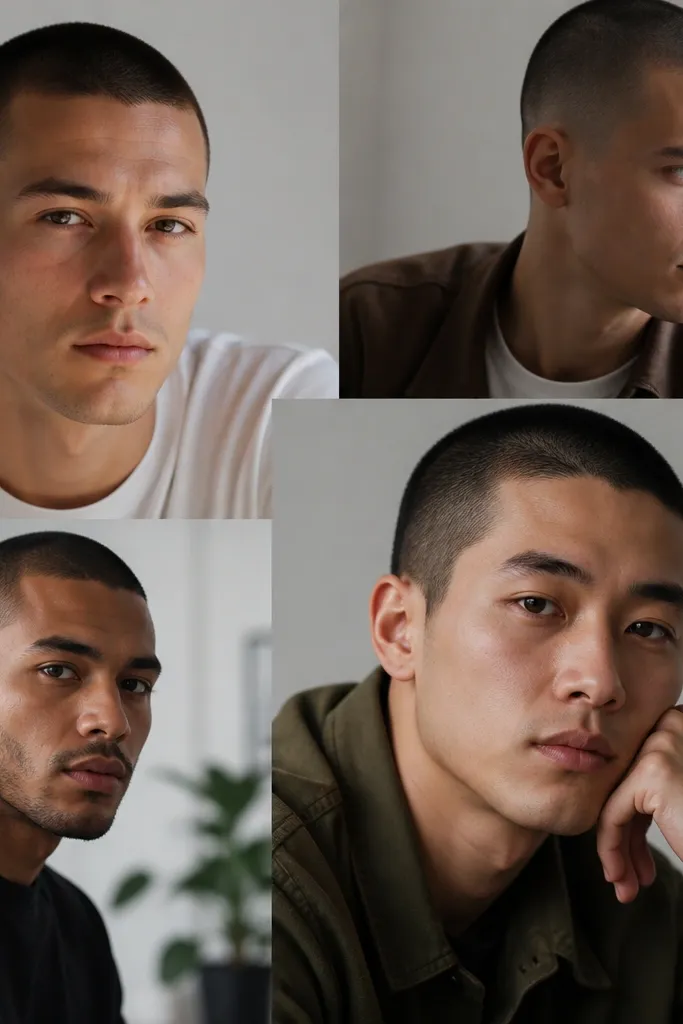
1. 1.5 Guard All Over With a Low Temple Line
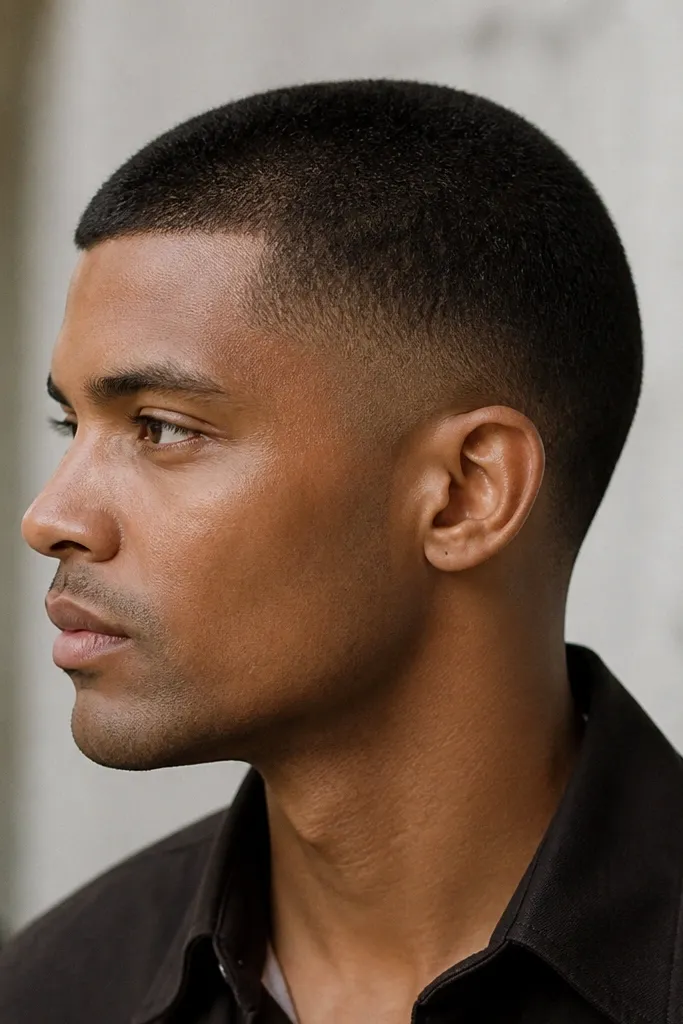
I like the 1.5 guard all over when you want a buzz cut mens look that looks tidy even if your bathroom mirror is small. The 1.5 length hides patchiness better than a 0.5, so it reads even on most scalps. It also keeps your head from looking too "helmet" shaped, especially if your face runs round or soft. The low temple line adds a little structure without creating harsh contrast that can make hairline unevenness obvious.
Start by combing hair down and clipping the top at a 1.5 guard, going in small sections from front to back. Then do the sides at the same 1.5 guard, keeping your passes flat against the head. For the low temple line, switch to a 0.5 guard for the first 1 to 1.5 inches above the ear, then blend upward with light pressure and a half-guard step if your trimmer allows it. Finish with a trimmer close guard for the neckline only, using a straight line across and then shaving the center slightly higher if your neck crease dips.
Try thisAfter you're done, run a damp microfiber cloth over the hair. It shows you missed spots instantly because the scalp flashes where the guard didn't pass.
Watch outDon't shave the neckline too high - it makes a small-space buzz cut look like a barber emergency.
2. 0.5 Top With a 0.25 Neck Clean (Soft and Subtle)
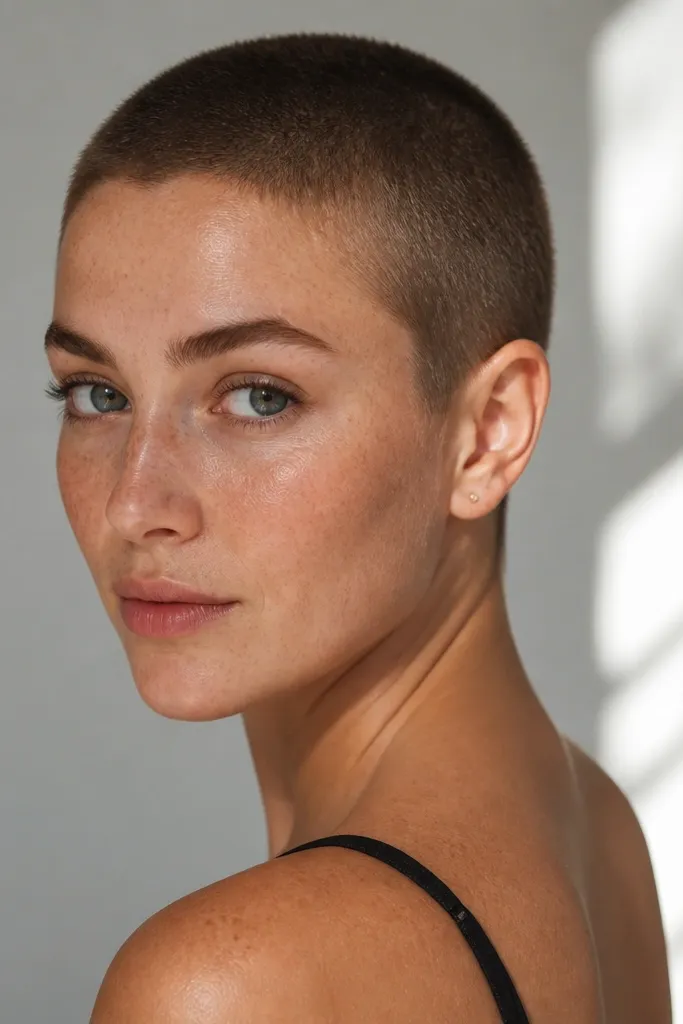
This is the "I want it short but I still want it to look neat" setup. A 0.5 top is crisp and shows off clean skin and cheekbones, which looks great on oval and heart-shaped faces. The 0.25 neckline clean gives you that barbershop finish without making the entire head look shaved. I've worn this in summer heat and it stays looking sharp because the contrast is controlled - you don't get a muddy halfway length.
Start at the top with a 0.5 guard and do straight passes from crown outward, then re-check the grain in the last pass. Next, keep the sides at 0.5 as well so the silhouette stays smooth. For the neckline, mark your neckline with a finger and a mirror: then use a 0.25 guard or close trimmer to clean only below that line. Use the same close trimmer to tidy around the ears, but don't carve the temples too far back.
Try thisUse a matte skin-friendly balm on the scalp right after cutting. A thin layer reduces the "dry scalp shine" that makes 0.5 cuts look uneven.
Watch outAvoid doing a full shave (0) if you have uneven hair density, because the scalp will show through in patches by day three.
3. Buzz Cut With a Mid Fade Using 1.0 to 0.5
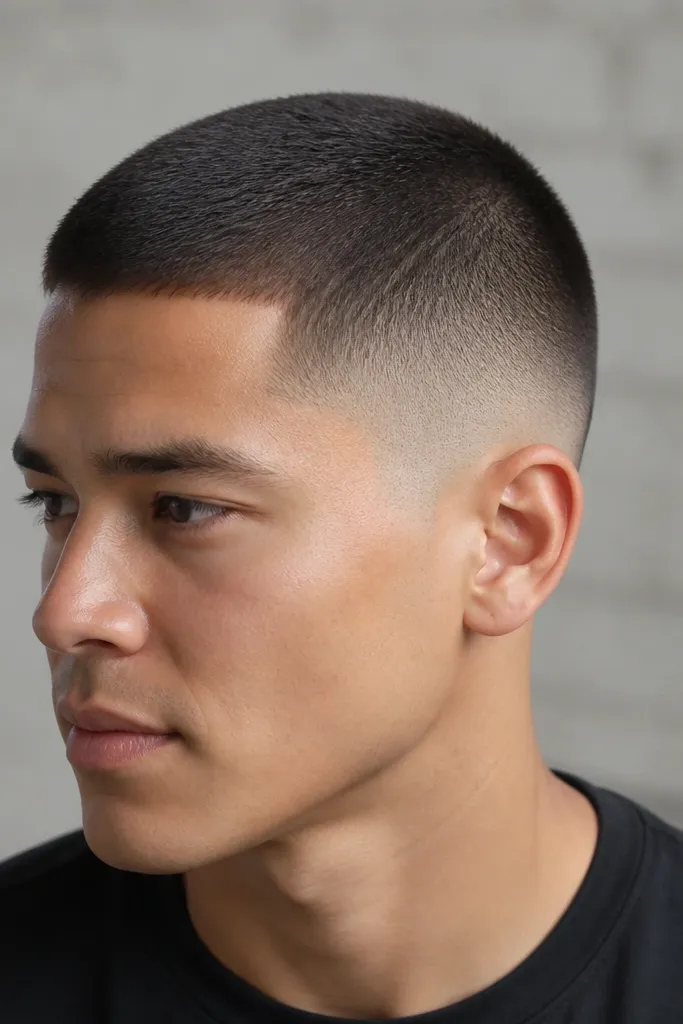
If your goal is "face looks tighter" without going full skinhead, this 1.0 to 0.5 mid fade hits the sweet spot. The mid fade adds contrast that makes the cheeks look more defined, which flatters round faces and soft jawlines. Because the top isn't too short, you still get a little texture so the haircut doesn't look flat. I like it for people who want a buzz cut mens style that photographs well in side angles.
Start by cutting the top at 1.0 guard, then keep the sides at 1.0 for the upper section. For the fade, switch to 0.5 starting about halfway down from the parietal ridge toward the ear. Blend the transition by doing short upward strokes with the trimmer between 1.0 and 0.5, so you don't leave a stripe. Finish by cleaning the edges around the temples and neckline with a close trimmer, then wipe away all loose hair with a damp cloth.
Try thisHold the clipper slightly angled upward when blending. It reduces the "step" effect that shows up in harsh bathroom lighting.
Watch outDon't set the fade too high - it can make the head look top-heavy on smaller builds.
4. High Fade Buzz With a 1.5 Top and 0.5 Sides
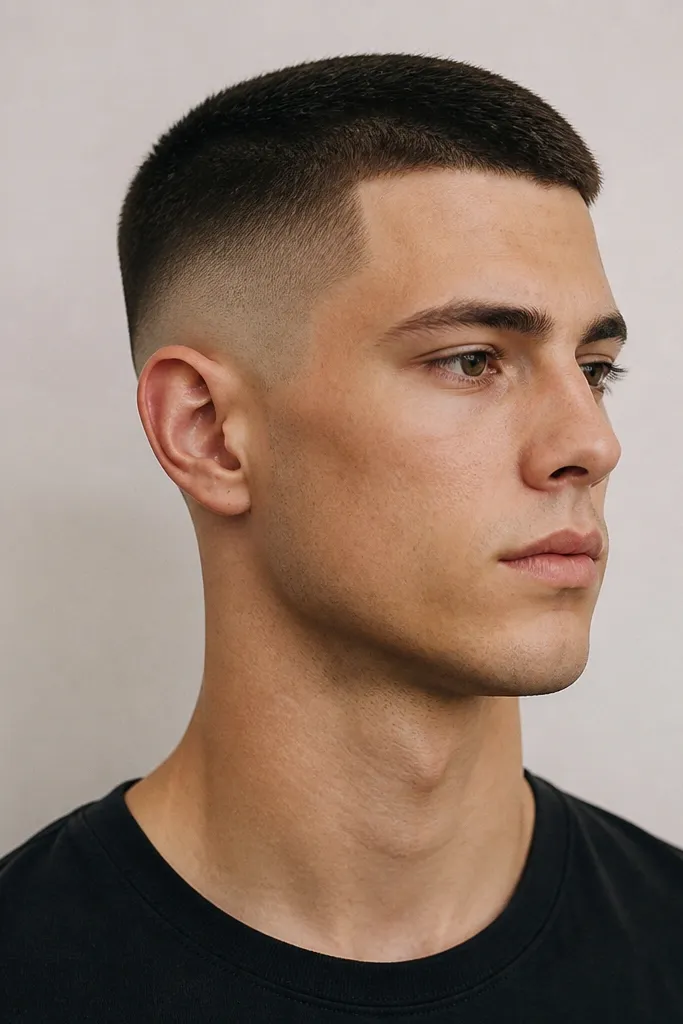
This one is for men (and women) who want the face to look longer and sharper. A 1.5 top keeps the silhouette balanced so the shorter sides don't make your head look too narrow. The high fade lifts the visual weight upward, which works well on square and longer faces when you keep the top length consistent. I've seen this look amazing on people with thicker hair because the top reads fuller and the fade looks crisp.
Cut the top at 1.5 guard first, staying level across the crown. Then do the sides at 1.5 until you reach your chosen fade start point, about 1 to 1.25 inches above the ear. Switch to 0.5 and blend upward with light passes, using shorter strokes as you approach the 1.5 area. Clean the temple corners lightly and tidy behind the ears so the line doesn't look jagged. Finish with a close trimmer on the neckline only, keeping it below the natural crease.
Try thisIf you're doing this at home, use a phone flashlight held from the side to check for uneven fade steps.
Watch outAvoid a harsh temple line that's too squared off - it looks like a sticker in close-up photos.
5. Tapered Buzz Cut With 2.0 Top and 1.0 Sides
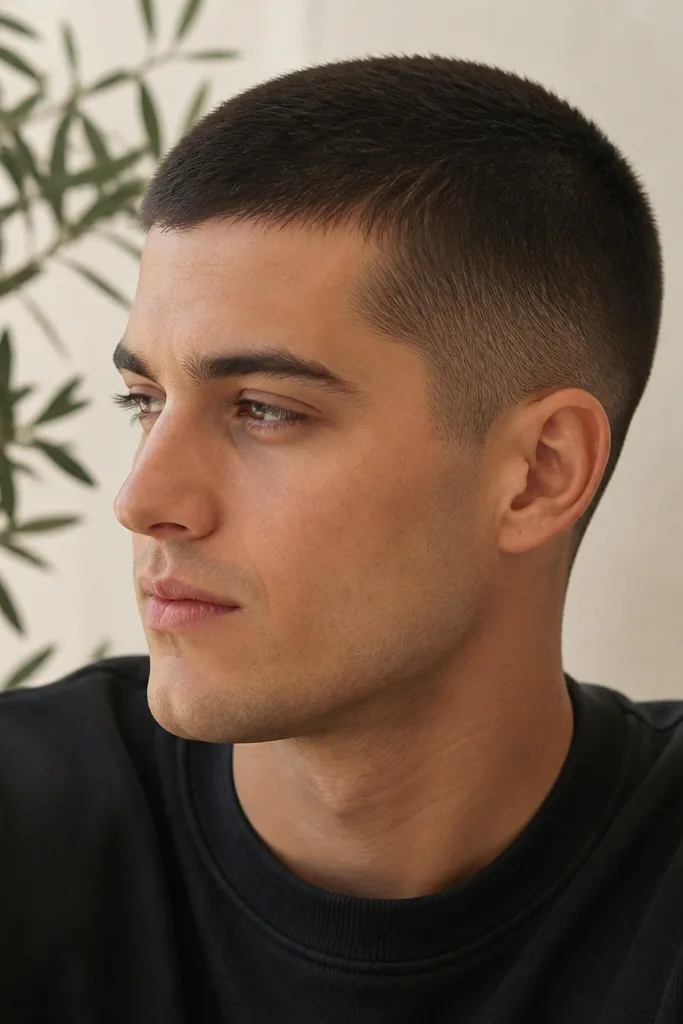
A 2.0 top with 1.0 sides is the "I want buzz cut mens style but I don't want it to feel too exposed" option. This is especially flattering for people with thinner hair around the crown because the extra length reduces scalp show-through. The taper keeps the sides from making the face feel wider, but it stays subtle enough for work settings. I like it for people with short necks because the neckline cleanup is easier to keep proportional.
Start with 2.0 guard on top and blend lightly toward the sides without dropping length yet. Then switch to 1.0 guard on the sides and work from mid-side downward to the neckline. Blend the transition with your trimmer halfway between guards if your model allows, or by using a "feather" pass with light pressure. For the neckline, use a rounded shape following your natural hair growth line, then clean the edges with a close trimmer. Brush off with a dry towel so you can see the taper line clearly.
Try thisIf your hair grows in different directions at the crown, do a second pass against the grain only on the crown - don't attack the sides.
Watch outDon't go heavy on the blend - a mushy taper looks uneven when the top is longer.
6. Buzz Cut With Sideburn Fade: 1.0 to 0.5
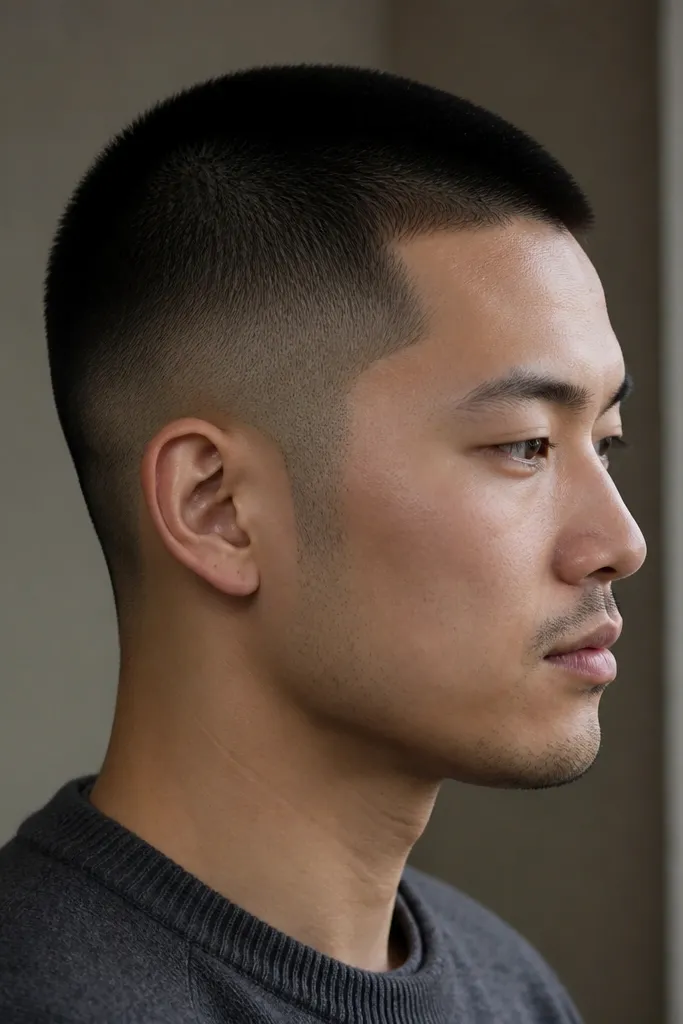
This look is all about framing. When you clean and taper the sideburn area, the whole face looks more deliberate, even with a short buzz. I recommend it for people who have uneven sideburn growth or a hairline that looks patchy at the temples. The 1.0 to 0.5 gradient keeps the contrast controlled, so it doesn't draw attention to skin texture. It also looks good on both men and women who want a buzz cut that still has "shape."
Cut the top and upper sides at 1.0 guard first, then leave the lower sides for the fade stage. Start the 0.5 guard at the bottom half of the sideburn area and blend upward with short upward strokes. Keep the sideburn line natural - don't create a curved "goatee" shape; just taper it softly into the fade. Clean around the ear edges and use a close trimmer to remove stray hair under the ear fold. Finish by checking symmetry with a mirror held low, since sideburns look different from above.
Try thisUse a comb to lift hair at the sideburn edge before blending. It prevents you from shaving the line too aggressively.
Watch outAvoid leaving a "shadow line" where the sideburn fades but the hair behind the ear doesn't - it looks patchy.
7. 0.75 Guard Buzz With a Clean Straight Neckline
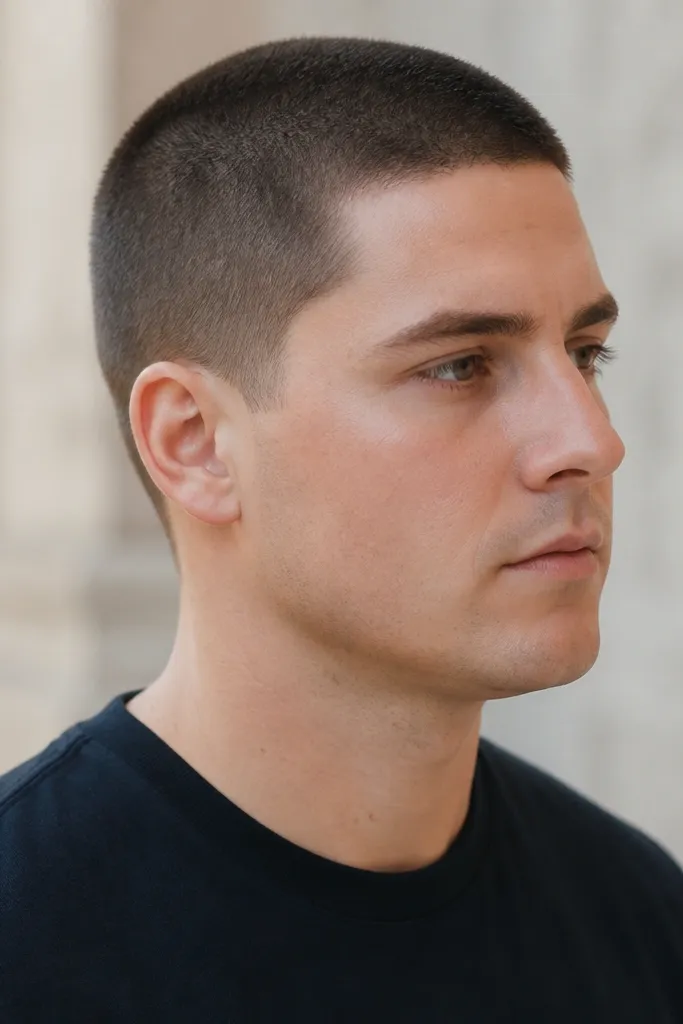
A 0.75 guard is my go-to for people who want short hair but hate how 0.5 shows scalp. It's a sweet length where the buzz looks uniform and still hides minor uneven density. The straight neckline makes the face look cleaner because it removes the messy "neck fuzz" effect. If your face is round, this works because it keeps the sides from puffing out and it gives you a clear boundary around the jaw.
Start by cutting the top and sides at 0.75 guard, using a steady rhythm: front to back on top, then back to front on the sides. For the neckline, find your natural hair growth line by looking in a mirror and lightly lifting hair with your fingers. Use a straight edge trimmer pass at that line, then refine the corners so they match both sides. If your neckline dips in the center, keep the line slightly higher in the middle and blend down with a close trimmer. Wipe and brush so you don't leave tiny hairs stuck at the edge.
Try thisAfter cutting, run a piece of tape gently along the neckline edge. It lifts fine stubble you can't see until you sweat.
Watch outDon't angle the neckline too downward - it makes the jaw look longer than it is.
8. Buzz Cut With Curved Neckline for Low Hair Density
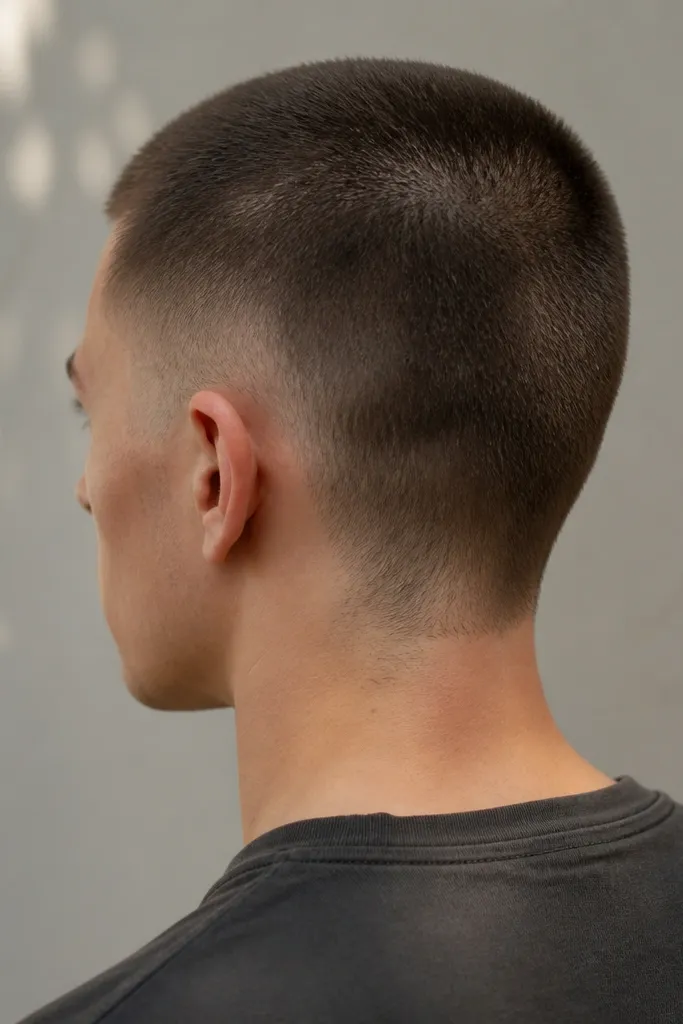
When hair density is lower at the neckline, a straight line can look too harsh. A curved neckline follows the natural pattern, so even if the hair thins, the cut still looks intentional. I've used this when someone's neck hair grows in patches and the scalp shows if you shave too high. Keep the overall length at 1.0 guard so the buzz stays even while the neckline cleanup stays subtle. This is a good option for both men and women who want short hair without the "bald spot" look.
Cut the entire head at 1.0 guard first, including the sides and top. Then, use a close trimmer only at the neckline area to shape the curve - don't go upward more than a half inch above the natural hair line. Blend the curve into the sides by using light touches around the corner points near the jaw. Clean around the ears with a close trimmer, keeping the edges soft so they don't create a hard contrast line. Finally, rinse with cool water and check in daylight for any missed patches.
Try thisShape the neckline with short strokes while looking down. It keeps the curve consistent and avoids a lopsided line.
Watch outAvoid a neckline cleanup that climbs up the sides - it makes thinning areas look worse.
9. Buzz Cut Mens With a 2.5 Top and 1.0 Drop Fade
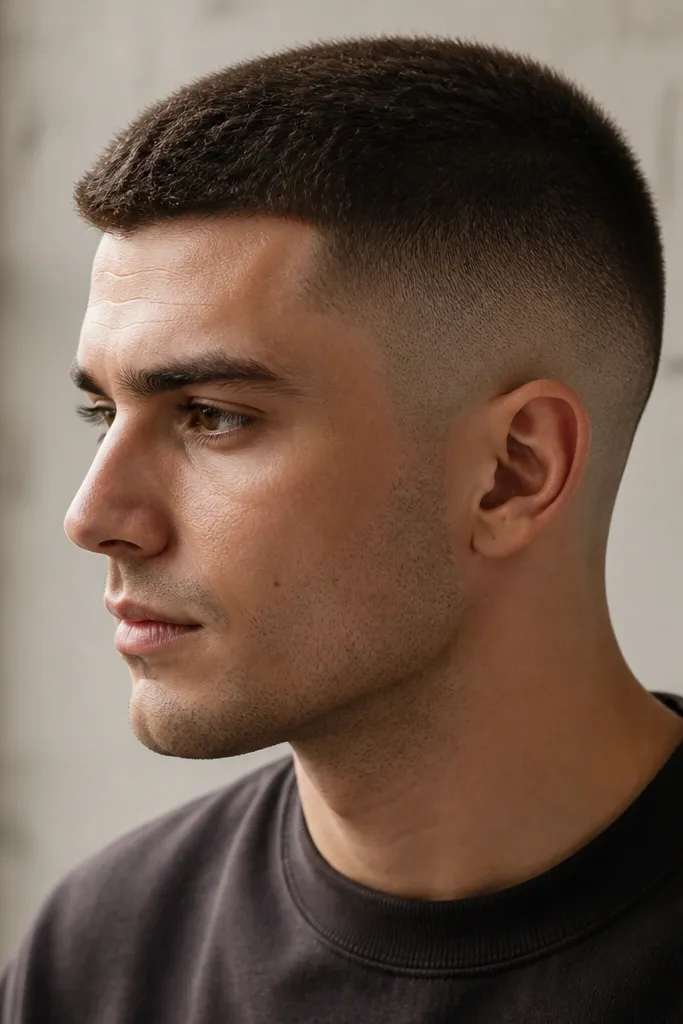
A 2.5 top gives you a little "cap" effect without turning into a flat top. This is great for people who want their face to look more balanced when their forehead is slightly larger or their jaw is narrower. The drop fade makes the sides hug the head while keeping the top thick enough to avoid scalp show-through. In tight living spaces, this style is forgiving because the longer top hides small unevenness from DIY trimming.
Start by setting the top at 2.5 guard. Cut the sides at 1.0 in the lower section first, then blend upward to meet the 2.5 area. For the drop fade, pick a line slightly behind the ear and blend upward toward that point, not straight across. Use a comb to check that the transition feels smooth at the back - that's where DIY cuts usually show. Clean the edges with a close trimmer and keep the neckline conservative so the top volume stays the focus.
Try thisAfter the cut, blow-dry the top for 20 seconds on low heat. It shows whether the top needs one extra leveling pass.
Watch outAvoid leaving the top longer on one side - it reads like a mistake immediately in side photos.
10. Skin Fade Buzz With 0.5 Top and Razor Edge Finish
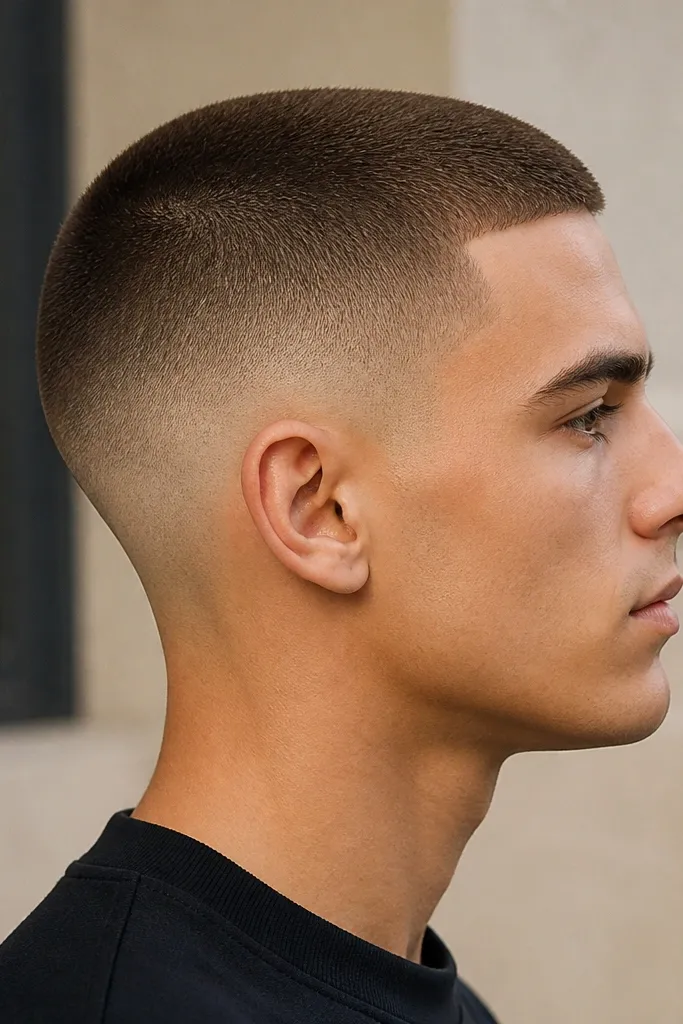
This is the sharpest look in the list, and it's worth it if you like high contrast. A 0.5 top keeps the silhouette tight, and the skin fade makes the face look more sculpted. It works best when you have decent scalp coverage and you keep your skin moisturized so the fade doesn't highlight dryness. I like it for oval faces and for people who have strong cheekbones because the fade draws attention upward.
Cut the top at 0.5 guard first, then keep the sides at 0.5 up to your fade start point. Drop down to a 0.25 or skin level near the bottom of the fade, depending on your trimmer options. Blend upward in steps, using the trimmer without pressing hard - you want a gradient, not a stripe. Use a razor or close trimmer for the final edge cleanup at the temple and neckline, but only after you've removed all hair clumps. Rinse, then apply a light moisturizer so the skin looks even.
Try thisIf your scalp gets dry fast, wait one day before using a razor on the edges. Fresh shave plus moisturizer can trap irritation for some people.
Watch outDon't skip moisturizer - skin fades show flakes and redness more than any other buzz cut.
11. Buzz Cut Mens With a 1.0 Guard and No Fade (Uniform Block)
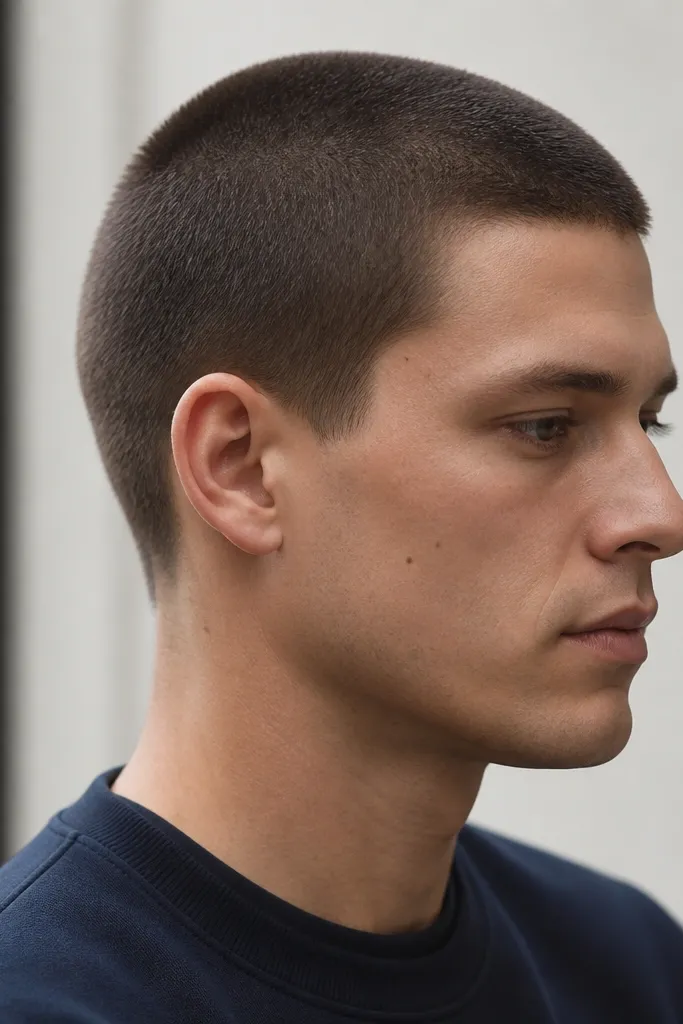
This one is the easiest in a small space and the most forgiving on uneven barber mirrors. A uniform 1.0 guard removes the need for blending, so your biggest job is just even passes. It flatters almost everyone because it creates a consistent silhouette - no harsh lines. If your face is long, this style prevents the sides from visually stretching your head. If your face is round, it avoids the "too-skinny sides" look that can happen with aggressive fades.
Start with 1.0 guard across the entire head. Use three directions: front to back on the top, then back to front on the sides, and finally a quick sweep across the crown to catch missed spots. Hold the clipper flat and keep your wrist steady so you don't carve waves. Clean the neckline with a close trimmer only if you see stray hairs above the natural line. For the ears, tidy with short strokes so the hair meets the ear edge evenly.
Try thisDo one last pass after you've wiped off hair with a damp cloth. Missed areas show up when hair isn't sticking to the scalp.
Watch outAvoid rushing the crown. That's where unevenness shows first in bright bathroom lighting.
12. Buzz Cut With 0.75 Sides and 1.25 Top for a Face-Tightening Effect
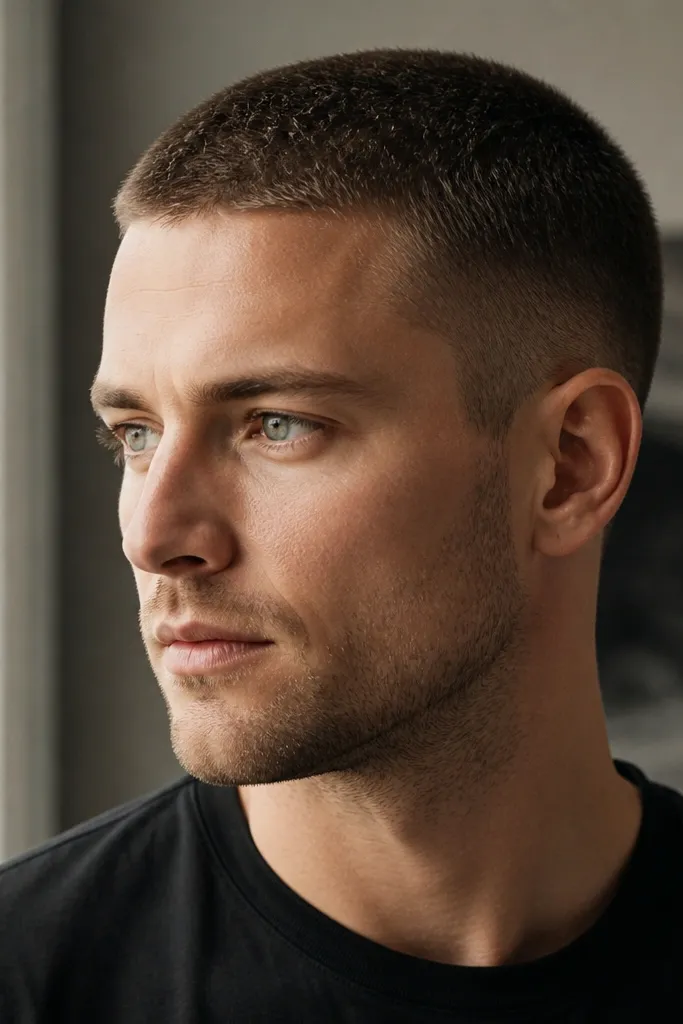
This is my favorite "small space" trick for making the face look tighter without going too short. The shorter sides (0.75) reduce side width, while the slightly longer top (1.25) gives structure so your head doesn't look flat. It works well for square faces because it softens the jawline edges, and it also helps round faces by creating a cleaner vertical shape. The blend should be subtle - the point is controlled contrast, not a dramatic stripe.
Cut the top at 1.25 guard first so you set your base length. Then switch to 0.75 guard on the sides, starting from where the head begins to curve outward toward the ear. Blend the transition using light strokes with your trimmer between lengths, aiming for a smooth gradient that disappears when you tilt your head. Clean the neckline with a close trimmer and tidy around the ears with short, careful passes. Finish by brushing in the same direction so the top looks even.
Try thisUse a mirror at eye level, not above your head. Eye-level checks catch uneven blending that overhead lighting hides.
Watch outDon't make the top too long compared to the sides. If the step is obvious, it stops reading as a buzz and starts reading as uneven stubble.
13. Buzz Cut With a Soft Low Fade and 1.5 Top for Sensitive Skin
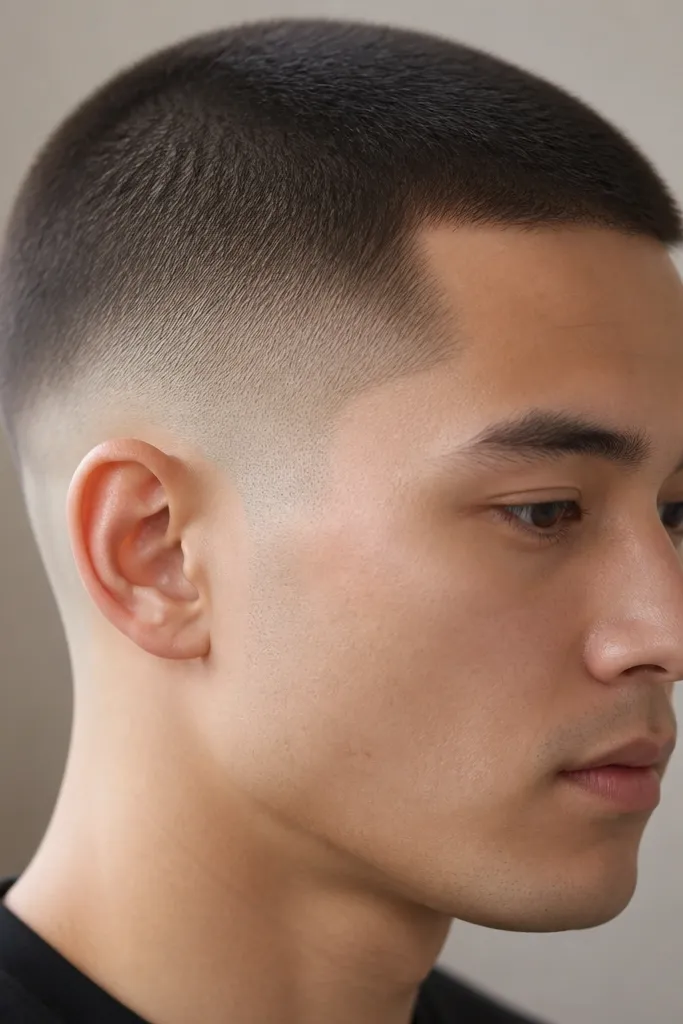
If your scalp gets irritated easily, you want fewer "skin-on-skin" moments. Keeping the top at 1.5 guard helps protect your scalp from razor burn and reduces the look of redness. The low fade is gentle, so you still get shape but you're not exposing skin at multiple levels. This style flatters people who have dry skin or who get bumps after super-short cuts. It also looks good on both men and women because it reads clean without being aggressive.
Cut the top at 1.5 guard and keep the sides at 1.5 for the upper portion. Switch to 0.75 for the lower side area only, then blend upward with light pressure so the transition stays soft. Avoid skin-level shaving anywhere - keep the lowest guard at 0.75 or 0.5 if your scalp tolerates it. Clean the neckline with a close trimmer carefully, using short strokes and stopping if you see irritation. Rinse with cool water and apply a fragrance-free moisturizer.
Try thisBefore you cut, wash your hair and dry it fully. Dry hair helps guards glide evenly and reduces tugging that causes bumps.
Watch outAvoid cutting over irritation. If you already have redness, wait a day and choose a slightly longer guard.
14. Buzz Cut With a Slightly Longer Crown (1.0 Sides, 1.5 Crown)
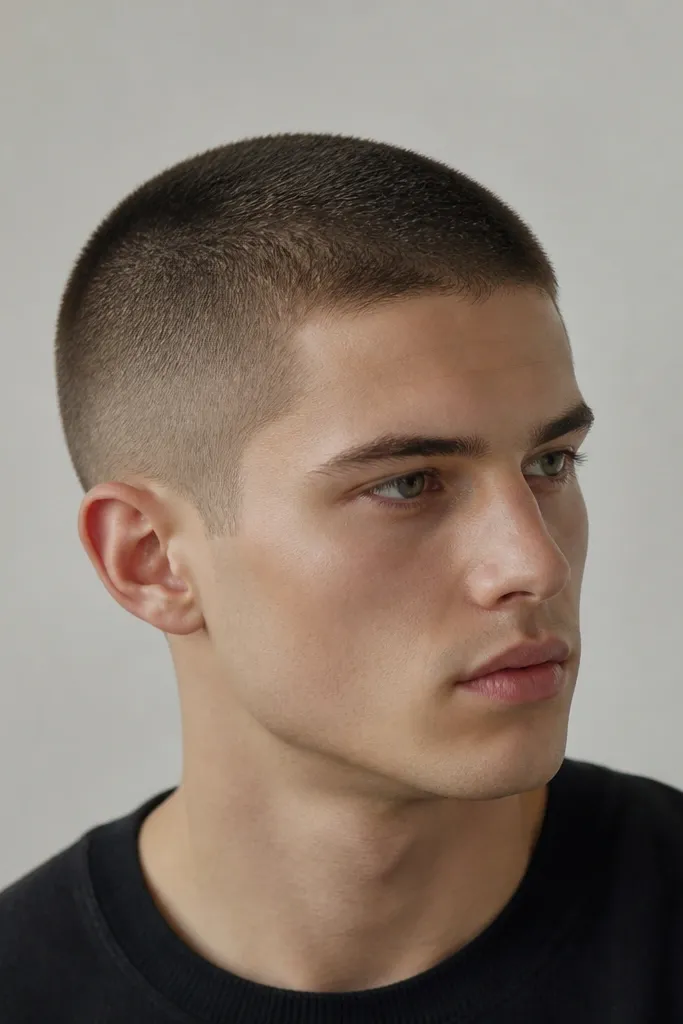
This is the "shape fix" for people who feel their head looks too flat or too round. A 1.5 crown adds a small amount of height and makes the face look more balanced. It works especially well on round faces and some oval faces because it creates a vertical line through the center. The 1.0 sides keep the width controlled, so the haircut doesn't widen your face. I like this because it still looks like a buzz cut, not a grown-out haircut.
Cut the sides at 1.0 guard first, then move to the crown and cut it at 1.5 guard. Blend the edge where the crown meets the sides using gentle half-step passes so there's no visible ring. Keep the front hairline at 1.0 or 1.25 so it doesn't look like a separate chunk. Clean the temples and neckline with a close trimmer, but keep the crown length untouched. Check the shape by looking at the head from the front and then from above - the crown should look slightly higher, not uneven.
Try thisUse your fingertips to feel for steps. If you can feel a ridge, you need one more blend pass.
Watch outAvoid making the crown longer than 1.5 if your hair grows in patchy around the top. It can highlight gaps.