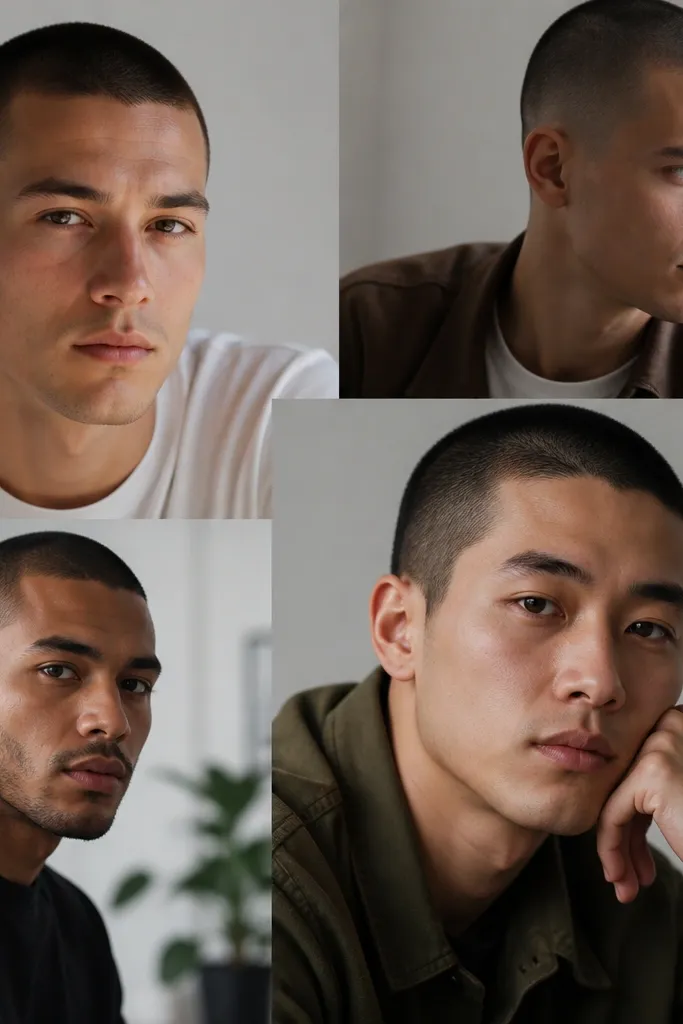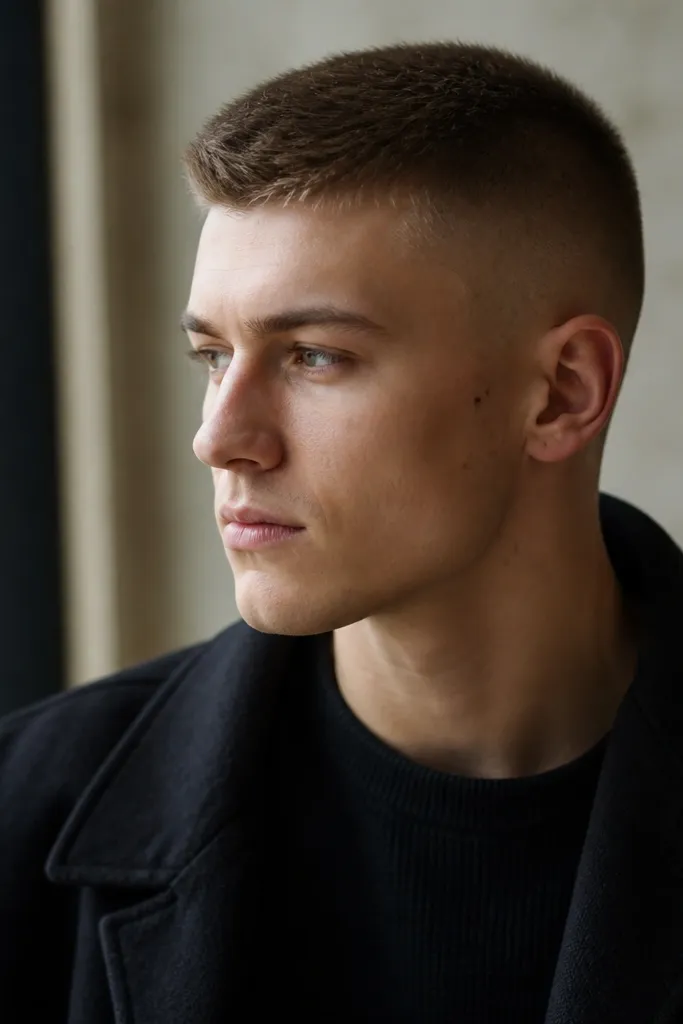
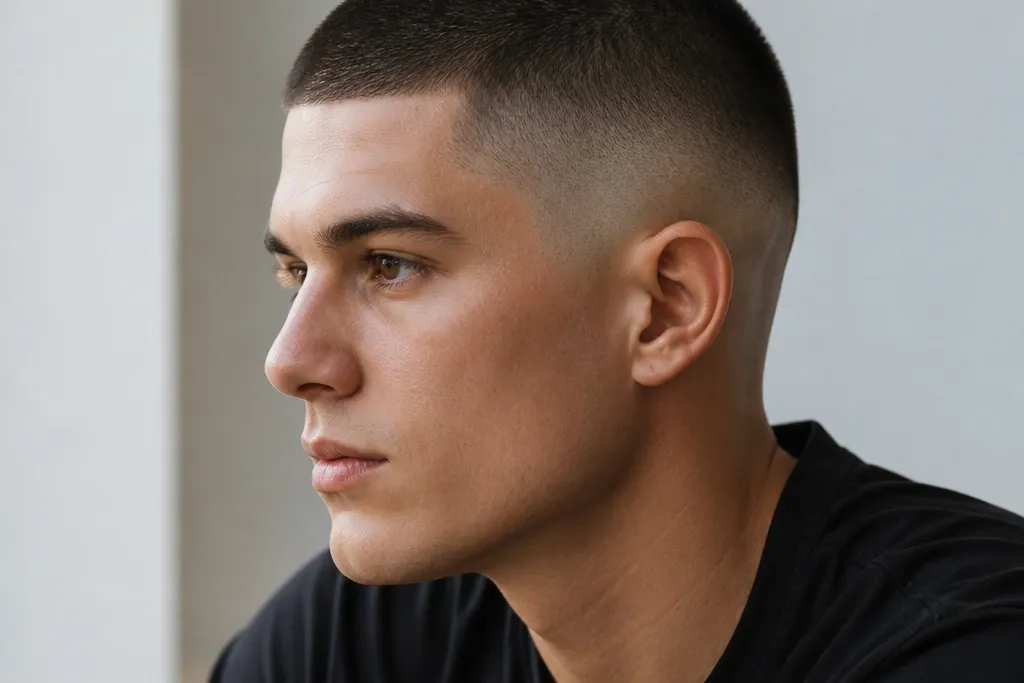
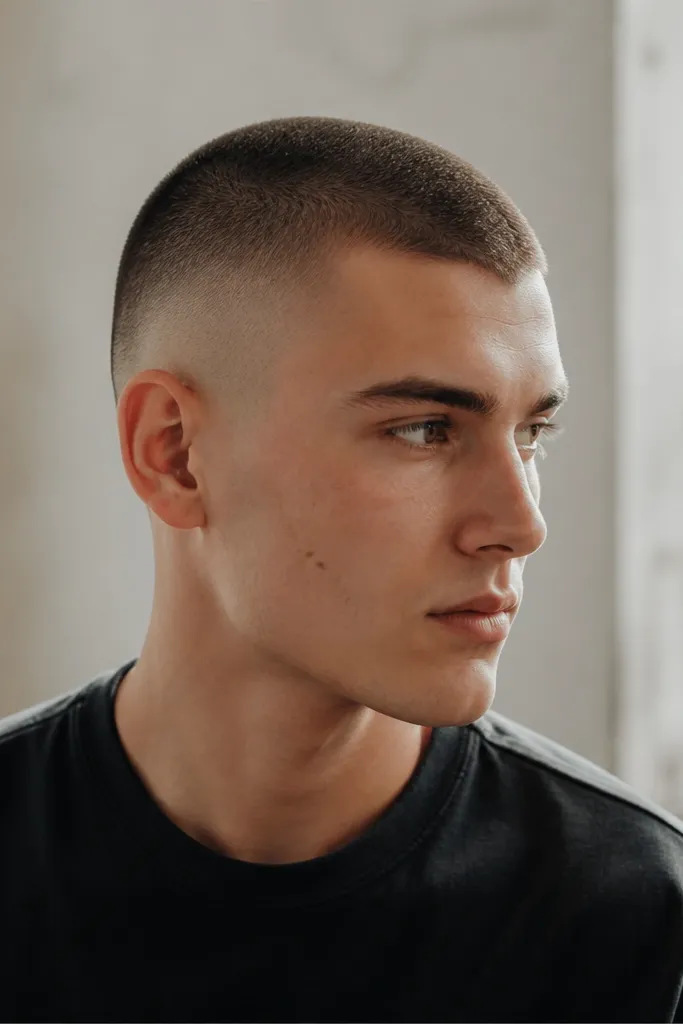
1. Mid Skin Fade with #1 Buzz Top and Ear-Flush Edges
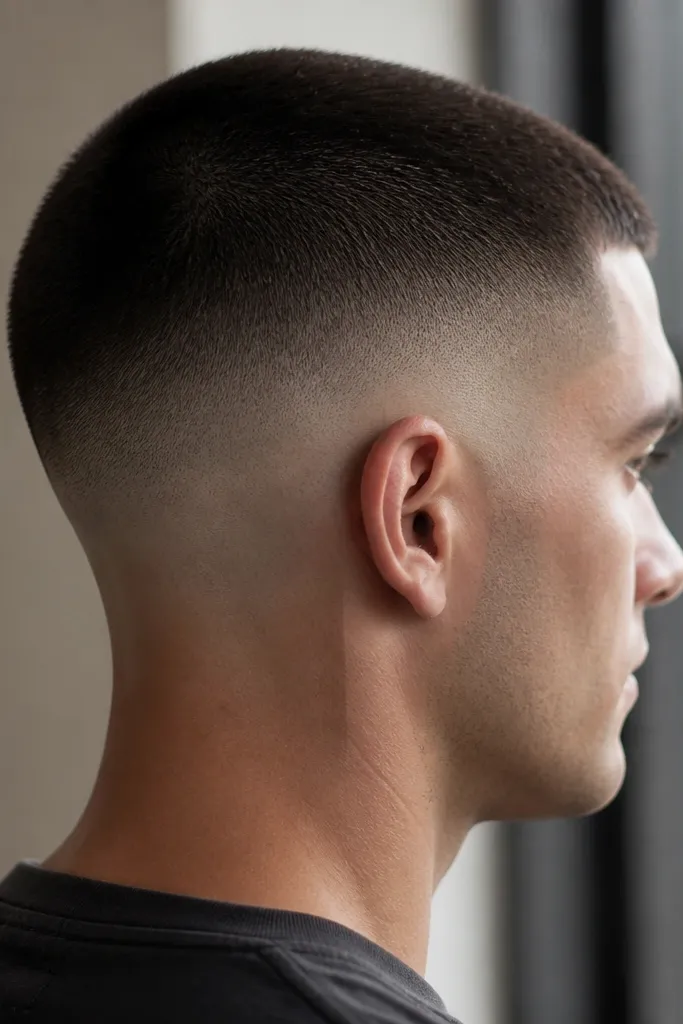
This is the “works on everyone” setup: a #1 buzz top that stays even and a mid skin fade that starts around the upper ear and reaches skin by the middle of the side. The contrast is noticeable but not extreme, so it flatters most face shapes, especially if your cheeks run a little round. On medium to deep skin tones, the skin fade reads clean and deliberate. If your hairline is straight, the squared neckline keeps it contemporary without looking harsh.
Start with the top: set your clipper to #1, comb the hair straight up, and clip parallel to your scalp to keep an even cap. Next, on the sides, use #2 at the top of the fade area and clip down to about two finger-widths above the ear. Then switch to #1 for the next band and blend it into the #2 using light upward strokes. Finally, use a trimmer to shave down to skin at the lower band and clean the edge around the ear with short, careful passes.
Try thisAfter you finish, wipe the sides with a damp cloth. It removes loose stubble so you can see if the fade has any step lines.
Watch outDon’t leave the first guard band too high — that’s what makes the fade look like separate patches.
2. Low Skin Fade with #0.5 Buzz for a Clean, Subtle Contrast
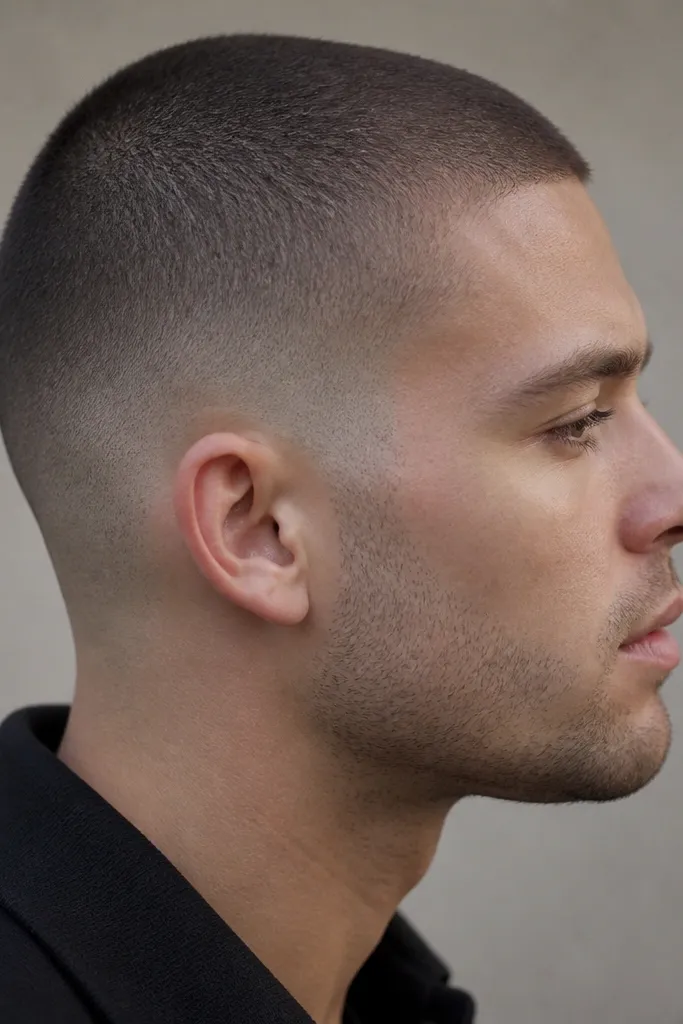
A low skin fade with a #0.5 buzz is the “fresh and simple” look. Because the top is super short, you don’t need a dramatic fade to create contrast, so it looks natural on people who don’t want their haircut to scream. I like it on heavier jawlines and slightly longer faces because the low fade keeps the proportions steady. It also looks good on lighter skin tones where high contrast can feel too stark.
Clip the top with #0.5 across the whole head in one direction, then do a second pass against the grain for an even finish. For the sides, start with #1 from the temple area down to the lower half of the head. Blend to skin by using the trimmer on the bottom band only, keeping the shaved area narrow. Finish by defining the neckline with the trimmer — follow your natural line, don’t force a straight shelf.
Use a mirror for the back. Low fades hide mistakes until you see the occipital area.
Avoid over-shaving the entire side — if the low fade turns high, it stops looking subtle.
3. High Skin Fade with #1 Buzz and a Sharp Temple Line
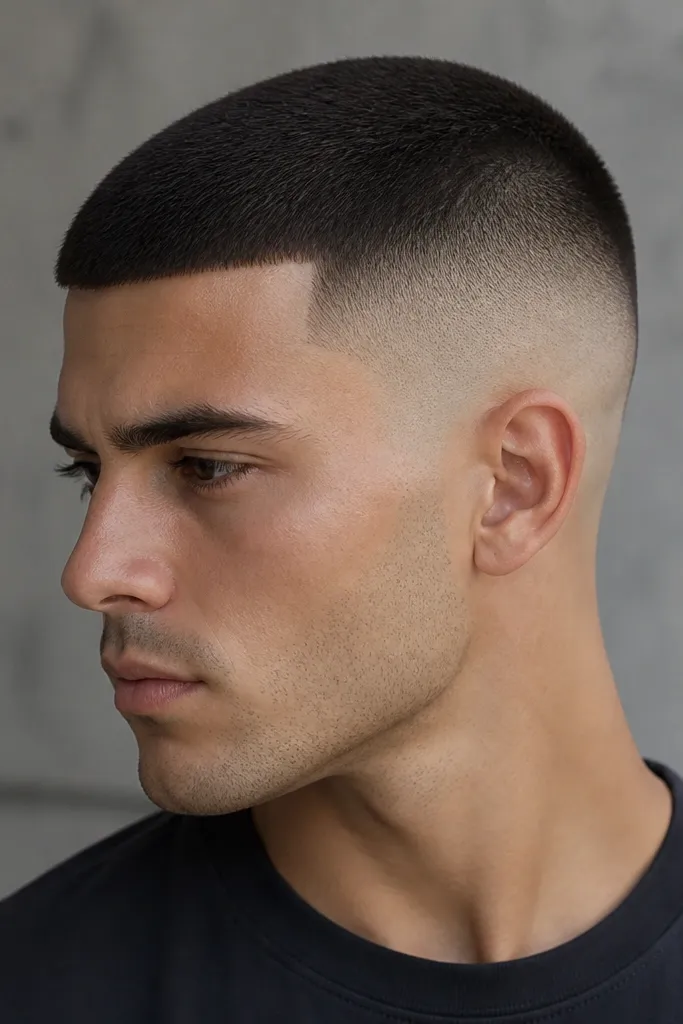
This is the “head looks smaller, sharper, cleaner” fade. The high skin fade starts higher up, so it emphasizes structure — it looks best if you have a more oval or square face and you want your eyes and cheekbones to take center stage. The crisp temple line makes it feel modern, especially with a short buzz that doesn’t add bulk. On people with thick hair, the high fade also keeps the sides from puffing out.
Start with a #1 buzz top and keep the shape flat by clipping in consistent strokes from front to back. On the sides, use #2 first at the top of the fade, stopping around the highest point of your temple. Then move to #1 for the middle band and blend lightly — don’t press hard. Shave to skin with the trimmer in the lower band and define the temple line by shaving a thin strip with the trimmer set flat to the skin.
Try thisIf your temple line grows in uneven, keep the line slightly curved instead of perfectly straight.
Watch outDon’t leave a thick “shadow” band of stubble under the skin — it makes the high fade look dirty.
4. Tapered Skin Fade Hybrid with #1.5 Buzz Top
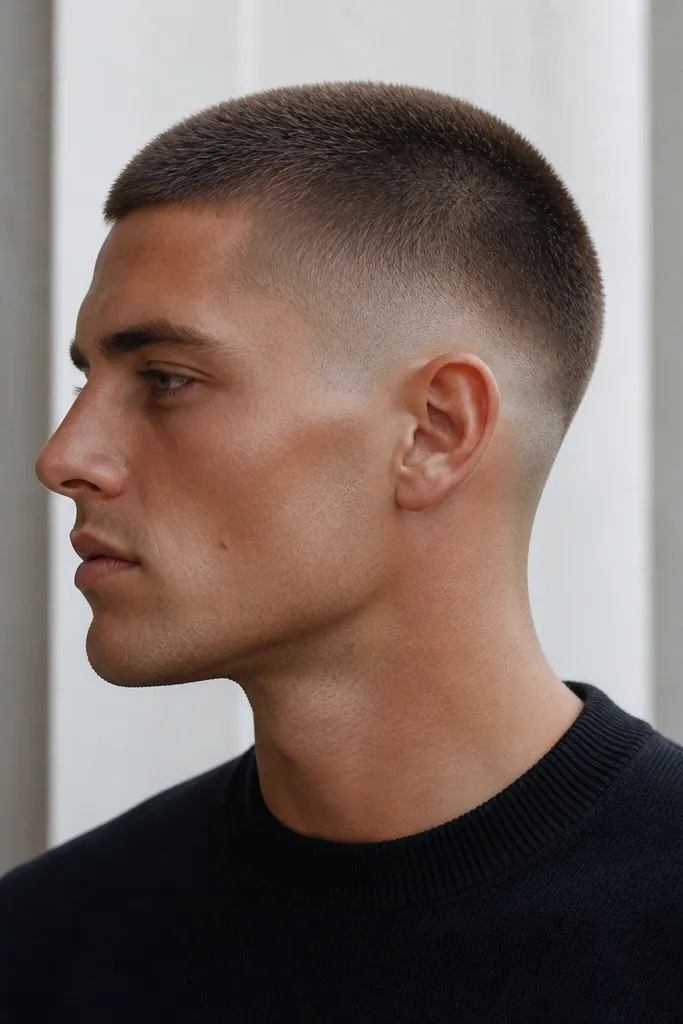
This hybrid is for people who want a little more length on top without losing the skin-fade edge. The #1.5 buzz top adds softness and flatters guys with a narrower forehead because it doesn’t create a super high contrast line. The taper-to-skin drop keeps the haircut wearable for office settings and still looks sharp at night. If your hair grows in with a slightly uneven texture, the longer buzz helps hide patchiness.
Clip the top to #1.5, then do one careful pass against the grain to even it out. For the sides, start with #2 at the top and clip down to just above the ear. Use #1 for the next band and blend into the taper area. Then switch to the trimmer and take the bottom band to skin only, leaving a small taper zone so the gradient looks intentional. Clean the neckline with the trimmer and keep it natural, not square.
Try thisUse a comb to check the sides — if the comb catches a step, re-blend that section with lighter strokes.
Watch outAvoid making the top too short when you want a softer look — #1.5 is your friend here.
5. Skin Fade Around the Ear with a Rounded Blend
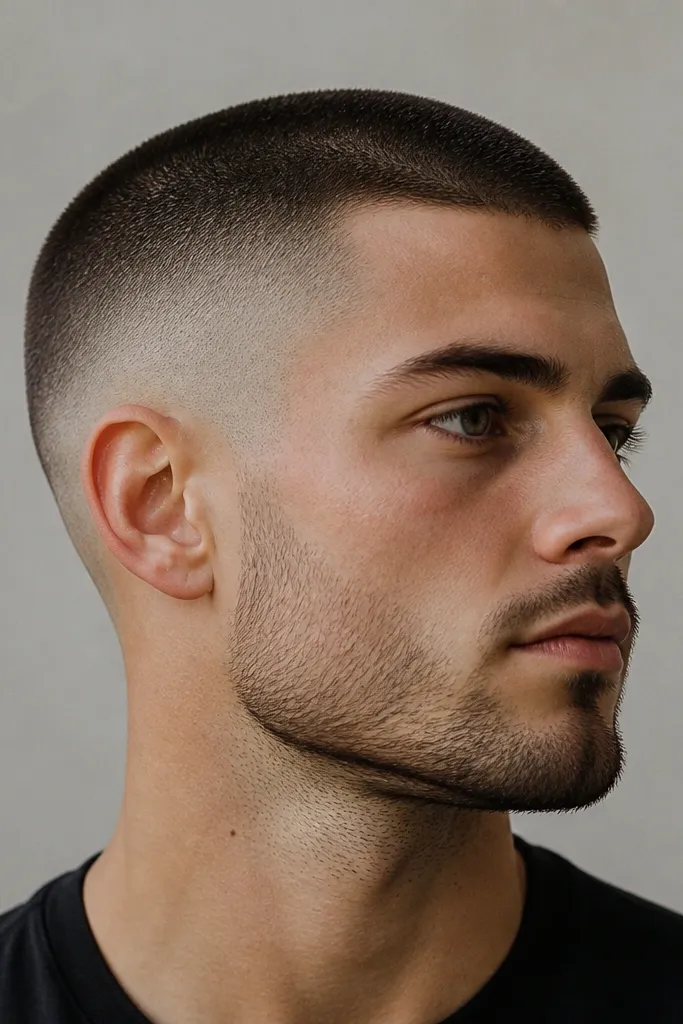
This look is all about how the fade meets the ear. A rounded blend makes the haircut look custom because it follows your anatomy instead of fighting it with straight lines. I recommend it if your ears stick out or if you’ve had fades that look lumpy behind the ear. The rounded shape also keeps the transition smooth on the back corners, where beginners usually leave a visible step. With a buzz top, this makes the whole head look more cohesive.
Start by buzzing the top to #1 and keep your clipper angle consistent so the top doesn’t get patchy. On the sides, use #2 around the upper ear area and blend down to #1 with gentle, curved motions. For the skin portion, use the trimmer and shave in a controlled arc — start at the lower back of the ear and work downward. After that, clean the area behind the ear with a smaller trimmer pass so the skin fade doesn’t look separated. Finish by checking the blend in a side mirror and touch up any flat spots.
Try thisHold your skin tight with your fingers while trimming behind the ear. It reduces bumps and uneven shaving.
Watch outDon’t blend only in front of the ear. The back ear corner is where the haircut tells on you.
6. Buzz Fade with a Slight Fringe Line (No Hair Styling Needed)
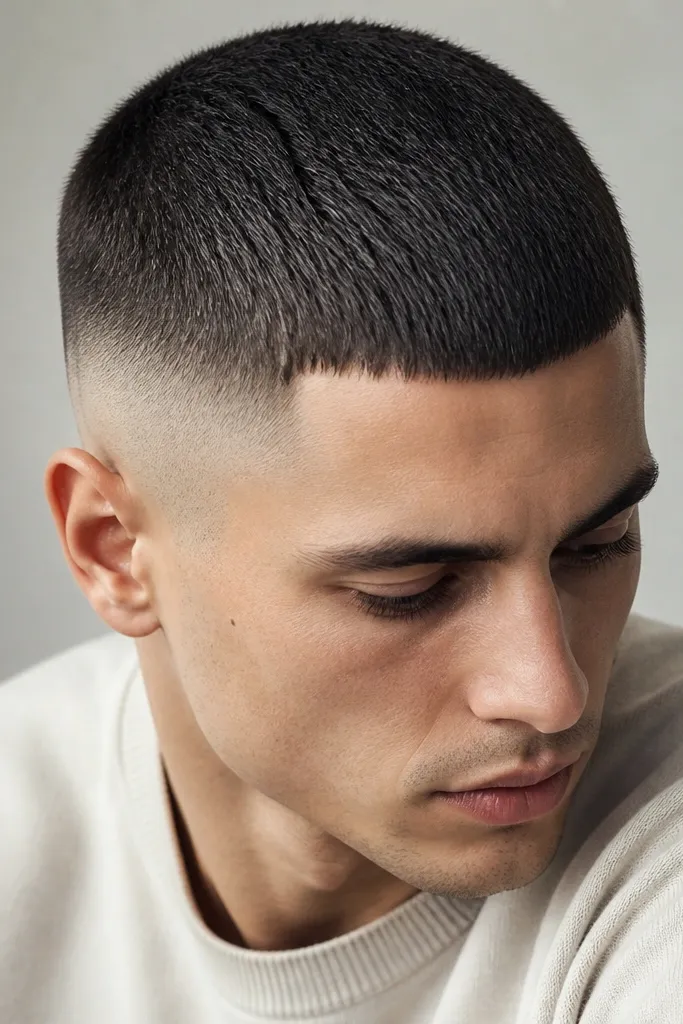
A tiny fringe line makes a buzz cut look more styled without adding length. I do this by leaving the front buzz a hair higher — still short, still uniform, but the front edge reads like a deliberate cut. It flatters guys who have a higher forehead because it visually balances the face. It also works on thinning hair because the front definition makes the haircut look fuller. The skin fade keeps the sides tight so the front detail doesn’t feel messy.
Buzz the top to #1, then comb the front straight down and clip the front edge slightly higher than the rest by about 3-5 mm. Keep the rest of the top consistent so you don’t create a patch. On the sides, use #2 at the top of the fade and blend to #1, then take the bottom band to skin with the trimmer. Clean the front edge with the trimmer by shaving a thin line where the fringe meets the temple area. Finish with a quick blow-dry or towel dry so the front edge stays crisp.
If you have cowlicks at the front, comb them the direction you want them to sit before clipping.
Avoid cutting the front too long. A fringe that’s too noticeable ruins the “quick easy” vibe.
7. Skin Fade with a Hard Part Line (Ultra Clean, Minimal Product)
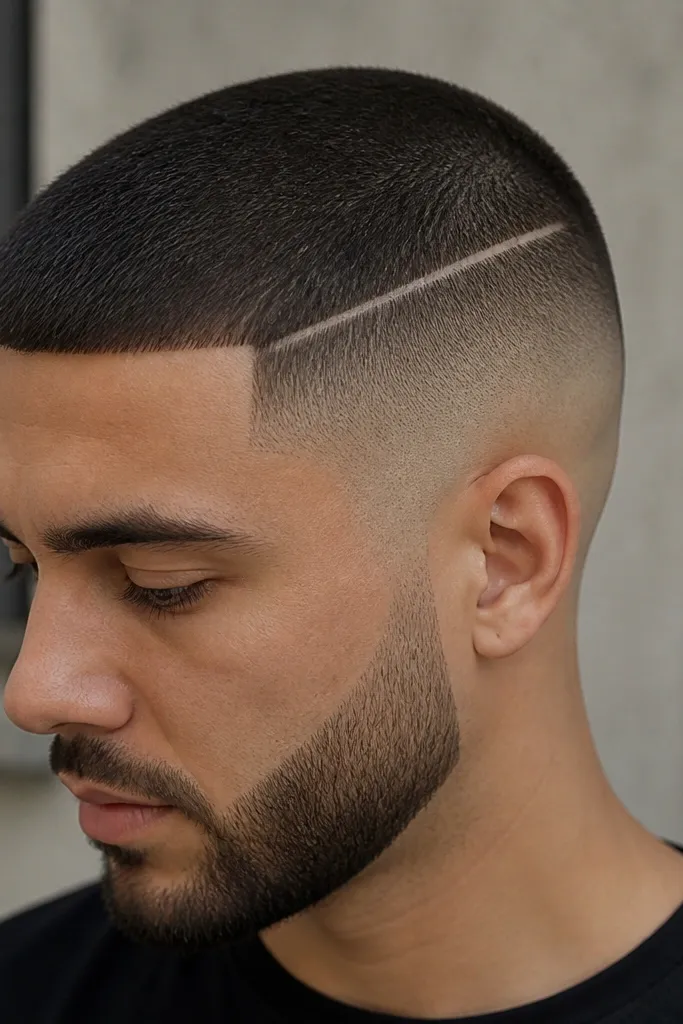
A hard part line on a buzz fade sounds edgy, but it looks clean when you keep it thin. The line adds a graphic element that frames the face, which is great if you wear glasses or have strong eyebrows. I’ve used this for events and it photographs well because the contrast is clear in low light. It also makes your haircut look intentional even when the top is just a buzz. Keep the line narrow so it doesn’t look like a mistake.
Buzz the top to #1 and keep the sides even before you carve the line. Use #2 and #1 to build the fade, then shave the bottom band to skin. With a comb as a guide, place the hard part line where your natural part would sit — usually slightly off-center — and carve it using the trimmer with a steady hand. Then use a tiny brush to remove loose stubble and check the line in bright light. If it looks too thick, lighten it by trimming the edges rather than widening the center.
Use a dry styling brush to lift loose stubble away from the line before you check it in the mirror.
Don’t carve the line before the fade is finished — it will smear while you blend.
8. Skin Fade with a Natural Neckline Cut (No Boxy Look)
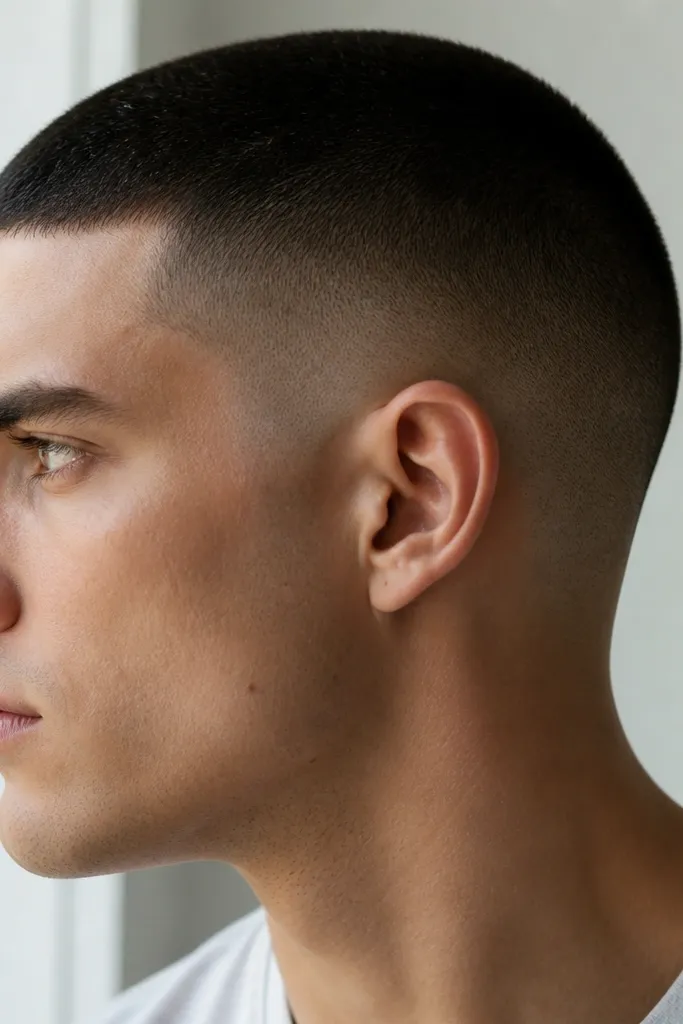
This is the one I do when someone wants “sharp” but not “barber-chair sharp.” A natural neckline keeps the fade from looking boxy, especially on people with a thicker neck or a slightly higher hairline at the back. It also works well for women who wear buzz cuts because it avoids that harsh, pre-set look. The skin fade still gives you contrast, but the bottom edge stays flattering and easy to grow out.
Clip the top to #0.5 or #1 depending on how much contrast you want. On the sides, build the fade with #2 up top, then blend into #1, then use the trimmer to skin on the lower band. For the neckline, shave lightly along your natural hair growth line — stop where your skin starts to look smoother. Don’t force a straight line; instead, follow the curve from behind the ear to the center. Finish by brushing the neck clean and checking from the side and back.
If you’re unsure, leave the neckline one guard length higher. You can always shave more later.
Avoid going too high on the neckline — it makes the back look like a cap.
9. Skin Fade with a Slightly Longer Top (#2 Buzz) for a Soft Look
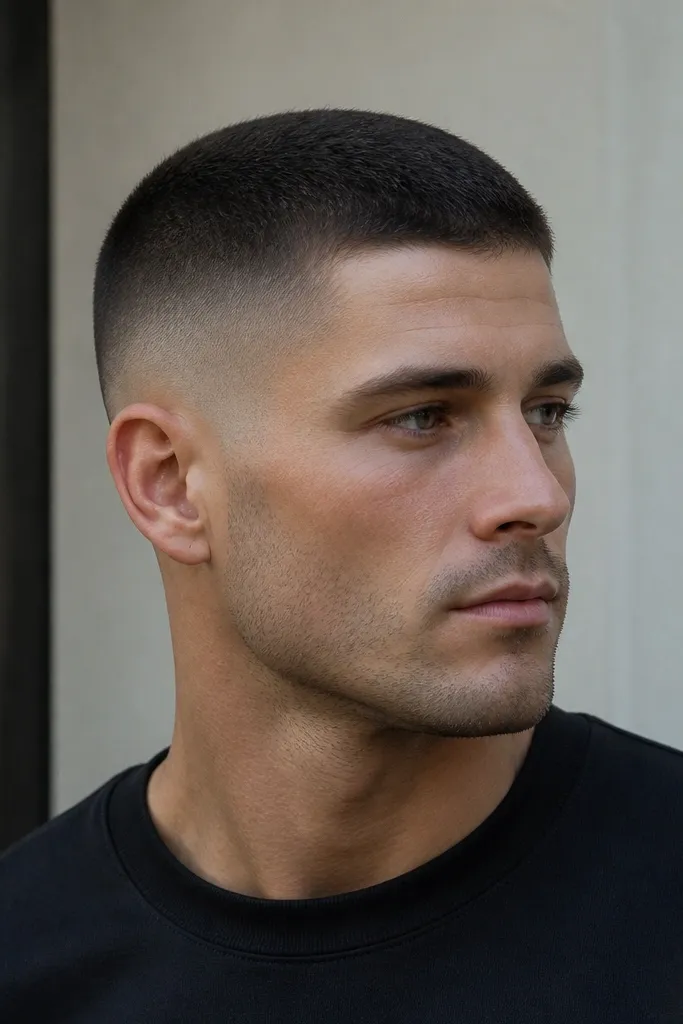
A #2 buzz top gives you a softer silhouette while the skin fade keeps the sides crisp. This is a good call if your scalp shows easily or if your hairline is uneven and you want less contrast. It flatters round faces because the extra length on top adds height without turning into a flat bowl. I also like it on dry or fine hair — the longer buzz hides texture gaps better than #0.5.
Buzz the top to #2 using consistent passes, then do a second pass against the grain for evenness. For the sides, start with #2 at the top of the fade and blend down to #1 around the ear. Use the trimmer to take the bottom band to skin, keeping the skin area smaller than the longer guard zone. Clean the edges at the temple and behind the ear with the trimmer, then brush everything down. If the fade looks too steep, re-blend one band with #1 to soften it.
Keep your clipper blade clean. Hair buildup makes the fade look patchy and slows you down.
Don’t make the skin band too wide with a #2 top — it can look top-heavy and harsh.
10. Skin Fade with a Clean Clipper-Over-Comb Look on the Back Corners
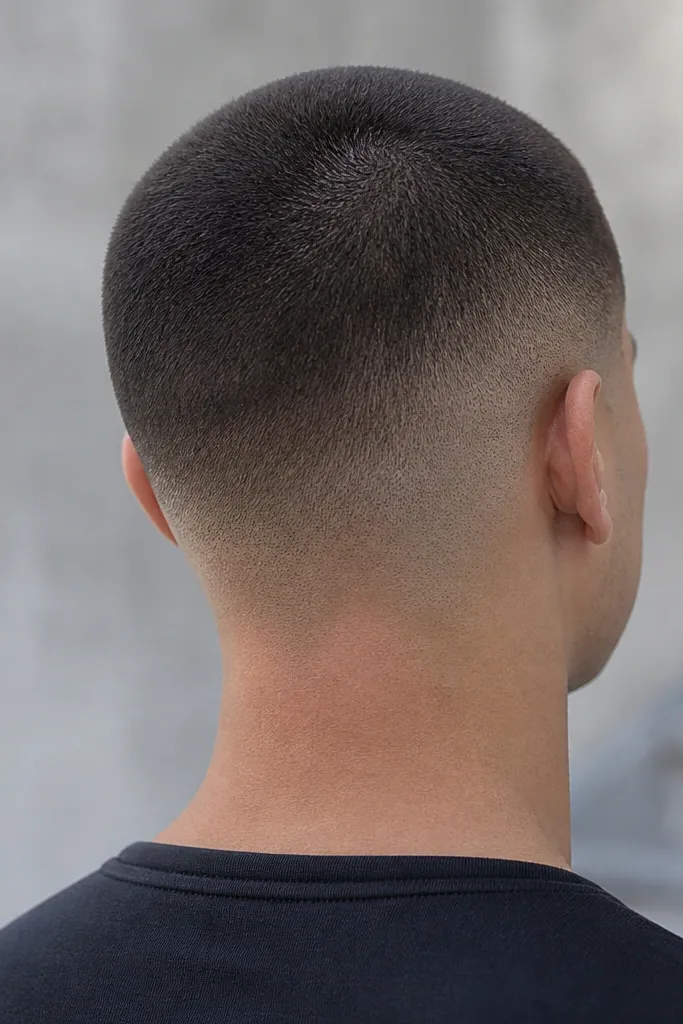
Back corners are where home fades usually go wrong — you end up with a step or a flat panel. Using a clipper-over-comb approach just on those corners makes the transition look custom while keeping the top buzz simple. This works well if you have a head that rounds strongly at the back or if your hair grows in different directions there. The skin fade still reaches skin, but the gradient reads smooth instead of mechanical. It’s also a great option if you’ve tried fades before and the back always looks “off.”
Buzz the top to #1 and keep the sides built with #2 and #1 first. Then, for the back corners, hold a comb flat against the head and lift the hair slightly away — only in the corner area. Use the clipper teeth lightly to trim the combed hair down to blend into the skin zone. Work in small sections and stop once the corner looks even from the side mirror. Finish with the trimmer around the lower band to blend the last bit to skin.
Take a photo in bright light and compare the back corners. You’ll see steps your mirror misses.
Avoid forcing the comb to the skin. Lift just enough to create a gentle blend.
11. Skin Fade with a Soft Line-Up for Sensitive Skin
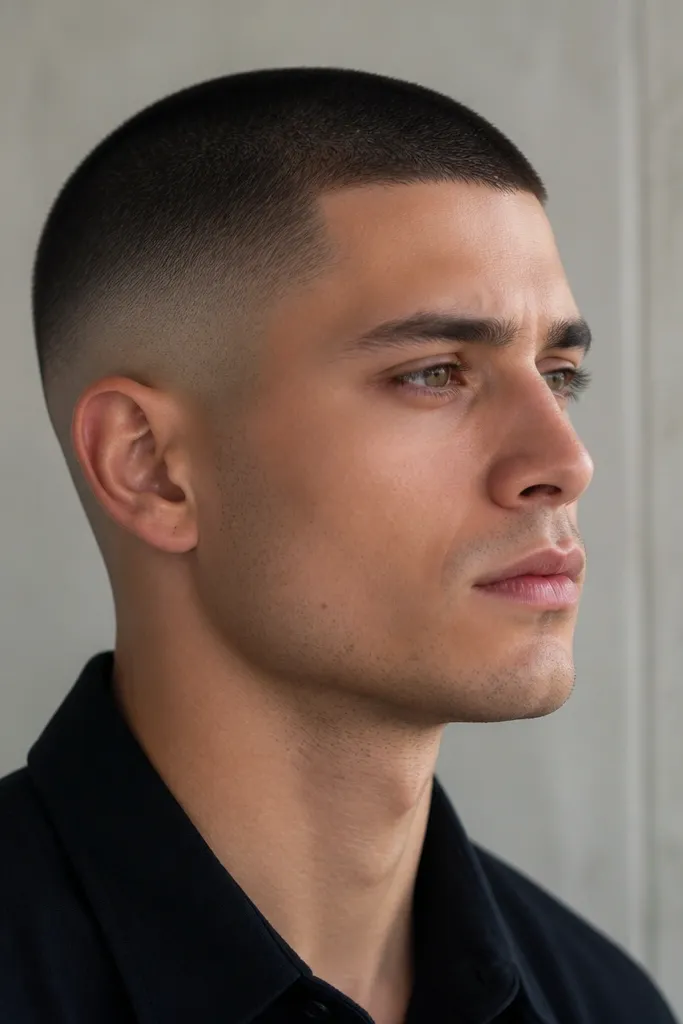
If your skin gets irritated easily, you still want the fade to look crisp — you just need softer finishing. This style uses a skin fade with reduced pressure and shorter passes for the line-up so the edges look neat without razor-burn. It flatters people who get redness around the hairline or who wear their haircut close to the skin. The result looks clean and contemporary, especially on #0.5 and #1 buzz lengths where the top doesn’t need extra styling. It’s also a smart pick for hot weather because it avoids heavy product near the edges.
Buzz the top to #0.5 or #1, then build the fade with #2 and #1 on the sides. Shave to skin with a trimmer set to a comfortable closeness, not the harshest setting if you’re prone to irritation. For the lineup, use short, light strokes at the temple and neckline, checking frequently in the mirror. Don’t go over the same spot repeatedly — that’s what causes redness. Finish by rinsing with cool water and patting dry before you apply any moisturizer.
Use a thin layer of fragrance-free moisturizer on the neckline only after you’re done. It calms the skin fast.
Avoid dry shaving the same edge multiple times. That’s how you get bumps.
12. Skin Fade with a Slightly Blended Beard Line (Clean, Not Sharp)
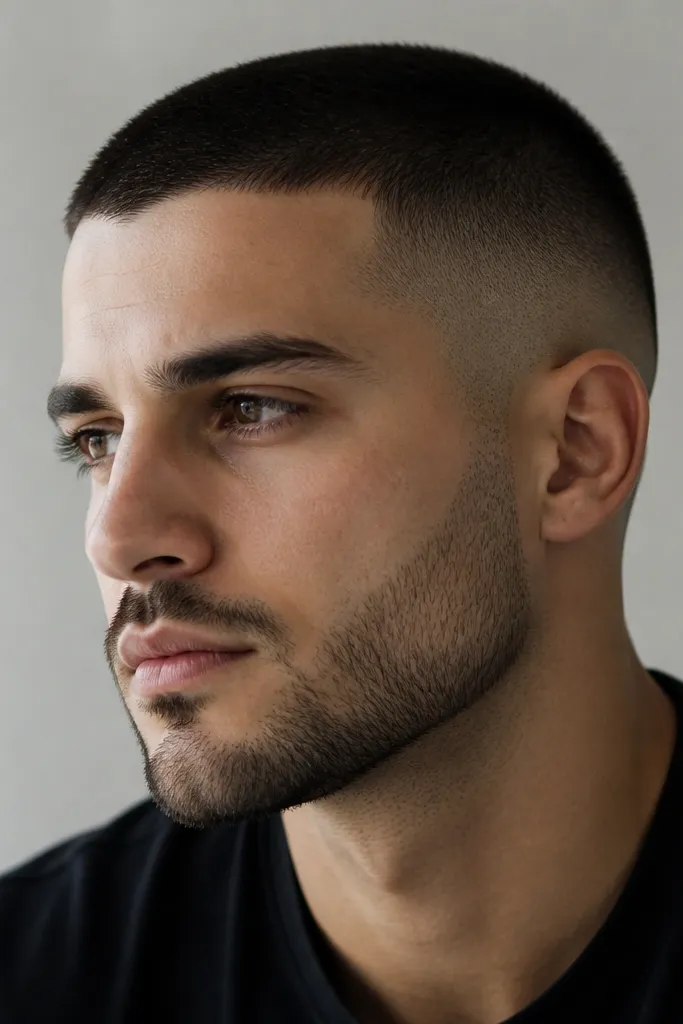
This one makes the haircut look finished even if you don’t do extra styling. When the fade transitions into your beard line smoothly, the whole look reads cohesive. I like it for people with patchy beards or uneven beard growth because a hard line can highlight gaps. It also flatters longer faces since it keeps the lower half clean without extra harsh geometry. The buzz top stays simple, while the beard blend adds that “put together” feeling.
Buzz the top to #1 and build the sides with #2 and #1, then take the lower band to skin with the trimmer. Now bring the trimmer up toward the beard line, but don’t carve a hard border. Use light, upward blending strokes where the fade meets the beard. Keep the beard itself trimmed to a consistent length so the blend looks intentional. Finally, clean the jaw edge with a quick brush and wipe to remove stubble so the transition reads smooth.
Try thisIf your beard grows uneven, trim it slightly shorter than you think. The blend looks cleaner when both zones are controlled.
Watch outAvoid connecting a razor-sharp neckline to a patchy beard. It highlights what you want to hide.
13. Skin Fade with a Razor-Clean Sideburn to Brow Line
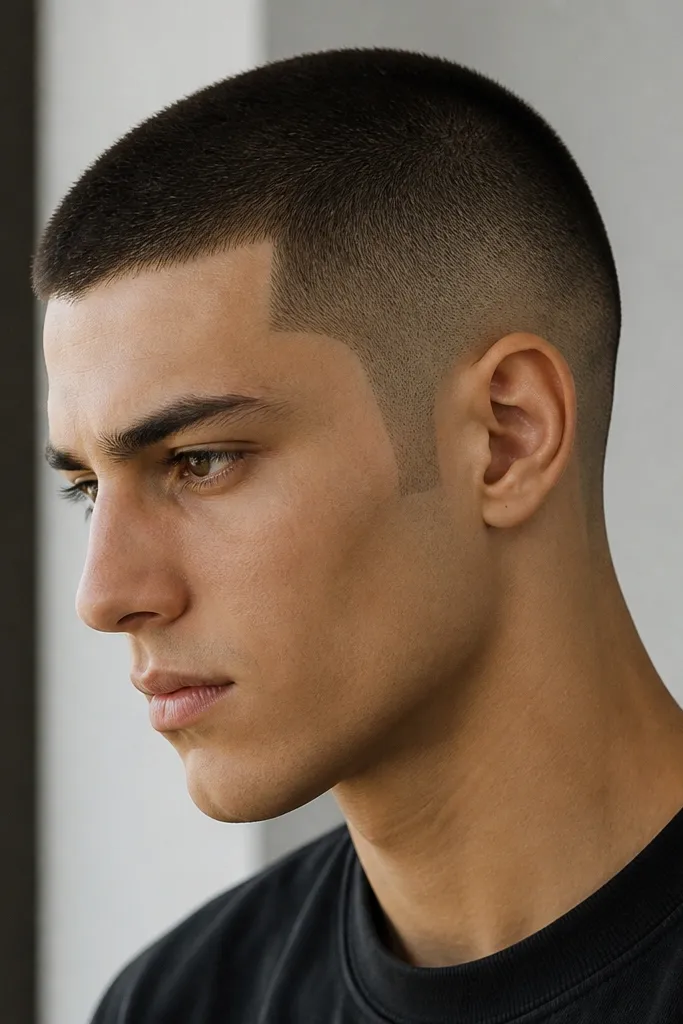
A razor-clean sideburn edge makes a buzz fade look extra intentional, especially if you have strong brows or wear glasses. The sharp sideburn boundary pulls attention to your eyes and gives the haircut a tailored frame. This works best with a mid to high skin fade because there’s room for the contrast to read clearly. It also looks great on darker hair — the edges show up clean without looking gray or dusty. I’ve done this for photos and it always looks crisp in both daylight and indoor lighting.
Buzz the top to #1 and clip the sides with #2 on the upper fade band, blending into #1. Shave down to skin on the lower band with the trimmer. Then define the sideburn edge: use the trimmer against the skin at a slight angle and follow the natural sideburn curve upward until it meets the temple fade. Keep the edge thin — about the width of a matchstick — so it looks like a deliberate line, not a thick stripe. Finish by cleaning the area under the sideburn to remove stray stubble.
Use a small handheld mirror when doing sideburn edges. You’ll overshoot less.
Avoid thick sideburn lines. Thick edges look like you rushed it.
14. Skin Fade with a Matte Finish Top and No Shine Product
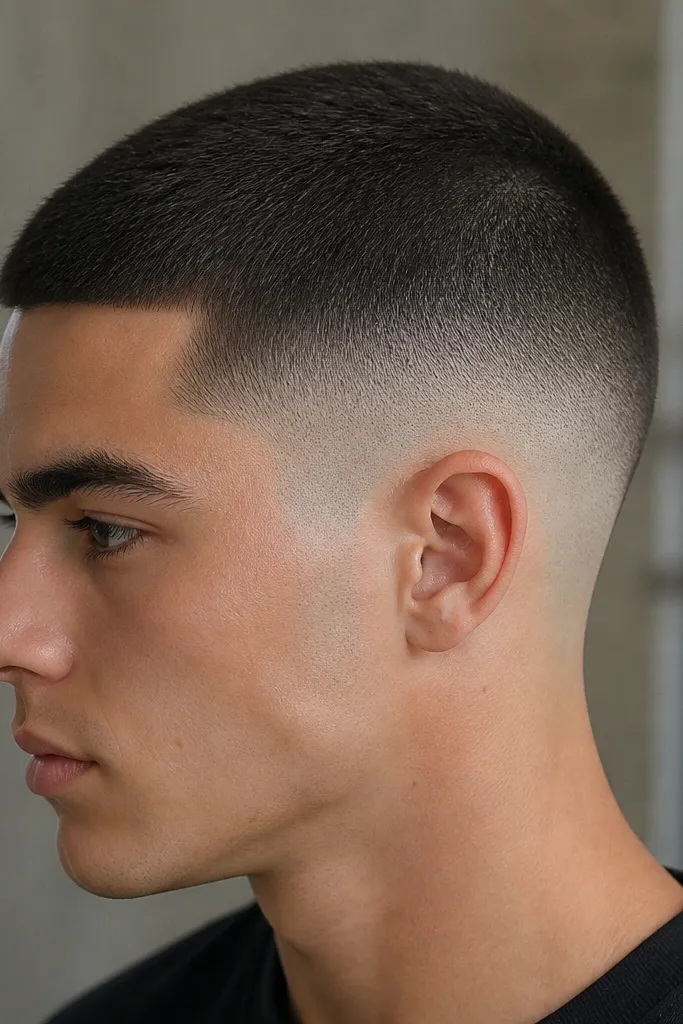
A matte top makes skin fades look more expensive because the contrast looks natural. If you use shiny pomade or heavy oil, the top catches light and draws attention away from the fade — I learned that the hard way after a haircut that looked great in the mirror and dull in photos. This style is perfect if you’re wearing a short buzz and want it to look like one clean cut. It flatters almost every skin tone because the fade handles the contrast, not the product. Keep it matte and the whole haircut reads sharp.
Buzz the top to #1 and even it with one quick pass against the grain. Skip leave-in oil. If you need something for flyaways, use a tiny amount of matte paste on dry hands and rub it in lightly, focusing only on the top surface. Build the fade with #2 and #1 on the sides and then take the bottom band to skin with the trimmer. Clean the edges around the ear and neckline so the matte top doesn’t look like it’s floating.
If you see shine under indoor lights, you used too much product. Wash it out and start with a pea-sized amount next time.
Avoid glossy hair gel. It makes the buzz look greasy and the fade look less clean.
15. Skin Fade with a Slightly Tighter Crop Around the Crown
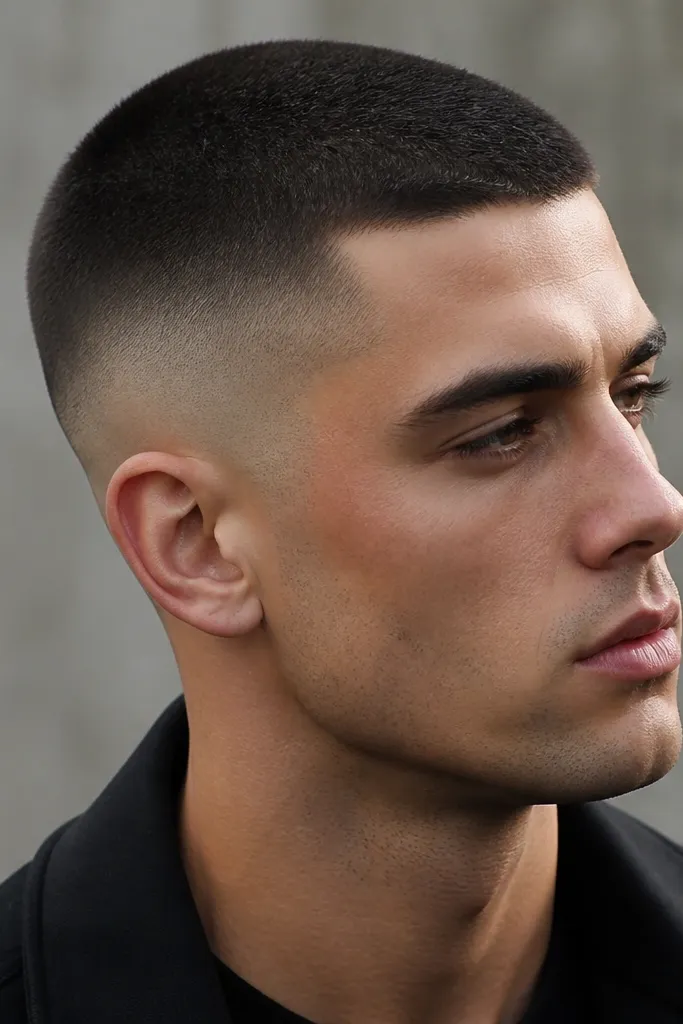
The crown is where buzz cuts can look uneven if you don’t treat it differently. A slightly tighter crop around the crown helps it sit flat and avoids that “puffed” look when hair grows outward. This style is great for people with a whorl or cowlick because it makes the buzz look intentional. The skin fade keeps the sides tight, which makes the crown adjustment more forgiving. It also looks good on both straight and curly hair because the trimming method evens out the pattern.
Buzz the whole top to #1 first, then go back to the crown. Comb the crown hair in the direction it grows, then clip lightly to keep it even with the rest of the top. Don’t overcut — you’re tightening the crown by trimming, not changing the whole length. For the sides, use #2 at the top of the fade and blend into #1, then shave the bottom band to skin with the trimmer. Clean the edges around the ear and neckline and brush out any loose stubble.
Do the crown work last. If you cut the crown first, you’ll forget it while blending the sides.
Avoid skipping the crown check. One missed whorl makes the top look patchy.